Green Hat Expert

  • Home
  • Social Media
    • Instagram
    • TikTok
    • Snapchat
    • Facebook
    • YouTube
    • Twitter
  • Messaging
    • Discord
    • Telegram
    • Whatsapp
  • About
  • Submit Guest post
You are here: Home / Archives for Blogging

FREE Grammarly Premium Accounts 2025 [Username & Password]

Last Updated on December 24, 2024 By Arsalan Rauf

Grammarly Premium Accounts Free 2025 [Username & Password]

If you are a writer and want to write anything using your PC, then you will definitely need this tool Grammarly. It is one of the best online English corrector tools which allows you to write anything on your laptop or computer. Grammarly is the best choice for those writers who write online content on websites using their computers or laptop. It is a tool that corrects your mistakes whenever you make one and it will tell you continuously.

It does not matter what you type, it will be functional in your browser. You can download it as Firefox or Chrome extension to use it in your browser. In addition, it also helps you to post updates on Facebook without doing any grammar mistakes. If you are writing an email and professional, making an assignment online, then you should start using this tool to get help. Grammarly is available in free as well as in the premium version. If you are a student and cannot afford the premium version, then you can also download the free version with ease. You can download it from Grammarly’s official website.

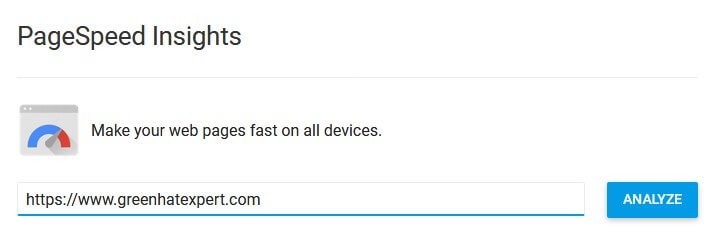
In this post, I am going to show you how to get Grammarly premium for free in 2025. But first of all, we need to know the functions of Grammarly. At times, people also search for Grammarly username and password crack but you cannot crack it.

Want to Check Alternatives to Grammarly?

  • Grammarly Alternatives 

How Does Grammarly Work?

It corrects several errors including spelling errors, and punctuation errors. In addition, it also marks incorrect words as well. it has two versions, free and paid or premium version. We have a default grammar checker tool on our PC but Grammarly outperforms it. The free version consists of basic things that you may need. In the premium version, it allows you to write more comprehensive and error free content and also gives you a great number of suggestions.

If you want a free version of Grammarly then you need to download it from the official website. if you want premium account you need to pay for it.

Check Related Post:

  • Grammarly for Word
  • Grammarly for Chrome Free

What is Grammarly Premium?

In Grammarly premium, there are more than 400 types of features and checks available. It gives your writing vocabulary enhancement suggestions, checks your grammatical errors, gives citation suggestions and detects plagiarism.

So in a way, it gives boost to your writing skills and you will be able to write anything without making mistakes.

Before you purchase the premium plan of Grammarly, you need to know a few things about Grammarly premium.

How Much Does Grammarly Premium Cost?

There are three plans offered by Grammarly and the pricing is:

  • Monthly Plan — $29.95/month
  • Quarterly Plan — $19.98/month
  • Yearly Plan — $11.16/month

I prefer you opt for the annual plan, it will save money. For instance, if you are using a monthly plan, the cost is $29.95/mo. On the other hand, the quarterly plan will cost only $19.98/mo. The ideal plan is the annual plan, it only costs $11.66/mo. Although it is expensive if you are a student, you can get a discount on it. They offer ideal plans for students too.

What Are Features of Grammarly Premium?

  1. It will give you a great set of words or vocabulary enhancement that allows you to write everything as per your need without making errors. So your writing will be error free. In addition, it also checks for plagiarism while you are writing new words. Plagiarism means copied material in the content which you will write.

For example, if you are making your assignment or essay on something, you will not want it to be plagiarized. There comes Grammarly premium to help you and it is the best option to begin with your writing. I am also using it.

  1. Apart from a plagiarism checker, Grammarly premium checks for your spelling errors. You may make spelling errors while writing without noticing it on your PC but this tool will detect it.
  2. If you are composing an important email or you want to prepare your presentation for work, office or at school. You will definitely need Grammarly premium for it. if you do not want to make mistakes whether the mistake is grammatical or punctuation, Grammarly free version for students is also available.
  3. There is an option for the use of new words in the premium version. If you want to write creative content for someone and you want to impress him/her. You need to use this feature in order to come up with new and fancy words which have the same meaning. In other words, we can call them synonyms. So it will show you suggestions for new words and you need to select it in order to make your content better.
  4. There is another great feature available in the premium version. It gives you examples of every word if you want it. If you are a student and learning grammar, in this case, you will need this feature of examples to understand the word which you write. You will get the suggestion in the premium version of Grammarly while writing on your computer or in any other application.
  5. Lastly, when you log in to your Grammarly account, you write anywhere in the browser and it will detect your error. It is because it will be running in the background unlike other apps. There are other apps in which you have single screen and you need to copy all the text to check the grammar. It also works on social media sites to correct your grammar including Facebook, Twitter and Instagram. So install the Chrome extension of Grammarly or Grammarly for Chrome to start using it.

Method-1 Grammarly Premium Accounts Free For Bloggers in 2025

Are you a blogger with a handsome amount of traffic on your blog?

If yes, then there is a great chance to get Grammarly premium account free of cost. There are a lot of chances to get premium access to Grammarly free. Follow the steps below on my website to get the premium version free of cost.

Step-1

Sign up by using the button for a free account of Grammarly.

   Grammarly Premium

Step-2

Use the free version of Grammarly for a few days.

Step-3

Send an email to Grammarly team and explain to them that you are using Grammarly. You want to create a sponsored post on Grammarly, in order to test it, you need Grammarly premium account access.

Step-4

After watching your request, they will send you premium account username and password. This account will be functional for at least a month. After testing for few days, you have to write a Grammarly review post on it.

Step-5

Once you have created the article then post it, then send it to Grammarly affiliate team. So this is the method to get Grammarly premium account free.

Method 2: HOW TO GET GRAMMARLY PREMIUM USERNAME AND PASSWORD 2025

Disclaimer: Green Hat Expert does not support any kind of piracy or illegal use of accounts. The accounts mentioned on Green Hat Expert are either submitted by the users or have been collected from other open access portals.

First of all, you need to go the official website of Grammarly and visit the login screen.

Here is the list of Grammarly Premium Logins to enter the login screen:

Method 3: GET GRAMMARLY PREMIUM FOR STUDENT USING FLIKOVER:

Flikover is one of the best tools that enables you to get all your favorite SEO tools at a reasonable price. You need to create a Flikover account for this purpose and start buying Grammarly Premium. You can get Grammarly premium from Flikover only for INR 150 or 3$ only. Go to Flikover to install the chrome extension as they need and it will be available there.

Follow these steps:

  1. Go to Flikover
  2. Make another record.
How To Get Grammarly Premium Account Free 4 Methods 2018
  1. Presently introduce
  2. Flickover extensions and you are good to go

Method 4: SIGN UP USING YOUR REFERRAL LINK

It is the second method to get free Grammarly premium account in 2025. You need to follow these steps to get Grammarly premium free and it will be for a lifetime.

  1. First of all, go to this Grammarly link
  2. Now, download the extension available there on your browser, it will be Safari, Chrome or even Firefox.
  3. Now, sign up for Grammarly from the using the same extension and go ahead to enjoy Grammarly Premium for free for lifetime.
  4. However, if you face any problem in this process, then you need to change or try some other browser.

Method 5: Become an Affiliate with Grammarly

This is the third method to get free Grammarly premium account. If you are a blogger or essayist, then become a grammarly affiliate or associate. It will allow you to get the Grammarly premium account without spending a penny. It includes these two steps:

  1. Apply for Grammarly Affiliate Account
  2. Get the notice of approval within a couple of days

When you will get the approval for Grammarly referral account, then you will get cash for every client you refer.

GRAMMARLY PREMIUM ACCESS CODES

If you are a new user then why don’t you try these free Grammarly access codes and it will provide you free premium account of Grammarly.

I have generated these codes using Grammarly access code generator.

u5cjCJ6KbHabg9Q8

J3XhbKTUax7chWTc

Kvmh6r7RhonaZSac

RmKvZghXPpnxL9J2

G3ZAkz6v3JAVSck3

n9bkZv9JYW5aUqWB

w84oyGF6QZ9aBb22

sEFgS39UvL9FECRr

FFeV6oSnRuE8pVxi

2gZ4ZF74xKUF8toB

CSzJNf7facYann6

RfsvdpL6gyUBoKrwB

Frequently Asked Question about Grammarly FAQs

How do I get rid of my Grammarly Account or How to Delete Grammarly account?

If you want to delete the free version of Grammarly follow these steps.

  • Log in to Grammarly
  • Visit the Profile page and click on Account
  • Now click the Delete account link

Before deleting it, the server will ask for your current password to confirm the action. It will delete all your personal information from the server.

How do I Get Grammarly on Microsoft Word?

If you want to use Grammarly in Word then follow these steps and check which one is working for you.

Step 1: Run Grammarly as administrator

Step 2: if you are unable to see it in Word, then:

  • Uninstall Grammarly
  • Install Grammarly for Office
  • Check the Grammarly tab in Word

What do you get with Premium Grammarly?

  • Offers 400 types of checks
  • Checks grammatical errors
  • Detects Plagiarism
  • Gives vocabulary enhancement suggestions

So this is the process to get a free Grammarly Premium account in 2025. What are you waiting for? Go and get it.

I hope that you liked the post. Are you a blogger and using WordPress?

If yes, then you may want to see our post on the Best online Grammar Checker tools for WordPress.

Arsalan Rauf
Arsalan Rauf

Arsalan Rauf is an entrepreneur, freelancer, creative writer, and also a fountainhead of Green Hat Expert. Additionally, he is also an eminent researcher of Blogging, SEO, Internet Marketing, Social Media, premium accounts, codes, links, tips and tricks, etc.

www.greenhatexpert.com

Filed Under: Blogging, Grammar, Guide Tagged With: free grammarly premium accounts reddit, grammarly access code generator, grammarly free for students, grammarly free premium access code, grammarly premium crack, grammarly referral

How to Fix Low Value Content in Adsense

Last Updated on December 24, 2024 By Arsalan Rauf

If you are a new website owner and recently applied for Google Adsense and you have got rejected due to a low-value content, you might be thinking about how to solve it.

In this article, I am going to give you some tips on how to fix low value content in Adsense and you will be able to get approved.

You can monetize your content easily by displaying ads on your website, and usually, it is the first priority for bloggers.

It does give preference to traffic but not all times.

A lot of users complain about getting disapproved by Google Adsense and the main reason behind it is “Low Value Content”

It will be heartbreaking if you get this rejection message in your Gmail after putting a lot of effort in your content.

Google gives you a Low-Value content error when your content does not provide value to the users and people will give preference to see ads if they are reading your blog post.

Many times, you may face rejection after putting a lot of research and effort to your content while writing it.

And the main cause of the rejection is still “Low Value Content” so how to solve Adsense low value content error from these tips.

After making these changes, you will be able to fix low value content error. I have come to know about it after disapproved from AdSense multiple times for my other websites.

Tips to fix Low-value content AdSense problem

After making these changes, you will be able to fix low-value content error. I have come to know about it after being disapproved by AdSense multiple times for my other websites.

1. Change The theme

There is no guarantee that if you use any specific theme, you will get approval from Adsense because every theme is different.

The first recommendation is to use a theme that is user-friendly as well as mobile-friendly.

Whatever the theme you are using, it should be mobile friendly and easy to navigate to provide a good user experience.

If you are seeking my advice, I prefer using generate press for this purpose. You can also use Astra theme on your blog but if you are not familiar with page builders, I prefer you use generate press.

The purpose of recommending it is that it is easy to use and it is a lightweight theme you can use to score 100/100 on page speed insights.

I cannot say that it is the last resort for you, but it is my suggestion to keep the user happy and it will make Google happy and you will be good to go.

2. Re-write old posts

After rejection, I have gone through all my posts to find out which articles are causing the rejection. After reading some of my blog posts, I came to know that they need to be updated.

So, some of my posts were not up to the mark and I updated 3 of my posts and added more value to it.

Google AdSense gives preference to high-quality and unique content, so, it is necessary to write content in such a way that it stands out among other blogs.

Low-value content can become a hurdle in your approval, so you should read the content as a reader to find out if it is satisfying the needs of a reader.

If it needs improvement or lacks anything, make sure that you add it and it will increase your chances of approval.

3. Try to Build Topical Authority

If you are focusing on any topic, try to add related posts to become a topical authority in your niche.

If you are writing 15 posts, you should be focused on the same topic in different ways. For instance, if you are making a blog on SEO, you should write about What is SEO, Mobile SEO, Voice Search SEO, and Google RankBrain etc.

This will help you to get rid of low value error in Adsense.

After that, you will find out that your website will not be rejected due to this error.

Another thing I want to tell you that is you do not have to write 50 posts to get approved by Google and even traffic is not the case.

The key to success is some unique, helpful, and in-depth articles.

Google also launched helpful content update for this purpose to prioritize the helpful content.

4. Change the logo

To make a website high quality and trustworthy in the eyes of Google, the best way is to build a brand and do it with an effective design. In my experience, the unique brand tends to perform better in this process.

For instance, my previous website did not have a professional logo and it was a handwritten design that has domain name on it, which lead to the error of low value in terms of approval.

So, I add a professional logo to the website and make it an official brand that improves its value in the eyes of approvers.

The new logo was designed to attract users as well as advertisers to my website.

In short, I think these changes boost the process and lead to the approval of AdSense in an easy way.

So, if you want to avoid low value content error in AdSense, you should focus on the brand name and site’s design as well as logo to make it a user friendly and ads friendly so you get approval easily.

5. Categorized the posts properly

The next step you need to take is to categorize the post in their relevant categories in order to provide good user experience.

If your website contains user-friendly experience, it means you are giving preference to the users on which Google has been focused on is the positive signal for them to consider you in their program.

I am sure that this step impacts significantly in terms of approval because I give preference to it.

6. Fix website links

Another factor that can cause the error is the broken links and a lot of new bloggers do not give preference to broken links. As they forget to add link to menus, buttons and social media icons.

To find out, you need to perform site audit and I usually do it on a regular basis to find out the dead pages or broken links on my website.

You may face it if you have changed your theme. So, in this case, you need to check and make sure that every link on your website is functional. It is another positive sign to provide value to your content.

7. Fix Grammatical Mistakes

When it comes to English, I am an expert. But you may not be as good as native speakers. Many of you may not be good enough in English and may make errors in grammar.

So, after writing your content, you need to proofread them to avoid any grammatical or spelling errors and for this purpose, I prefer Grammarly. For the browser, you need Grammarly for Chrome.

After writing content, run it from Grammarly and it will find and suggest grammatical errors and even typo mistakes. If you have written a good piece of content and it lacks perfection, you will also get rejected.

Even if you are at home in English, it is my personal advice to check your content, proofread it through Grammarly, and after that, submit your application for AdSense.

That is it, these are the essential steps you need to take to fix low-value content in Adsense.

Related Read: How to get Adsense Approval Fast

Just keep in mind that the content is King and high-quality content is the key to approval.

Other than that, you should pay attention to some common factors before you apply for AdSense program. Let’s see them.

If you are still struggling with Adsense, you can also check Adsense alternatives like Adsterra here.

Checklist before applying for Google Adsense

Just make sure that you have fulfilled these requirements before applying.

  • The first thing you need to ensure is that you add the necessary pages to your site which are “About ” page, a “Contact Me” page, a “Privacy Policy” page, and a “Terms and Conditions” page.
  • Your site should be at least 1 month old, the older it is the better it is. The time period is to prove that you are not a churn and burn site.
  • You should publish useful/helpful content and it should be relevant to the niche that you are going to choose and I prefer to write informative content. Google AdSense gives preference to high-quality and informative content.
  • Add a main menu in your header to show the important pages. Before applying for it, make sure to add a menu.
  • A footer menu is also needed and every link should be real and related to the content.
  • Add relevant images to your posts, it will attract visitors as 10 percent of traffic comes from Google images and it should be interesting to attract the visitors.
  • Make sure that you write posts of at least more than 800 words. I personally prefer to write a post over 1000 words.
  • To add more weightage, it is wise to create a Facebook page, Twitter account or other social media profile for your blog and add their links to your website. This will not only engage the users but also improve your chances of approval.
  • If you are willing to add affiliate links to your blog, I prefer not to do that before approval. After approval, add affiliate disclosure on your website. You can also add them in your blog post in which you are going to add links.
  • The next step is to add Google Site Kit to your website, it will add your website to Google Search Console and your pages will be easily crawlable by Google.
  • Add a favicon to your site, this will be shown in your search results as well as give the site a professional look.
  • Create a professional-looking logo to build your brand.
  • Go through all your posts to see if there are any broken internal and external broken links.

Frequently Asked Questions

What is Low Value Content in Adsense?

If the content is unhelpful to the users and it has used obscene or profane language, duplicate or irrelevant content can be categorized as low-value content.

What is Good Quality Content in Adsense?

Content that provides a unique experience to its visitors. A better site with fewer pages will be more effective instead of a large website with poor-quality content. You have to provide enough articles on the website to show its identity (to determine what the site is about).

What are the benefits of Good quality content?

Good content attracts your visitors and they not only spend more time on your website but also return. If your content is good enough as compared to other sites, you will be in the good books. This will help your website to become more attractive in search engines over time. To keep your content in good condition, you need to update your content on a regular basis to keep it fresh.

What is bad quality content?

The bad quality content can be categorized as replicated, scraped, and duplicate content that does not attract visitors as much as the original content. It also causes a bad user experience.

How do you solve low-value content?

  • Write an article of at least 1000 words
  • Update it if there is anything outdated
  • Delete useless or obsolete content
  • Easy to navigate
  • Use bullets within your blog post
  • Upload relevant and copyright-free images
  • Add internal links where they are needed
  • Avoid duplicate content

Final Words

I hope that you will be able to solve Adsense low value content error after reading this guide. These steps are necessary to take into account in order to get approval.

I have different websites and I generally go through this process very often. After getting rejected many times, I have finalized the reasons why Adsense is rejecting for low-value content.

Am I missing anything? You can share your experience to fix this error in the comment section. you can also leave your questions related to Google AdSense and I will try to respond to them asap.

Arsalan Rauf
Arsalan Rauf

Arsalan Rauf is an entrepreneur, freelancer, creative writer, and also a fountainhead of Green Hat Expert. Additionally, he is also an eminent researcher of Blogging, SEO, Internet Marketing, Social Media, premium accounts, codes, links, tips and tricks, etc.

www.greenhatexpert.com

Filed Under: Blogging, How to

How to Get Google Adsense Approval Fast – 2025

Last Updated on December 21, 2024 By Arsalan Rauf

In this post of Green Hat Expert, I am going to discuss how to get Google Adsense approval fast in 2025.

Every online content creator or bloggers gives preference to Google AdSense when it comes to monetization through display ads and you may not be able to be accepted into the program due to strict Google AdSense policies. In this article, I will give you the best tips that can help you to get Google Adsense Approval faster for your new website in 2025.

If you follow the basic guidelines and write high-quality content on your blog, follow the policies of Google Publisher, and remain real from the beginning by avoiding spam or using duplicate content, it has added legal pages including contact, about us, and privacy policy. Additionally, ensure the fast website speed, use royalty-free images, and use free themes rather than premium ones, making your navigation ideal for users.

Just keep in mind that Google does not permit AdSense on certain niches including fake news and adult content. In this case, you can choose Google AdSense alternatives such as Adsterra, Ezoic or other networks. Another point to keep in mind is that AdSense revenue is not guaranteed.

I will also discuss the misconceptions and common challenges you can face while getting approval.

In this guide, you will learn some Google Adsense approval tricks and the main things you must do before applying for Google Adsense.

Let’s get started!

adsense policy
Google Publisher Policies

Understanding AdSense Approval Criteria

Traffic Requirements

There is a misconception about the website traffic but there is no minimum criteria of traffic to get yourself approved in AdSense. The number of visitors is not the main concern of AdSense approval. Unlike other ad-serving platforms, you don’t to meet the minimum traffic thresholds.

Even though Google does not give preference to the number of traffic in terms of Google AdSense approval factor, as per my experience, 10-20 visitors a day will be sufficient.

If you do not generate much traffic, you will not earn a handsome amount of money from your website. right?

So, if you are a newbie, you can use Quora, Pinterest, Facebook to drive traffic to your new blog and work on your website to reach the organic traffic from Google.

Write High-Quality Content

quality content vs quantity content

As you know, content is king! So, you have to write some plagiarism-free articles. They should be valuable, unique and high quality to target your visitors.

Try to write blog posts of at least 500 words to more than 2000 words and they should be well-optimized and in-depth to satisfy the searcher’s intent.

Just remember that Adsense will also reject your application if you write Adsense-prohibited content.

So, you should not violate any guidelines and write high-quality content before you apply for Adsense publisher program.

Make Your Blog Posts SEO Friendly

After that, the high-quality content on your blog should have a proper meta title and meta description.

Google AdSense uses a bot that crawls your website to find out if it is ready to show ads or not. It is not possible for their team to go through every single website and review it manually who have applied for participating in the program.

If you are a WordPress user, optimize your website’s content with a plugin called Yoast SEO plugin, it is easy as well as free to use that can help you to optimize your content for search engines.

If you do not like it, you can also switch to the Rank Math SEO plugin to help with your sitemap setup and other basic settings.

The plugin can also help you to increase your rankings in the Google search engine as well.

Write Sufficient Blog Posts

I got Google AdSense approval on Green Hat Expert after writing 12 high-quality blog posts.

The number of posts does not matter; all you need is quality content.

But my recommendation is to write at least 20 posts before you apply for Google AdSense, and every blog should not be less than 1000 words.

You need to focus on quality rather than quantity. As the program is very strict it is better to focus on quality that agrees with the guidelines to avoid rejection.

Essential Website Pages

about us contact us

You need to add must-have pages to your website before you apply for Google Adsense.

The pages like About US page, privacy policy page, and contact page will help the readers to learn more about you and your website.

It is imperative to add a privacy policy to follow the law if you are collecting personal information from users, and it is mandatory to mention that you are going to use Google Adsense ads on your website/blog.

If you are having trouble creating them, you can use WP Legal Pages plugin to do it for you. You can see your competitor’s privacy policy and update yours accordingly. It will not affect your blog in a negative way. The reason is that the internet is flooded with millions of privacy pages and most of them are the same.

Check the Website’s Age and Copyright

Ensure You’re 18+

AdSense Terms and Conditions clearly state that applicants who are over 18 can send applications and they will accept them.

To meet the minimum age requirement, they will use any of the government-issued identity documents such as ID, passport, and driver’s license. I used my ID while registering.

The right proof of age is essential in order to comply with AdSense policies and regulations.

If you’re under 18, it is my suggestion you ask your parents or guardian to register an AdSense account from their information.

Make Sure You Don’t Have Copyrighted Images

AdSense will not approve your website if there is copyrighted material on your blog.

Maybe you have got the images that are copyrighted and you are using them without their permission. Just remember that it will not be legal and will be harmful to your blog too.

So, you need to use your own images and for this, you can also use copyright free images for your website.

For this purpose, Shutterstock and Freepik are the best options to explore.

Prioritize User Experience

Create a User-Friendly and Professional Blog

The next step is to create a user-friendly blog that has a clear navigation menu to enable the users to browse the important pages.

Plus, your website should be responsive to improve the user experience on different devices including mobile, tablet, desktop, iPhone, iPad and so on.

The user should be able to reach the destination within 2-3 clicks and it can be done by using the drop down menus.

One thing you need to avoid is not to create too many navigational elements that can cause confusion to the readers/visitors.

navigation for adsense approval

If you are willing to use WordPress, my recommendation is to choose the fastest theme and my recommendation is to use Generate Press.

I also prefer this theme, it is easy to customize and fast loading to improve user experience.

If you cannot buy it, use free themes from the themes section of your WordPress dashboard.

Mobile Optimization

When it comes to user experience, mobile optimization is the first thing to begin with. Most traffic comes from mobiles which is why it is necessary that your website should be mobile-responsive.

You can also focus on Mobile SEO to boost your presence in the search engines.

Call to action should be clearly visible and visually appealing to mobile users. It will make the user experience better and the user will stay longer.

Make Sure Your Website is Not Banned

website block list

To make your website penalty-free, you need to build its reputation and avoid getting banned. You can do it by adding unique content, avoiding invalid clicks, and not indulging in fraudulent activities.

A study was conducted by Online Income Teacher to find out the trick to improve the AdSense approval rates. They concluded that high-quality content and good user experience can help you to get AdSense approval faster.

Remove Other Ad Platforms Before Applying For Google AdSense

adsense ads vs other ads

It is the last recommendation before you apply for the program, remove other Ad networks such as Amazon ads. It is essential to take down all the promotional material from your blog to provide a clean and professional look on your website.

Applying for Google Adsense

After following all the tips and tricks given in this article, you can apply for Google Adsense and quickly get Adsense approval for your new blog.

To apply for Adsense, visit their sign up page for Google Adsense and use your website URL, contact information and other required information and apply.

When you try to fill out the information for Adsense, you need to make sure you use your original information including your real name, an actual address, and a correct payee name.

Google Adsense Approval Process

Once you have signed up for Google Adsense, the next step is to add code on your blog. But my recommendation is to install Google Site Kit plugin and it will paste the code on your website automatically.

After that, you have to wait for 1 to 2 weeks so you go through the review process and finally get approval.

Getting Started with AdSense

After getting approved by Adsense, you will receive an email from them saying that ‘The site “yourdomainname.com” is now ready to show Adsense ads.’

Yes, now you can add ad codes to your website or use the Auto Ads feature from Adsense to let Adsense apply ads on your website. After a few hours, your site will start showing relevant ads to the users and your online earning will start on your blog.

After earning $10, you will have to go through the PIN verification, and Adsense will send you the PIN through mail to your address. To enter your PIN, you need to log into your account.

Congratulations,

You have completed all the steps to get paid on Google Adsense. Once your earnings reach $100, you can receive your earnings using your bank account or cheque.

Google AdSense Alternatives

Want to get approved without any limitations and looking for a Google AdSense alternative?

Try Adsterra ads. And other alternatives are Media.net and Propeller Ads.

On Adsterra, you can get approval without limitations of traffic or content limitations.

Google AdSense can give you a limited amount of money. You can also sell your banner ad space to others to get more profit.

When it comes to selling ads directly to users, you have to do more work than AdSense. It includes pricing negotiations, agreements and invoicing, etc.

However, you can use ad manager plugins on WordPress including  Ad Inserter and WP Quads to make the process easier.

If you are a blogger, you can also earn through affiliate marketing, and sponsorships to monetize your website.

Frequently Asked Questions

How Long Does Google AdSense Approval Take?

Answer: The first request will take 2 weeks for your application to be approved. In case you get rejected, you can add more articles and reapply, you will get the approval in 24-72 hours.

How Will I Know My Website is Approved?

Once your website is approved, you will receive an email from Google Adsense informing you that you are ready to show ads on your website.

What are the main reasons for Google AdSense Rejection?

The main reasons include low-quality content, plagiarized content or copyrighted images, insufficient content, poor navigation, not complying with the guidelines of Google AdSense or your website is in a language or from a country that is not supported by AdSense.

What Should I do If the AdSense Application for my Blog is Rejected?

In case, your application is rejected by Google, they will give you the reason and how to fix your site to make it ready to show ads. You can fix them and reapply and get approved. While making these changes, you can use AdSense alternatives to monetize your content.

Now It’s Your Turn.

I hope that you liked my Google Adsense approval guide.

If you follow all the above-mentioned tips, Google Adsense approval tricks before applying for Adsense, there is a great chance that Google will approve ads on your website.

Is there anything regarding Google Adsense approval that I am missing?

Leave it in the comment section below. If you liked the post, kindly share it on your social media profile with friends and other beginners.

Arsalan Rauf
Arsalan Rauf

Arsalan Rauf is an entrepreneur, freelancer, creative writer, and also a fountainhead of Green Hat Expert. Additionally, he is also an eminent researcher of Blogging, SEO, Internet Marketing, Social Media, premium accounts, codes, links, tips and tricks, etc.

www.greenhatexpert.com

Filed Under: Blogging Tagged With: account status in review youtube, application submitted and in review youtube, how to activate google adsense on youtube, how to approve adsense account with blogger, how to get google adsense approval in 1 minute, how to get google adsense approval without a website, how to safe adsense, how to secure adsense account, monetisation application submitted and in review learn more, monetization application submitted and in review learn more not enabled, why is adsense taking so long, your adsense account is awaiting approval, your adsense application is still under review

Mobile SEO guide in 2024 – How to Optimize Your Website for Mobile SEO

Last Updated on January 9, 2024 By Arsalan Rauf

In this post, I shall share with you everything you need to know about mobile SEO in 2024.

I shall also tell you why mobile optimization is necessary now?

In addition, I will also help you to ready your website for Google’s mobile first algorithm.

Mobile SEO guide in 2024 – The Definitive Guide

CHAPTER 1: Mobile Optimization 101

In this chapter I’ll help you to learn the basics.

So if your site is not mobile optimized or you are not sure, this chapter will move you to the right track.

In upcoming chapters, you will learn advanced strategies and techniques.

What Is Mobile SEO?

Mobile SEO stands for the practice of optimizing your website for users on tablets and smartphones or android. It also refers to make your site resources accessible to search engine spiders.

Why Is Mobile SEO Important?

In short: the number of mobile searches is increasing day by day.

In fact, 58% of all searches in Google are now done from a mobile device.

1_2_mobile-vs-desktop

This trend is growing rapidly. According to statistics of Google, mobile has 27.8 billion more queries than desktop.

1_3_mobile-queries

So the mobile is the future of SEO. This is the reason why Google and its algorithm are focussing on mobile search.

SEO in 2019: The Definitive Guide

Is “SEO” Now About Optimizing for “Mobile SEO”?

Yes, if you want to optimize your site for Google.

Today, 95% of searches are from the search engine of Google.

1_4_mobile-searches-on-google

Google will retain this level of dominance by twisting their algorithm.

So you need to optimize your site for mobile users first.

Firstly, Google launched its Mobile-Friendly Update (which many people called “Mobilegeddon”).

1_5_mobile-friendly-update

This update affected those sites which were not mobile friendly for android or smartphones.

If your target audience does not search using their smartphones, this update was not a big deal for you.

Unless Google made every search a mobile search by implementing its Mobile First algorithm.

What Is Google’s Mobile-First Index?

Google Mobile first index will rank the search results according to the mobile version of the page. It occurs even if you are searching from a desktop as well.

Before this update, Google ran two indexes side-by-side: desktop version and mobile version.

If someone is searching from an iPhone or android, Google will show them results from mobile index. If someone searches on a desktop, he will get desktop results.

1_6_google-search-model

Today, it does not matter what device you use, Google will show you the results from mobile index.

1_7_google-mobile-first-search-model

I shall discuss more about optimization for mobile SEO in chapter 3, 4 and 5.

Is Google’s Mobile-First Index a Big Deal?

It depends.

If your site is optimized for mobile, you are good to go.

If your site….

  • Loads resources across all devices
  • Does not hide content on mobile versions of your site
  • Loads quickly like mobile users expect
  • Has working internal links and redirects
  • Boasts a UX which is optimized no matter what device your visitors use

If all is done, you are good.

If not, Google may drop your rankings.

Therefore, I am making this whole guide for you to optimize your site for mobile.

Firstly….

What Does Google Consider “Mobile”?

1_8_what-does-google-consider-mobile

Most of the people consider “mobile device” a table or smartphone.

Google puts tablets in their own class and states that they do not include tablets in the definition.

In short, according to Google: mobile=smartphones.

The main purpose is to optimize your site and content for every device. It includes tablets, phones and other mobile devices.

Image on right side

CHAPTER 2: How to Implement a Mobile Website That Ranks in Google

To get over mobile SEO, your site has to work on mobile devices at least.

If a visitor goes to a mini version of your desktop site, you will be in trouble.

Luckily, to implement a mobile website is not a hard nut to crack.

So in this chapter, I shall teach you different ways to implement a mobile version of your website by focussing on mobile SEO.

When It Comes to Mobile, You’ve Got 3 Options

There are 3 different ways to configure your site for mobile.

1

First of all, you have got separate URLs which is also known as“m” configuration.

With this setup, you have a mobile version which is “M” version of your site and you also have the “main” means desktop version of your site.

2_2_seperate-urls

In short, your site figures out what type of device your visitor is using and redirects them to optimized URL for that device.

Separate URLs were common in the past but now, not anymore.

Why? It is because they are hard to manage.

“M” version creates SEO problems and you require multiple URLs for every piece of content on your website. It also needs complicated “rel=canonical” and “rel=alternative” tags.

That is why I do not suggest M/separate URLs configuration. It is the worst way to configure your website for mobile SEO.

2

Next, we have Dynamic Serving.

When you serve content dynamically, all of your content is on the same URL. But you show every user different CSS/HTML that depends on the device that they use.

2_3_dynamic-serving

For example, if you visit https://www.greenhatexpert.com/seo-this-year on a desktop, you will see a pre-made desktop version of the site.

desktop version

But if you will visit the page from your iPhone 8, you will still be on https://www.greenhatexpert.com/seo-this-year but you will see the iPhone 8 version of the page.

mobile version

Dynamic serving is a better choice for SEO as compared to “M” version of the site. It has some downsides.

For example, it is notorious for showing desktop version to mobile users.

You need to create different versions of your content for upcoming devices. If you do not do this, your site will not be able to recognize a new device. And will show them the terrible version of your site.

3

Finally, we have Responsive Design.

I saved the best for last.

With the help of responsive design, the content and page’s layout responds to every user.

2_6_responsive-design

Responsive design gets rid of separate URLs and different HTML for every device.

In case of being SEO friendly, responsive design is the best and perfect option.

Why?

  • All of your content is on a single URL (good for sharing and getting links)
  • Minimal SEO headaches (no “rel=canonical tags”, duplicate content issues etc.)
  • Insanely user friendly (UX is a big part of SEO thanks to RankBrain)
  • No redirects (which cause technical SEO issues and can slow down your site)

Still not convinced? Google recommends responsive layouts.

CHAPTER 3: How to Mobile Optimize Your Site

After going through 2 chapters, your site is configured for mobile users. Now it’s time to do mobile SEO.

In this chapter, I shall show you how to tell Google and other search engines that your site is optimized for mobile.

Use Google’s Mobile Usability Test

This tool is available in Google Search Console and it will let you know the issues of your site regarding mobile usability.

To use it, go to your Google search console account. Click “search traffic”>Mobile usability.

There Google will let you know if your mobile users are facing any problem.

3_3_mobile-usability

(For example, the tool may let you know that you use Flash or that your font is too small for mobile users to read).

You can also use Google’s Mobile-Friendly test.

Just enter your URL into the tool.

3_4_google-mobile-friendly-test

And get a full report.

3_5_mobile-friendly-report

As you can observe, I passed. But it is telling me that mobile Googlebot is having trouble to load all of my resources on my page.

3_6_mobile-googlebot

Desktop Googlebot is having no problems to crawl the resources. But the mobile version is unable to do it.

With Google’s Mobile first index live, it is a serious issue. And this is something which remains unknown without this tool.

Super duper helpful.

Let Google Crawl Everything

Do you block Googlebot from accessing Javascript, CSS or other important parts of your site’s code?

It used to be no big deal. But today, it is a very bad idea.

Until Google cannot fully crawl your page, it cannot tell whether it is mobile friendly or not.

How do you know if this is an issue?

First of all, check your robots.txt file.

This file tells Googlebot to not index or crawl certain parts of your site. This file is usually available at site.com/robots.txt. You can also find it inside of Google search console.

3_7_google-crawl

While you’re there, click on “Google Index” —> “Blocked Resources”. This will let you know if you’re blocking Googlebot from crawling certain parts of your site.

3_8_blocking-googlebot

If you are not blocking anything important, you are good to go.

Put the Kibosh on Interstitial Popups

I know: everyone HATES popups.

Google also hates popups….. especially for mobile users.

Remember: Google #1 priority is to show their users amazing and engaging content. If the content is hidden behind a popup and it is not a good thing.

In fact, Google rolled out an update that specifically targets “Intrusive” popups.

3_9_intrusive-popups

So if you are using popups on your site, it can affect your rankings.

How do you know which popups are OK?

Google gives a few examples of acceptable popups…

3_10_acceptable-popups

…and popups that can get your site penalized.

3_11_bad-popups

How Does Your Responsive Site Actually Look? Check Out This Cool Tool

It is to see how Google views your mobile site.

But nothing can beat seeing your site on different devices.

If your site is responsive, I recommend checking this free tool.

It’ll show you how your site looks on iPhones, tablets and more:

Image

I love this tool.

Use The Mobile Version of “Fetch as Google”

Like most people, I’m a visual learner.

It is a nice thing to see a list of mobile SEO issues.

Personally, it is more helpful to know how Google sees my page.

Therefore, I suggest spot testing a few pages on your website using Google search console’s Fetch as Google feature.

Just enter a URL of a prominent page of your site into it:

3_13_fetch-as-google

(Make sure to select “Mobile” from the dropdown box)

3_14_fetch-as-google-mobile

And it will show you exactly that same result what Google Bot saw. You can also scroll down to see if Google missed anything like videos, menus and images etc.

Image

Very helpful.

Let Mobile Users See It All

In past, people would block certain resources from mobile users.

(For example, they might block javascript from loading or hide some content)

They were not doing anything suspicious. To block these resources allow them to load their page faster on mobile devices. It also improves the user experience.

Here is an example of what I mean:

3_16_dont-hide-content-on-mobile

See you need to click “read more” to watch the rest of the content. It may be a problem with Google’s first mobile index.

Why?

With Mobile-first, Google will consider the mobile version of your page as the main version.

If the content is hidden from the mobile visitors, it may not crawl or index or affect the weight of this content.

Back in the day, when it came to hiding content for desktop users, Google has said that:

“If something is relevant to the page, then it’s probably relevant to the user too, so I’d recommend showing it to the user.”

But then Google’s John Mueller recently said that, for the Mobile-first index:

“On the mobile version of the page it can be that you have these kind of tabs and folders and things like that, which we will still treat as normal content on the page. Even if it is hidden on the initial view.”

He also said that, when it comes to Mobile First Index:

“If it’s critical content, it should be visible.”

I shall wait for the official announcement on Google blog before saying anything on this.

In the meantime, here’s my take:

If you will hide or block the content for mobile users, Google will put less weight on it or simply ignore it.

So observe your website on different mobile phones. If desktop users can see something and mobile users are missing it. I suggest that fix it asap.

CHAPTER 4: How to Optimize Your Mobile Sitefor UX Signals

As you know, SEO today is less about focussing on meta tags and more about building an awesome website.

In fact, Google’s RankBrain algorithm is paying attention to Google searchers and how they interact with your site.

If RankBrain observes that your is frustrating for mobile users, it will drop your rankings like a stone.

In this chapter, I shall show you some tips that make sure that mobile users love your website.

Master Mobile Sitespeed

Does Google care how fast your mobile site loads?

Yes.

In fact, they recommend that your site should load under a second for mobile users.

That is a hard nut to crack. Luckily, there are some free tools on the market to help you to reach Google’s guideline.

First of all, we have Google’s PageSpeed Insights tool.

This tool allows you to know the time of site load on mobile.

In addition, it also gives you suggestions that you can use to speed up.

4_2_google-pagespeed-insights

You can also check out WebPageTest.org. By default, it will load your site on a desktop browser. You can select a mobile browser from the menu:

4_3_webpagetest-org

And it will give you a list of suggestion which are for mobile browsers:

4_4_adapted-for-mobile-browsers

If you are really interested in pagespeed, check out this excellent resource.

4_5_speed-test-big-g

This guide will help you to load your site like lightening.

Make Your Content Insanely Easy to Read on Phones

Do users have to pinch, scroll or squint to read your mobile content?

So they will press the ‘back’ button.

For example, you don’t want your content to look like this:

4_6_legibility-on-mobile-devices

Yes, this page is optimized for mobile. But it is hard to read.

You need your font to be big, bold and legible:

So:

How can you make your mobile content more readable?

  • Use at least 14px font (I prefer 15 or 16)
  • Use short paragraphs (1-2 lines per paragraph)
  • Go with a line length between 50-60 characters
  • Make sure there’s tons of contrast between text and background (people use phones outside, which can make low-contrast text harder to read)

It is also helpful if your content is good and interesting but that is another thing.

Use HTML5 For Video and Animated Content

Do you embed videos in your content?

Does your page perform all sorts of fancy animations when people visit?

If the content is coded in flash, it will not work on mobile devices.

Instead, you need to code that up in HTML5.

Don’t Forget the “Viewport Content” Tag

Do you use responsive design?

If yes, do not forget the viewport meta tag.

This tag changes the size of your page based on the device of user.

Google also suggests that you setup your viewport meta tag like this:

4_8_viewport-tag

If you will forget this tag or you will not configure it correctly. Your site will look funky to mobile users.

4_9_no-viewport-tag

You have double check it to know that you have set this up.

Implement These 3 Quick Mobile UX Hacks

These are 3 quick tips designed to boost the usability of your site for mobile Google searchers.

1

Make Header Images Really Small

Mobile Google users want to get answer now.

It means you do not have to use giant header images like this:

4_10_mobile-ux-hacks

So delete them or make them smaller for mobile users or visitors:

Use Lots of “Negative” Space

Negative space is the space between buttons, text and design elements. It is really important for mobile websites.

On a desktop, you can use a covered page.

But on a phone, you cannot get away with a covered page.

4_12_negative-space-on-mobile

It is very important for content which you want to rank in Google. If a Google visitor is having trouble to read your content or finding what he needs. He will bounce your site and will return to search results.

And using a lot of negative space, like this, is another way to reduce the bounce rate and improve the dwell time:

4_13_negative-space-improves-dwell-time

Put Social Share Buttons as a Tab Bar

The fact is: social sharing buttons can increase the amount of shares of your content.

Social share buttons work well when they are in a sidebar:

They do not distract but if someone wants to share, the buttons are right here.

The problem is: the setup is not possible on mobile.

Therefore, I suggest using a tool like Sumo that shows the social icons as a tab bar at the bottom of the page.

Image

Simple.

CHAPTER 5:Advanced Mobile SEO Tips and Best Practices

Now your site is mobile optimized, it’s time to take things to the next level.

In this last chapter of my guide, I shall give you an advanced mobile SEO tips, strategies and best practices.

Fix Your Mobile CTR, Get More Traffic

I do not need to tell you that your organic click through rate is a Huge Google ranking factor.

If Google will observe that the mobile users do not click on your result, it will downrank you.

But how do you know that your CTR is up to the mark? Here is the process:

First, go to the Google Search Console’s Search Analytics section.

Image

Next, click “Compare Devices”.

Image

And choose “Desktop” vs. “Mobile” and hit “Compare”:

Image

Now, take a look at how your desktop and mobile CTR size up.

Image

It is a normal thing for your desktop and mobile CTRs to be different here.

If you notice that your desktop CTR presses your mobile CTR for a certain keyword, search for that keyword in Google using your phone.

It can be that the mobile SERPs have more ads which are crowding organic results.

Or it can be your title tag is cutting off.

Either way, you will come with an insight which you can use to increase your mobile CTR.

Turn Mobile Donkeys Into Unicorns

Google’s Mobile first index means that Google will put more weight on mobile UX signals.

In simple words, if mobile users bounce from your site like crazy, it will put a negative effect on your rankings.

Therefore, I suggest compare your desktop vs mobile bounce rate and dwell time using Google analytics.

It is very easy and well worth.

To do it, login to your Google analytics account. Click Site Content>Landing Pages.

Image

It will show you the most popular pages on your website. Click on a page which you want to get more traffic to.

Image

Then click “Secondary Dimension”> “Device Category”.

Image

It will show you how your UX signals compare on desktop vs mobile.

For example, for this page, my bounce rate and dwell time are almost similar. So this page is probably optimized well for mobile users.

Image

But if Google analytics shows you the big difference between mobile and desktop users, then visit the page on your own phone.

You may find something bad that is causing mobile users to bounce your page.

When you are done, move to the next tip.

Boost Your Mobile Page Speed With These 3 Tips

After Google’s mobile-first update, Google will look into the mobile page speed. Will my desktop speed will still matter? Maybe.

But it will not get that importance as how your website loads on mobile.

Here is how you can skyrocket the mobile loading speed of your site.

First of all, do a mobile speed test at ThinkWithGoogle.com:

Image

This tool is similar to any other speed testing tool. It even loads your site on 3G to create the mobile environment.

It will give you a helpful report that will tell you how long your site takes to load on a mobile device.

Image

And also how to remove the speed breakers.

Image

Here are some other quick tips to try out:

  • Smash your images: If you use WordPress, I suggest installing an image optimizer, like Smush Image Compression. These SIGNIFICANTLY reduce the file size of your images, which can speed up load times dramatically.
  • Implement Browser Cache: Google themselves suggested caching your site to make your site load faster.
  • Get a CDN: CDNs can make page elements (especially images) load 2-3x faster.

Optimize Title and Description Tags for Mobile SERPs

Do you get the majority of the organic traffic from mobile?

Then you need to optimize your title and descriptions tags according to the mobile search results.

Here’s how:

Google provides more title tag characters to work on mobile. But your meta description is short.

(Go figure)

Here’s the exact breakdown:

Desktop
Title: Approximately 70 Characters
Description: Approximately 300 Characters

Mobile
Title: Approximately 78 Characters
Description: Approximately 300 Characters

In short words, if your title tag is 69 or fewer characters, it will not get cut off on mobile or on desktop.

But let’s suppose you get more traffic from mobile. You may want to expand the title tag and take advantage of the extra space. Even if you exceed the desktop characters limit.

For example, your title tag looks like this:

Image

That’s 66 characters. So this title will show in-full on desktop and mobile.

Now suppose you wanted to use a word or phrase that can increase your CTR. Your title tag will be look like this:

Image

That’s 78 characters.

Yes, 78 characters mean that Google will cut your title tag on desktop searches. But it will show up just fine on mobile.

If you have small traffic of desktop users. It may be worth making your title tag longer to increase the CTR.

Should You Implement AMP?

Accelerated Mobile Pages are designed to load quickly on mobile devices. In fact, AMP pages load 4 times faster than non-AMP pages.

As you may know, Google has led the charge on AMP.

Image

As AMP is a Google project, that is why a lot of SEO experts are implementing AMP on their client’s sites.

(It is due to the fact that Google will reward AMP-friendly sites with higher rankings)

Apart from higher rankings, Google also shows a little icon in the search results that may boost your CTR.

Image

The question is:

Does it make sense to use AMP?

The choice is yours, I do not recommend it.

Here’s why:

First, AMP puts SERIOUS limits on your page’s functionality.

Want full control of your ads? Not happening.

How about a lightbox or popup? No.

AMP also puts serious restrictions on CSS. This makes your site load faster but makes your content look like generic.

Secondly, AMP can hurt your link building efforts.

When someone links to your content, those links point directly to your site.

But here’s the deal:

When someone links to your AMP pages, this link will give a link to Google.com domain

Image

In other words, AMP can cost you in the link department as well.

So links to your AMP pages will boost Google domain authority, not yours.

Finally, AMP may not last.

LTE is already SUPER fast. And 5G is just around the corner.

So the idea of jumping through a thousand methods to increase in mobile loading speed can make sense. But moving forward makes more sense.

Bottom line? Unless you have a compelling reason to do so, I do not suggest AMP for most publishers.

Use Schema Structured Data To Stand Out in Mobile SERPs

As you may know, mobile SERPs show the search results like cards:

Image

And these cards make Schema.org structured data super effective.

Why?

Well structured data can hook you up with recipe images, review stars and event dates in SERPs. It can increase your organic CTR.

For example, look at the downshiftology mobile results from ToddyCafe.com. this contrast is not powerful on desktop:

Image

In a nutshell, if you want more clicks from mobile Google searchers, implement well structured data.

Now It’s Your Turn

So that’s it for my guide to mobile optimization.

I hope you enjoyed it.

What are you doing to get your site ready for mobile SEO?

Or maybe you have a question about something from today’s guide.

Either way, let me know by leaving a quick comment below.

Do not forget to share this post.

Related Posts:

  • SEO this Year: The Definitive Guide
  • How to Score 100/100 in Google Pagespeed Insights
  • How to Add SSL and HTTPS in WordPress Website
  • How to Fix Eliminate render-blocking JavaScript and CSS in WordPress
Arsalan Rauf
Arsalan Rauf

Arsalan Rauf is an entrepreneur, freelancer, creative writer, and also a fountainhead of Green Hat Expert. Additionally, he is also an eminent researcher of Blogging, SEO, Internet Marketing, Social Media, premium accounts, codes, links, tips and tricks, etc.

www.greenhatexpert.com

Filed Under: Blogging, Guide, SEO, WordPress Tagged With: mobile seo checklist, mobile seo definition, mobile seo google, mobile seo guide, mobile seo meaning, mobile seo techniques, optimize website for mobile free, what is mobile optimization

Best Online Grammar Checker Tools for WordPress in 2024

Last Updated on December 30, 2023 By Arsalan Rauf

In this post of Green Hat Expert, we shall discuss the best online Grammar Checker tools for WordPress in 2024.

Best Online Grammar Checker Tools for WordPress

Are you searching for the best online grammar checker tools for WordPress this year? There are several browsers that support built-in spell checking but they do not check grammar and readability. In this post, we are sharing the best grammar checker tools which you can use with WordPress.

Why Add a Grammar Checker Tool for WordPress?

It is due to the fact that most experienced writers also make mistakes while writing.

If you will do proofreading of your articles before publishing them, it will lead to small careless errors.

There is another way to get over this problem if you read your articles loud.

If you listen to your own voice, it will help you to find mistakes and you can also improve the readability score of your articles.

You need a grammar checker tool if you want to get help with spelling and grammar.

These tools can detect your grammar and spelling mistakes instantly.

So it will also save your time from proofreading and it will also improve your content.

Let’s take a look at the best grammar checker tools for WordPress which you can use.

  1. Grammarly

grammarly for wordpress

Grammarly is a professional grammar checker tool that you can use as an addon. The addon is available for Google Chrome and Firefox.

Grammarly checks your spelling and grammar errors when you compose your post.

You will find an indicator at the bottom right corner of the writing area. When you click the indicator it will show you the number of errors you make while writing.

It will highlight grammar, spelling and contextual errors with an underline when you write.

I am also using Grammarly for grammar checking.

There is a downside of Grammarly, you have to go to the text editor in order to proofread it. If you do not like it, you can always go for the best Grammarly alternatives.

  1. Ginger

ginger grammar checker tool

Ginger is another best online grammar checker tools for WordPress which improves your writing skills and also boost your productivity.

It is also available as a browser addon that gives good user experience.

It shows a tiny icon at the bottom right corner of writing areas including Gmail, Facebook and WordPress post editor etc.

Ginger starts checking your mistakes when you write content and highlights errors with context.

Additionally, it also has some few drawbacks, you have to go to the text editor in WordPress.

For better experience, you need to click on the icon (edit in ginger).

  1. After the Deadline

After the Deadline WordPress Plugins

After the deadline is a Google chrome extension which is another grammar checker tool.

It has built-in spelling checker along with readability and optional grammar check.

After the installation of the addon in your browser, you need to go to the options.

It will take you to the addon settings page where you can check the options of your choice.

The spellcheck icon of this tool is available at the bottom right corner of the editor and you can run it while writing your content.

  1. Hemingway Proofreading Tool for Writers

Hemingway Editor Proofreading Tool for Writers

Hemingway is another web based grammar checker tool or text editor. So it will not work in your WordPress post editor.

It is free web based editor which enables you to check grammar, spelling and readability of your articles.

Additionally, do not consider it only a grammar checker but also a style checker.

It shows you your readability score so that you improve the readability score of your content.

Hemingway app also suggests improvements in your content and it is the best grammar checker app.

It has distraction-free and clean layout that helps you to assess your content quickly before publishing your content on WordPress.

Hemingway app is also available in paid version for both Windows and Mac.

These versions allow you to post content directly to WordPress.

  1. Language Tool

LanguageTool Style and Grammar Check

Language tool is also available as a free addon for Google Chrome, Firefox, Libre office and Google Docs etc.

It is also a web based editor and we can also call it a complete desktop app.

Language tool has more than 20 languages including English, German, Polish and Russian etc.

So you can use this tool for various languages and correct your spelling and grammar errors.

In addition, this feature makes it beneficial for multilingual websites and multilingual writers or authors.

Note: The free version of this tool is limited to 20,000 characters per check. If you want to get more features, you need to switch or upgrade to paid plans.

  1. Jetpack

jetpack for wordpress

Jetpack is a WordPress plugin that has a number of modules.

You can add proofreading feature to your WordPress post editor using this plugin.

Go to Jetpack > Settings page for extended grammar check. You will find spelling, grammar and style section under the writing tab. You can enable different options for proofreading such as style rules.

The user needs a WordPress.com account if he wants to use Jetpack which is a downside of this plugin.

Additionally, you also get a number of features that you may not require.

I hope that after reading this post, you will get the best grammar checker tool for WordPress.

You may like our post on Best Managed WordPress Hosting.

Do not forget to share this post.

Arsalan Rauf
Arsalan Rauf

Arsalan Rauf is an entrepreneur, freelancer, creative writer, and also a fountainhead of Green Hat Expert. Additionally, he is also an eminent researcher of Blogging, SEO, Internet Marketing, Social Media, premium accounts, codes, links, tips and tricks, etc.

www.greenhatexpert.com

Filed Under: Blogging, SEO, WordPress Tagged With: best grammar checker app, best grammar checker app for android, best grammar checker for mac, best grammar checker software free, best grammar checker software free download, professional grammar check, whitesmoke grammar checker, whitesmoke writer grammar

SEO in 2024: The Definitive Guide

Last Updated on December 7, 2023 By Arsalan Rauf

Guide to SEO in 2024

We are going to share with you the ultimate guide to dominating Google search results in 2024.

I want to make something clear about something.

It is not a lame post for SEO in 2024 because it is based on reality.

I am going to share those SEO strategies which are working right now and will become more useful in 2024.

If you are researching an SEO guide in 2024, you will love my guide.

Let’s go.

1st Chapter: RankBrain & User Experience Signals

2nd Chapter: Become a CTR Jedi

3rd Chapter: Comprehensive, In-Depth Content Wins

4th Chapter: Get Ready for Google’s Mobile First Index

5th Chapter: Go All-in-with Video (Or Get Left Behind)

6th Chapter: Pay Attention to Voice Search

7th Chapter: Don’t Forget: Content and Links are Key

Bonus Chapter: Quick Tips for Seo in 2024

CHAPTER 1: RankBrain & User Experience Signals

Last year Google Announced that RankBrain was the third most important ranking factor:

So in the few months it has been effective, RankBrain has become the most important factor that contributes to the search results or search query.

Google changes its algorithm, RankBrain will become an important factor in 2024.

Now, what is RankBrain and how to optimize for it?

Google RankBrain: a Dead-Simple Explanation

RankBrain is a machine that assists Google to sort out their search results in search engine.

It may seem complicated but it is not.

RankBrain measures the interaction of users with search results and it ranks them according to this user interaction.

For example, I say you are searching for “cold brew coffee” on Google.

cold brew coffee

The #4 result seems to be attractive and you will click on it quickly.

When you reach there, you find that you have got the best article or post about coffee. So you read eagerly every word of that post.

RankBrain is going to notice that and will give boost in rankings to that #4 result.

On the other hand, you search something and click the first result without looking at it.

But you find that content is awful and you bounce that first result within seconds. When you go to the result #4 and find the best article and attractive information about coffee which is worth reading.

RankBrain will also notice this and if the people keep bouncing the first result, Google will throw him from 1st ranking.

So, RankBrain focuses on 2 things:

1: (Dwell Time) the amount of time one spends on your page

2: (CTR or click through rate) the number or percentage of people who click on your result.

RankBrain and Dwell Time

Dwell Time= how long a reader or user spends time on your page or post.

It means that RankBrain pays a lot of attention to dwell time or amount of time.

The head of Google Brain in Canada has also confirmed that Google uses Dwell time as a ranking signal now.

It is also a SEO trend to watch in 2024.

dwell time

RankBrain pays heed to “when someone clicks on the page and stays on that page and when they go back”

A recent study by SearchMetrics also support this statement and they also tell the average dwell time. They are of the view that average dwell time for a top 10 Google result is 3 minutes and 10 seconds.

If you have gone through Google Analytics, you will come to know that 3+ minute dwell time is legal.

There is no coincidence that pages have good dwell time rank higher in Google search results. RankBrain is upranking them due to this reason.

It makes sense when someone likes the content then he will spend a long time on that page.

Additionally, if there are some people who feel the same way, Google will rank that content and make it easier to find.

If you want to improve or increase the Dwell time so check this video:

RankBrain and Organic Click Through Rate (CTR)

The engineer of Google Paul Haahr put a slide in the conference and it says:

interpreting live experiments

RankBrain sometimes ranks pages higher up than they “should” rank.

If that page is getting more than average CTR, it means that this page should get a permanent ranking boost in Google.

Do not consider it as a surprise because if no one is clicking on your result, why would Google keep your site on the first page?

If you want to know the strategies that how to increase CTR, check this infographic

CHAPTER 2: Become a CTR Jedi

You have to become a CTR Jedi in order to become the master SEO in 2024.

Yes, it is due to RankBrain.

But also because of:

And:

And most deadly of all:

In fact, the study of industry found that organic CTR is down to 37% since 2015.

There is no secret in why Google is building organic search results with Ads, answer boxes. Carousels, “people also ask” sections etc.

And to survive it, your result should shout “click on me!” otherwise, it will be ignored.

This video will help you to improve CTR and I call it “the click magnet method”.

CHAPTER 3: Comprehensive, In-Depth Content Wins

In the old days, Google was analyzing your page to see how many times you are using the specific or focus keyword.

They were focussing 100 percent on page’s content. So Google spider will visit your page in order to check if your keyword is present in:

  • Title tag
  • URL
  • Image ALT text
  • Description tag
  • H1 tag

They still consider this stuff and Google has become more smarter than ever.

So now they do not only measure content but they also focus on context as well.

Who do I mean?

The first job of Google is to show the best result to its users. And in most of the cases, the best result is not a piece of keyword stuffing content.

The best pages consist of in-depth analysis of an entire topic.

When the user finds in-depth content, he gets everything he wanted to get in one place.

In SEO in 2024, in-depth content ranks the best in Google search results because it is a recent ranking factor.

How To Write Comprehensive, In-Depth Content

The question is, how can one write an in-depth content that Google needs or wants to see?

First of all, the length of your content is at least of 2000 words. When you will write in such a manner, Google searcher will get what he wanted to know about the topic.

In fact, the studies of Backlinko also shows that longer content can outrank short articles in Google.

Add LSI Keywords to Your Content

When you complete 2000 words article, you need to add LSI keywords to it.

LSI keywords and phrases are linked to your topic or post.

For example, you have written an article about the Paleo diet.

LSI keywords would be terms like:

  • Nutrition
  • Caveman
  • Weight loss
  • Recipes
  • Grains

When Google observes LSI keywords on your page, it considers it an awesome topic.

The question is how to find LSI keywords.

There are three simple ways to find them.

First of all, you can use a free tool that is LSI Graph.

You need to enter your focus or target keyword in this tool and it will give you a number of LSI keywords which are linked with your term:

Select and add any of these keywords to your content it is also one of the SEO strategies in 2024.

Secondly, you can search your keyword in Google search engine to get search trends of your keyword in 2024. Check related searches to your keyword which are available at the bottom of the search results.

Bold words in these related terms are LSI keywords.

Lastly, you can use Google Keyword Planner for LSI keyword ideas, take a look:

Enter your target keyword in Google Keyword Planner and click get ideas.

Get the results and there are several LSI keywords available.

Just like other SEO strategies, you need to focus on Google keyword planner too for your content.

CHAPTER 4: Get Ready for Google’s Mobile-first Index

Last year, Google also announced that they are moving to “mobile first index”

Precisely, Google will consider the mobile version of your website as the real version and same is the case if a user searches from a desktop too.

So it is due to the fact that 60% of Google searches or visitors are from mobile devices. This percentage will increase in the future.

So it will be live any day so prepare it for now.

How to Prepare for Google’s Mobile-First Index: 3 Simple Steps

1: Make Your Content Consistent Across Desktop and Mobile

Sometimes people hide content on the mobile version and we share with you an example:

Here’s an example:

It will become a big problem for people when Google will unveil its mobile algorithm.

Once Google will launch mobile first version, it will be the true version. Google will ignore the hidden content.

Therefore, you need to display 100% of your content on mobile and desktop version.

For example, when you visit this post of Backlinko from android phone, you will get the same content like desktop users.

There is nothing hidden behind buttons such as expendable or menu.

2: Move From m. to Responsive Design

If your site has “M” version, Google recommends to switch to responsive design.

3: Make Sure Your Site Kicks Butt On Mobile

We can see that there are several websites which are painful to use.

So, you need to recall my first point of RankBrain in which Google measures users interaction with your site.

If the people will get a hard time using your site with their Android, they will press the “back” button without thinking again.

How to Know your Site is Mobile Friendly or not?

Use Google Mobile friendly test tool. You need to enter your URL and tool will tell you whether your website is mobile friendly or not.

They will tell you the recommended settings to optimize your mobile version.

CHAPTER 5: Go-All In With Video (Or Get Left Behind)

According to Cisco’s opinion, online videos will get 80 percent of all online traffic in 2024.

Despite the fact that there are more than enough videos but according to HubSpot 43% of the people still want to watch more video content.

If you are not creating videos, you are losing. There are several advantages of making videos in Seo in 2024.

Tap Into YouTube

YouTube is world’s 2nd largest search engine and it is growing rapidly. According to Huffington post, the spend time on YouTube has increased to 60% as compared to last year.

In short, people are searching things on YouTube and skipping Google.

If you want to get traffic from Search Engine Optimization this year, I recommend optimizing and creating content using YouTube videos.

It is also a search engine which we cannot ignore.

Most of the people are not making videos due to laziness. So it is an easy task for you until you know what you are doing.

For example, if a channel has fewer than 20 videos and they generate 100,000 views per month.

When you will launch SEO optimized videos on YouTube, you will get more space on Google.

The question is why? For start, 55% of Google search results consist of at least one video.

Almost all of those videos are from YouTube.

As you know Google owns YouTube, so you should expect more YouTube videos in 2024 in search engine results.

Additionally, Google is also adding Youtube results into Google image search.

Embed Video Content Into Text-Based Blog Posts

If people want to watch more videos, why not give it to them?

Therefore, you should use video content on your blog posts.

In my opinion, it will also give you dwell time.

Here’s an example of this in action:

CHAPTER 6: Pay Attention to Voice Search

The voice search has become the big thing in SEO now because it is growing day in day out.

For example, check out these eyebrow-raising facts:

  • 40% of adults perform at least one voice search per day (source)
  • Voice searches performed in Google are up 35x since 2008 (source)
  • 20% of all searches on mobile are voice searches (source)

So Seo masters are optimizing some of their content for voice search as well.

Including me.

How to Optimize for Voice Search

There are few things we know about voice search and how it works and how to optimize for it.

1: First, your content needs to be on the first page.

First of all, your content should be on the first page and it is necessary.

2: Next, it helps A LOT if your content appears in a Featured Snippet, like this:

Google’s algorithm is already giving the snippet for users.

After testing Google voice search, I have come to know that Google spits the text inside of featured snippet.

3: Finally, include a question (and answer) in your content.

The vast searches on mobiles are question based. We can quote examples from our content

“How to do SEO in 2024” or “What are the SEO tips for 2024”

Google picks the page which has questions and answers.

For example:

When I search something and go to that page.

It has my question with a short answer.

That is what Google’s voice search algorithm wants to observe.

CHAPTER 7: Don’t Forget: Content and Links are Key

After doing all the discussion, we cannot neglect the value of content and links.

If you do not have an amazing content, you will never get backlinks.

And without backlinks, you will not reach the first page.

You have to be on Google’s first page to worry about RankBrain, Mobile-first algorithm and Voice search.

These things matter when you get rank.

In fact, Google recently said that links and content are their #1 and #2 ranking factors.

So question is, Are backlinks still useful for rankings in 2024?

The answer to this question is backlinks and content are still the foundation of SEO in 2024.

BONUS CHAPTER:Quick Tips for SEO in 2024

In this bonus chapter, I shall give you some tips that will work well in 2024.

Create Visual Content (Especially “Embeddable Images”)

Visual content is growing rapidly like video.

Almost 37% of the marketers stated that visual marketing is an important form of content in order to grow business.

Thanks to Instagram and Pinterest and visual content will also grow in 2024.

How to get advantage of Visual content?

You need to create visual content like embeddable images.

It gives fancy infographic and looks better.

People can easily embed images which are embeddable into their content. And they will link back to you as well.

It is nice and simple.

A single embedabble image can generate high quality backlinks to your site.

Publish Unique Data

Journalists and Bloggers like unique data.

If you give them surveys, stats and industry study, they will throw links at your feet like rose petals.

Encourage Comments on Your Site

Do blog comments help your rankings or are blog comments improve your rankings?

Yes!

Last year, Google said that blog comments are helpful in rankings.

This year Google said that “Comments are better on-site for engagement signals for SEO than moving to social.”

Google will acknowledge that you have an active community on your site. So it will be a ranking signal in 2024.

Go On Podcasts

Podcasts are another way to build backlinks.

They are like guest posting. Just show up, give value and you will get a backlink.

Now It’s Your Turn

That is how I prepare for SEO in 2024.

Let me know your tips and tricks to rank in 2024.

Do not forget to share this post.

Arsalan Rauf
Arsalan Rauf

Arsalan Rauf is an entrepreneur, freelancer, creative writer, and also a fountainhead of Green Hat Expert. Additionally, he is also an eminent researcher of Blogging, SEO, Internet Marketing, Social Media, premium accounts, codes, links, tips and tricks, etc.

www.greenhatexpert.com

Filed Under: Blogging, Guide, SEO Tagged With: search engine optimization techniques tutorial, seo strategies and techniques, seo strategy definition, seo strategy example, seo strategy pdf, seo strategy plan, seo strategy template, seo techniques meaning, seo techniques pdf, what is seo techniques

How to Score 100/100 in Google Pagespeed Insights in 2023

Last Updated on December 31, 2022 By Arsalan Rauf

In this post of Green Hat Expert, we shall show you how to get 100/100 score in google pagespeed insights.

How to Score 100/100 in Google Pagespeed Insights in 2023

When you buy and build a new website for you or for your company. You spend days to build it’s design and spend weeks in production and it has labor of hours.

After doing so, you find that your new website is beautiful but it is not as fast as it has to be.

When you want to build a search engine optimized site, speed is a serious factor in this regard.

If your website is not fast enough, get ready to get bounce rate because user will not wait for your website to load.

But speeding up a site is also a hard nut to crack.

It is another issue to find out the cause of slow website and why is it slow?

There can be a problem in your code which is not well written in large page elements or images.

So you have to find or diagnose these issues and fix them as well.

Google will take action against your website if you will not.

If you go through Google pagespeed insights and your score is 100%, it means that your website is fast.

And Google gives preference to those websites that load faster or quickly.

If your website will load faster, the bounce rate will also reduce. Additionally, if your website is fast, you have a chance to get ranking on Google over slow sites which get high bounce rates.

Thanks to God. Google is offering free tool that is, pagespeed insights and it will allow you to see what you need to fix.

There is an unfortunate thing as well, that they do not give you proper instructions to get 100/100 score in pagespeed insights.

So here we shall tell you how to get 100/100 pagespeed insights score and why is necessary?

Why You Should Care About Page speed?

It has become a critical factor and if you want to get rank your website higher in Google search engine.

If your website is not in the top 10 listings, you will not be able to rank on the first page.

Majority of the search engine users do not visit the second page.

So it is clear that top 10 results in Google get the majority of clicks.

If you want to run a successful company with a website, you need to focus on page speed.

Backlinko has done the study where they have analyzed more than 1 million SERPs (Search Engine Results Pages) in Google.

They wanted to know the factors behind the ranking of top 10 listings.

So they quickly analyzed that average page load speed for any website was a major factor in higher rankings.

average page speed load speed for a website

The top ranking positions in Google hold fast page speeds on their websites.

They have optimized their website.

In addition, they also come to know that top ranking websites have low bounce rates if we compare them to second page results.

Bounce Rate

There is a mutual relationship between low bounce rates and fast website.

This mutual relationship is supported by Google’s new Pagespeed industry benchmarks.

They have come to the conclusion that if the page speed goes down the chance of bounce rate increases.

page speed goes down the chance of bounce rate increases

It means that if your website loads in 10 seconds there is a huge chance that the user will leave your website.

According to the graph of Backlinko, top ranking websites on Google have page speed less than 3 seconds.

According to the latest report of Google, most of the websites are extremely slow in every industry:

average page index

The average load time is exceeding eight seconds and at times, it passes the 11 digits in the tech section.

Why do we Improve Page speed of site?

If you want to get rankings on the first page of Google search engine, your site has to lead in three seconds.

In another study, BigCommerce stated that the conversion rate of e-commerce website is 1-2 percent range.

Portent used this study to do their own research. They come to know that if the site speed increases from 2 seconds to 1 second, your dollars per pageview also increase by 100 percent.

speed up your site from two seconds to one second

So if your site speed is lower than two seconds, it can double your revenue as well as traffic.

What Causes a Page to Load Slowly?

Slow pages and bulky images are the most common causes of poorly-designed coding.

In the modern era, when you take a look at any website, it is full of images.

So if you will not optimize your images, it will take enough megabytes of space.

The weight and page size of a web is measured by the weight of page bytes. Page bytes show the total size of your web page and it is measured in bytes.

According to Google’s benchmark, the best practice for page size to keep it under 500KB.

The average web page size

So we are also missing it, it is due to the fact that we are exceeding this limit.

Google’s quote about it

“No matter what, faster is better and less is more,”

70 percent of the pages are more than 1MB size and 36% are exceeding 2MB. 12% are over 4MB size so the statement holds a weight.

Google found a page and the size of that page is 1.49MB which is equal to one HD image. It can take 7 seconds to load on a page.

Additionally, during their research, they have found a web page that contains images and the average size of that image is 16MB.

We need to become serious to improve our website.

How to Diagnose Your Desktop and Mobile Site

Slow websites can kill the conversions is the first thing.

In addition, you may have some underlying issues that you cannot see on the surface is another step.

Most of the sites load slowly due to the large size images which take enough time to load.

This is not the case for every website.

First of all, you have to know the cause which is slowing down your site speed before you make any changes. You have to do it before going to get 100% score on the pagespeed insights tool of Google.

To start it, you have to open pagespeed insights tool and enter your website in the URL bar:

How to Diagnose Your Desktop and Mobile Site

Then click analyze and Google will run a quick test on your website.

When Google will complete its test then you will get everything you want to know about your site. Why is it getting slow?

Here is what my report looks like:

desktop report on pagespeed insights

It is 89/100

That is not great.

As you know you almost have room for improvement and my goal is to get 100% when I shall finish this article. So let’s take this journey together.

Firstly, let’s have a look at the items which I have optimized perfectly:

already optimized options

Now, see there are some items on the list compared to my “possible optimizations” list:

Possible Optimizations options in google page speed insights

This information tells us that the items available on “possible optimizations” are less impactful than those that I have perfectly optimized.

But you have to take care of everything in order to get 100% on page speed insights tool for WordPress.

So start with the top priority items.

Next, we shall test our mobile site separately.

You have two options to test your website on the page speed too.

Firstly, you can test it on pagespeed insights tool.

Secondly, Google has announced an updated and accurate version of it.

Go this Test My Site link and input your website to check it or hit enter.

You need to wait until Google run this report and it will take a few minutes. After making the report, it will show you a detailed report that how your site performs on mobile.

In addition, it also tells that how many visitors you can lose due to low page speed.

Here is what my data looks like:

test my site think with google report

My load time on mobile is 6 seconds.

Note: The recommended load time is three seconds or less than that.

It means that my speed does not fulfill the requirement.

So because of this reason, I am losing 10 percent visitors on my website.

Here is the screenshot to compare it to the industry standards:

Industry comparison

So in the top performing section, my website needs more effectiveness in order to drive more traffic and conversions.

Scroll down to know what top fixes I should do for my website:

fixes to speed up your web page

Google is saying that I can reduce my load time by doing some fixes and can load my site around three seconds.

It shows that I have the potential to load my website at one second.

It is an amazing thing to follow and you can save 10 percent of your visitors by doing it. That is an important task to do.

You need to run your website in this tool to get the fixes that you need for your site.

In this section, we shall discuss the top five page speed problems and after solving them you can get 100 on the pagespeed insight tool.

4 Ways to get a Perfect Pagespeed score

Again, to get 100% score on Google page speed insights is not a child’s play.

You cannot do it in a jiffy, so you have to spend some hours to do it.

If you want to get traffic so drive conversions and get more revenue.

It can be a boring and tiresome task but you need conversions. So do not be lazy otherwise, you will lose traffic and profit.

There are five ways to speed up your website and get 100% score on Google.

1: Compress your Images

Large images are one of the biggest cause of low score and slow pages.

After fixing this issue on our website, we have found a huge difference on speed.

You need to compress to fix this issue to get the top optimization.

If you use a simple compression tool, it can save 50% of the image size.

If you are a WordPress user, you can use a plugin for this task without paying anything.

Our recommendation is WP Smush Image plugin for compression and optimization and it has a number of features.

wp smush plugin for image compression

When you will add smush images plugin, it will automatically do the work for you. It will go through and scan your media library on WordPress to compress.

wp smush Plugin

Additionally, if you want to smush new images in bulk, you need to upload them directly into the plugin.

It enables you to smush 50 images at a single time and it is one of the best and fastest tools on the market.

Bulk Smush

If you want to save your time, you can turn on the feature of automatically smush images on upload.

Auto smush image on upload

This feature will save your time and you do not have to worry about compression ever. In addition, if you also compress the existing images on your library and turn on the feature of automatically smush. Your worries are gone.

Every WordPress user can use WP Smush easily without paying anything.

If you are not using WordPress, what will you do?

Do not worry, there are several more plugins available for different websites. For example, if you are using shopify-based store so use Crush Pics.

crush pics app by shopify

According to Crush pics, you can increase even get a big jump in PageSpeed insights score by using it.

So install this free plugin in order to start compression on shopify and improve pagespeed score.

If you do not aware of plugins and do not want to use them for your website, you can use other free tools including Optimizilla and Compress JPEG. Both are free and fast which can compress 20 images in a single upload.

Check the example image which I have compressed to give you an idea of how these programs are helpful.

crush pics example image

I have reduced the file size by 68% using Optimizilla and within only 2 seconds. It has reduced the size of 380Kb to 120KB and there is no quality difference in them.

So these tools are also free of cost and you can use them if you do not like to use a plugin.

2: Use Browser Caching

Using browser caching is another tool to make a difference if you want to increase your page speed.

It takes a lot of effort to load your website because it has to load every image and page element. Additionally, it has to deal with heavy HTML and coding as well.

When someone loads your site, it will take them too long to load it and browser caching is helpful in this regard.

It remembers the previously loaded resources and it does not load it whenever that user visits your site again.

When this user visits your new page on your site then your data such as footers and logos do not have to load again.

This process will results in a big increase in speed when people come to your site.

The question is, how to implement it?

So the answer is, you have a plugin for it too. You do not need coding for this.

Use W3 Total Cache for WordPress sites. It has more than one million active installs and it is also the popular one.

w3 total cache plugin for wordpress

W3 Total Cache plugin claims that it can increase 10x performance of your website.

Additionally, they also claim that this plugin gives you higher results on Google Pagespeed insight tool.

It will also help you to minify HTML, CSS and JavaScript, and saves 80% of bandwidth.

So use W3 Total Cache plugin today for your site to make it fast and boost its speed.

3: Minify Your HTML

Minimize the space which your HTML coding is taking is another factor for perfect score in Google Pagespeed insights.

Minification is the process of fixing and removing duplicate and unnecessary data without impacting the process of HTML in browser.

It involves shortening code when possible, fixing code, removing unused code and formatting.

So thanks to WordPress, it is due to the fact that it also has an awesome plugin for this problem.

HTML minify is one of the best tools for this purpose.

minify html markup

You can download it from their website or install it on your WordPress account free of cost. It takes seconds to perform it.

Use this link to install this plugin from its page.

Minify HTML wordpress plugin

After installation, you have to take few steps to see the instant impact on your site.

In order to increase the speed, minifying the script is the best thing.

Go to the settings tab on your Minify HTML plugin and enable the following settings.

minify html plugin settings

You can kill a number of birds using one stone.

Google pagespeed insights demands that you should minify JavaScript, HTML and CSS.

You need to enable the “Minify HTML” + “Inline JavaScript” settings.

Select yes for “Remove HTML, JavaScript and CSS comments”.

This plugin will also tell you what the recommended actions are under each setting and it is the best thing.

So follow these settings if you do not know how these settings work.

Minify your coding in order to see the positive and instant effect on your insight report.

4: Implement AMP

AMP is an abbreviation for accelerated mobile pages.

It is a project launched by Google to load the mobile pages faster.

It throws away tons of unnecessary content and makes your mobile pages load faster and instant.

AMP feature get rid of all the clunky features which do not support mobile devices.

If you are browsing internet on your mobile phone, you may click on an AMP based post or article.

AMP results in google

They are assigned to the “top stories” section of Google search results and they load in a jiffy.

They do not consist of enough formatting and that is the reason they load quickly and deliver the content of your choice.

When the user clicks on AMP articles, he sees the content like this:

AMP articles example

This version of site enables the user to scroll between the different stories without leaving and clicking the web page.

For example, you can swipe right or left in order to read the next article in the sequence:

swipe left or right

It gives the fast user experience on mobile.

Those days are over when you had to wait for ten seconds for a site to load. Click the back button and wait another ten seconds for the next website to load.

Here in AMP, you can access multiple articles without clicking the back button.

This feature speeds up your website and reduces the bounce rate as well.

There are a number of companies that are taking advantage of AMP.

WIRED has started implementing AMP in order to reach their customers in a better way.

wired amp page

They have come to know that their mobile user experience was not good enough. They were also facing speed issues and visitor retention problems.

WIRED invested time to AMP and it has created a huge impact.

They have increased CTR or click through rate from organic search results to 25%.

They have also got 63% increase in Click through rates on ads in AMP stories as well.

Wired added over 100k articles in AMP stories on their site.

Gizmodo got into AMP train and got huge improvements as well on their mobile site or version.

gizmodo improvements with amp gages

They were getting more than 100k AMP page visits on daily basis with 3x faster load times than standard mobile pages.

Conversions increased to 50%.

So AMP can increase conversions and mobile speed. Additionally, it also gives you an opportunity to score higher on Google pagespeed insights.

If you want to start AMP on your own site, there are a few ways to perform it.

If you are aware of HTML, you can get AMP’s detailed tutorial here.

For those who are unaware of HTML or have no experience, should use a WordPress plugin.

AMP for WP is one of the most popular plugins.

AMP for wordpress plugin

This plugin has more than 80k active installs and has constant updates and support.

It supports an AMP page builder which allows you to easily drag and drop page elements.

AMP page Builder

It will enable you to create AMP friendly content easily.

You need to find, download and install the plugin on your WordPress site and also activate it.

After the activation, you can use page builder on each post that you will upload.

These pages will create AMP friendly version and it will be available in mobile search results.

AMP is another best project by Google to improve or speed up your mobile site.

It will reduce your speed to less than one second and a number of companies getting success with it.

Conclusion

You may spend a number of days, weeks and months to build a new site. It is evident that you want it to be the perfect one.

Every image and elements and icon should be of high quality.

But at times, your website is slower than as expected by Google.

When it comes to conversion on your website, speed plays a vital role.

It is due to the fact that people will not wait for 10 seconds to load your website because they can go back to Google to go to the next result.

Google provides good user experience, if your website is slow and Google notices that people are bouncing. You will lose your rankings.

It is a hard nut to crack to score 100% on Google pagespeed insights. Or we can say as close as to the perfect score.

It should be your priority to optimize as well as make your site perfect.

For starters, you need to identify the issues which are occurring on your site.

Are they images, page elements, bad coding, too much text, or something else?

You need to use Google Pagespeed insights tool to figure out the problem or issue.

Images are a common problem of your work.

Begin with compressing and optimizing your images using an image compressor or a plugin to score 100% in Google Pagespeed insights in WordPress.

Next, use a plugin to leverage browser caching. There are several plugins to load your site faster and they will reduce server-based requests.

Then minify your coding and it will remove the unnecessary coding which can slow your site.

Lastly, implement AMP to make your web page load instantly.

I have discussed the proven tools that are changing the fortune of companies’ sites.

If you will score 100/100 in Google pagespeed insights in WordPress, your website will boost.

If you have other ways to increase site speed, do not forget to share it with me.

Do not forget to share this post.

Arsalan Rauf
Arsalan Rauf

Arsalan Rauf is an entrepreneur, freelancer, creative writer, and also a fountainhead of Green Hat Expert. Additionally, he is also an eminent researcher of Blogging, SEO, Internet Marketing, Social Media, premium accounts, codes, links, tips and tricks, etc.

www.greenhatexpert.com

Filed Under: Blogging, SEO Tagged With: eliminate render-blocking javascript and css in above-the-fold content, google insights, google insights score, leverage browser caching google fonts, optimize css delivery google fonts wordpress, pagespeed insights chrome, what is a good google page speed score, wordpress page speed optimization plugin

21 Best Blogging Apps for Android 2025

Last Updated on December 24, 2024 By Arsalan Rauf

The operating system of android has become a part and parcel of growing smartphone and tablet devices. There are a number of applications available in the Google plays store, which includes photo editing, meme creating and blogging apps. The users of android and developers upload and download a number of applications on daily basis. All of them not useful but some of them are useful too.

I have created a list of best blogging apps for android platform for bloggers that are necessary for every blogger.

These applications can allow you to work easily. Smartphones are mostly used by the users instead of the PC/Laptops, it is because they are reliable, easy to handle/carry and fashionable too.

You may want to check: Top websites to download Cracked Apps

You need to know that after going through these powerful blogging apps for android users can help you to take maximum advantage out of them. You can complete your daily tasks and schedule them in the easiest possible way.

Top 21 Best Blogging Apps for Android Users

Here is the list of top must have blogging android apps that are imperative for every blogger:

1# Grammarly

As a blogger, our first priority is to write useful content, you don’t want the text full of spelling and grammatical errors in it. Grammarly app will do the proofreading, fix the grammatical and spelling errors to avoid the mistakes in your content.

Grammarly has the ability to check more or less 400 grammar rules and common errors to eliminate the best possible errors.

It also comes with a plagiarism checker to save you from the duplicate content and verify its authenticity before you publish it.

It is available in free and paid versions so you should install it on your android phone to avoid grammatical errors on Whatsapp and Facebook too.

Related Read: Best Ways to get Grammarly account free

2# WordPress

WordPress is another android app for bloggers that enable you to edit, write and publish new content on your WordPress website. In addition, you can also monitor the analytics and statistics of your website. It is an open source app that is why you can also read the posts in the reader section. If you have a blog that is powered by WordPress CMS (Content Management System), you should give it a try.

This app is not only available for android users but also for iPhone users, it is one of the best blogging apps for iPhone too.

3# Google Analytics

Everyone wants to monitor the traffic, statistics and analytics, here comes Google Analytics handy. We cannot ignore the importance of Google analytics tool, it is a simple tool by Google Inc to get an overview of your traffic, platforms, and other stats. It allows you to monitor your site visitors, how many of them are unique, page views, returning users, session, landing pages, exit pages and how many visitors are bouncing etc and you can do it free of cost with this free blogging app for android.

4# Blogger

Blogger is another one of the top blogging apps in this list of best android apps for android, blogspot users can use this app and again Google Inc developed it.

It allows you to handle your blog posts, edit the existing ones, publish new ones and view the list of posts you published on your blogspot and you can also see the drafted posts too. It is a wonderful application to keep in touch with your blogspot and its performance.

5#  Tumblr

Tumblr is another app that can be used for blogging same as WordPress and Blogger app. It allows you to write, edit and publish new posts to your blog using your tablets and smartphones. Tumblr app also enables you to share videos, images, gifs, texts, links, music and many more things with this app.

This video blogging app can be used on iPhone too, you can post audio and video to it from your iPhone device.

6# Writer

If you write a blog, you are going to love this application. It helps you to write notes, novels, stores and fulfills your writing needs. The app developer states that “Writer tries to be as basic as possible, giving you somewhere to turn your thoughts into text, markdown support, and some statistics. Nothing more, Nothing less.” You can get the gesture of this app with the statement of the developer.

7# gAnalytics

Do not get confused with the name, it is not Google analytics but the working is similar to it. it allows you to monitor the traffic of your website, visitors, pageviews, sessions, real time visitors, unique visitors and other stats. If you are looking for an alternative, I recommend you use Google analytics.

(Note: This app shows ads in the application when you monitor anything, if you do not want to see ads, switch to Google analytics).

8# Swiftkey Keyboard

Swiftkey Keyboard is one of the impressive android blogging apps that offers keyboard to make the writing easy for you. It has next-word prediction ability, auto corrector, supports more or less 60 languages, 800 emojis, and colorful layouts.

9# Evernote

Evernote is one of the best android blogging apps that can be used on Android as well as on iOS operating systems. This app offers you an opportunity to compose web articles, handwritten notes, powerful search, compose notes in a clean workspace and get access to those notes from any device. A number of premium features are also available in the premium version, it is one of the best blogging apps for iPhone in this list.

10# Dictionary.com

It is another android app in this list that is necessary for Android users who are bloggers. The app contains more or less 2,000,000 definitions and synonyms from dictionary and thesaurus.com.

It is full of features including idioms, audio pronunciation, word origin, phrases, voice search, word history, favorite words, abbreviations and so on.

11# Photo Editor

There are a number of photography applications available for blogging freaks, all of them are available at Google Play store but this is unique from the rest of them. It allows you to edit your pictures, draw over images, cropping, resizing, rotate, adjust color and effects and many more features.

12# Google Drive

This is another blogging app that ranks in this list, Google Inc is the owner of Google Drive and the service is free of cost.

Uploading is allowed for your data files including images, PDF formats, videos, and music files etc. The size of the data supports up to 15GB for each Gmail account you use, it is a pretty good deal right?

Furthermore, you can share the files on the internet publicly with others.

13# PayPal

As a blogger, you may need to make transactions online, sending and receiving of payments using its system. This program helps you to make the transactions easy.

The payment gateway will not only transfer payments to your clients but you can also receive amounts if your website is monetized.

It is suitable for mothers who do online jobs at home and receive payments online, it does not require them to sign up for a merchant account.

Furthermore, you can also monitor your online transactions, whether they are recent or old, you can do it with internet access at any time using your phone.

If you do not have a PayPal account, you may want to get one here. Furthermore, you can also learn how to save fees on PayPal while making transactions.

13# Disqus (Closed)

Disqus is another platform that can increase the engagement on your blog by managing the comments. Feedbacks and comments also help the readers to understand the blog and how bloggers are interacting with them. This app will help you to read and reply your blog comments.

Update: Now, this app is not working.

14# Twitter

Twitter is a social app that helps you to connect with your social circle and communities, it is one of the most used apps. It helps you to tweet your posts/articles to your readers who may follow you on Twitter too. Like Facebook, it is also free of cost.

15# Pocket

Pocket is another must-have app for bloggers on their android, it is necessary for readers who want to read a full article but due to a hectic schedule and lack of time, you do not read it. This app comes in handy there, it allows you to read the posts when you have the time even if you do not have access to internet. The main task of this app is to save the articles for offline reading in your android device so you can read them later.

16# Feedly

This is RSS feeds reader application that helps you to read the new posts and articles of any website if you are subscribed to its RSS feeds. The good part is you can subscribe to multiple RSS feeds sites to get the latest updates at one place. It is a famous blogging app for blog writers and bloggers.

17# Pingdom

This app helps you to monitor the uptime and downtime of your websites. In short, you can detect when your website was not working and you can resolve the issue. in addition, it also displays the response time of the site so you can use it to monitor your blogs.

It is a part and parcel for not only bloggers for every website owner that is why I have listed in this best android blogging apps list.

18# Buffer App

Whenever you write a post you may want to share it on your social media groups or sites including Twitter, Facebook, Linkedin etc and it is a time taking and frustrating thing one can encounter. Buffer app is a jack of all trades and solves this problem with ease. It can share your new blog posts on all the social media websites.

19# Flipboard

Flipboard is the next app for bloggers who keep themselves abreast of new videos, news, stories, images around the globe. Connect the flipboard with your social media circle including FB, Twitter and Google+ to know about the latest sharing of your friends and you can also share your posts with them too.

20# Facebook Pages Manager

You are reading this article, it means you are a blogger right? Then, you definitely have a Facebook page to share your latest posts and articles. This app will help you to do all the tasks at one place including pages and posts insights, Facebook page, reply to messages, status update and ads promotion. You can monitor your web pages too using this app.

21# Photo Editor Pro

This application is helpful for you when it comes to editing your images and photos for your blog posts. It is replete with features such as contrast, color, and brightness adjustments of a picture.

Additionally, you can also add photo frames and effects, create memes for pages and stickers too.

Main features of this app:

  • Outstanding one-tap auto enhance feature
  • Beautiful photo effects and frames
  • Funny stickers
  • Balance the colors
  • Ability to Crop, rotate, and straighten photos
  • It can make an adjustment to the brightness, contrast, color temperature, and even saturation
  • Capable of sharpening and blur photos with ease
  • Ease of drawing and adding text to photos
  • You can create your own memes
  • You can share photos directly on to your social media network

This is the list I have compiled after doing a lot of research, I highly suggest you should use these best blogging apps for android to make your work fast and easy. With the help of this list, you will be able to get the job done even if you are not working on PC/Laptop.

Am I missing any blogging app you want to add in this list? If yes, feel free to leave it in the comment section so everyone can benefit from it.

Do not forget to share this post with others.

Arsalan Rauf
Arsalan Rauf

Arsalan Rauf is an entrepreneur, freelancer, creative writer, and also a fountainhead of Green Hat Expert. Additionally, he is also an eminent researcher of Blogging, SEO, Internet Marketing, Social Media, premium accounts, codes, links, tips and tricks, etc.

www.greenhatexpert.com

Filed Under: Blogging

How to Create a Google Adsense Account from india in 2025

Last Updated on December 30, 2024 By Arsalan Rauf

In this post of Green Hat Expert, we shall discuss How to Create a Google Adsense Account.

How to Create a Google Adsense Account

Whether you are a new or old blogger, we hope that you know about Adsense program by Google. It is regarded as one of the best advertisement programs on the internet. This post will guide you that how to create a Google Adsense account for your blog or website.

There are several Adsense alternatives available too, after trying every network we ensure you that you will consider Adsense as the best.

If you are aware of marketing and hold marketing skills, you can also go for affiliate marketing. Soon we shall share a post on Affiliate vs Adsense and it will give you insights of both networks.

When I started online working, Adsense was a new and international concept for me. Then I signed up for Adsense account, after researching I was able to handle it. But still, I was not sure that I am doing it right or wrong.

People who are beginners not aware of Adsense. According to them, it is an advertising program for publishers by Google(Wikipedia). Google shows contextual ads on your website and you get paid when any visitor clicks on these ads.

In this post of Green Hat Expert, we are going to show you that how to create a Google Adsense account. If you do not know how to apply for an Adsense account, this guide is for you.

There are some requirements which are necessary if you want to apply for Adsense

  • First of all, of course, you should have a website.
  • You also must be above the age of 18, otherwise, you will have to use the name of your guardian or parents to apply for Google Adsense account.

watch this video for google adsense aproval in india:

Steps to create an AdSense account:

The team of AdSense has recently implemented new rules to get Adsense account approval and added the following steps:

  • Sign up for AdSense
  • Add AdSense code to your blog or website
  • Wait while your application or account is reviewed and either accepted or rejected

Now the Adsense account approval has become difficult and lengthy. It is because Google wants to maintain the integrity of Adsense.

It is also essential to ensure that your blog or website is abiding by AdSense policies before applying.

Additionally, you need to read the terms and conditions mentioned on the signup page to learn more.

Step-by-Step Guide: how to Create an AdSense Account:

First of all, go to the Signup page for AdSense.

You have the option to create a new Gmail account or you can also use the existing Google account as well.

Creating AdSense Gmail account - Step 1

Note: If you have a custom domain name & you are usingGoogle Apps for your domain email address, we recommend you to use that to sign up for your AdSense account. When you use domain or website specific email addresses like (admin@website.com). Then it will give a positive impression and there are maximum chances of getting your AdSense application approved.

Otherwise, you can use your premade Gmail address.

Create AdSense Gmail account step 2

This form is simple and straight-forward. You simply need to enter your blog URL and select the language of your content. For the website URL (greenhatexpert.com) use your blog address, and make sure to add it without “http://”.

Adsense contact information

This is the most important part.

I remember I made mistakes at this part when I first signed up. Hopefully, if you will follow this guide, you will not repeat my mistakes.

The “payee name” is very important. You have to ensure that you use the same name which you have used in your bank account, as AdSense can send you cheques, Western Union or EFT payment under that name.

If you will a mistake in this section, there is a chance that you may not be able to change payee name later. It is a difficult task to change the payee name in several countries including India.

  • We are also sharing the list of countries which are not allowed to change their payee name. Here is the list of countrieswhich are not allowed to change the payee name after creating an account for Adsense.

So ensure your bank account name and the person who will receive Adsense payment(payee name) are exactly the same.

Next add your contact information and fill in the other details.

Now Accept adsense policies
adsense policiesadsensepolicies
Read the AdSense policies carefully and put a checkmark in the box.

Once you have done these steps, then click on “Submit” button, and on the next page you can review your details.

Make sure that all of your details are accurate and up to date!

Sign up with your email account

Create AdSense Gmail account step 3

The blogger can use his current email address to create a Google Adsense account. Additionally, he can also create a new Gmail ID for the sake of Adsense. If you want to get fast approval, we recommend you Zohomail and you can create a free domain specific email address.

When we tried to sign up for a generic gmail address, we got rejected a couple of times. Later we have applied for Adsense using a domain-specific email address. We got Adsense approval quickly.

(Must read: Google AdSense new account approval process)

Submit Adsense Tax Information

Once you have created account for AdSense, you need to put your AdSense code to your website. The Google AdSense team will review your application when you will add the code, and your account will be authorised and activated with an Adsense Pin that will be sent to you. You will get adsense pin at your address and Google publish it when you reach the threshold of 10$.

Adsense pin can reach you from one week to 3 months it depends on your geographical location.

Once everything is set up and you want to get paid from AdSense you need to complete two further steps:

  • Firstly, Submit your tax information
  • Secondly, Enter your pin

You will need to submit a tax form for your business. For certification of No U.S. activities, and for Indian AdSense publishers, you can fill in this tax information:

Indian Publisher Tax Info Adsense

AdSense Pin:

You will receive your Adsense pin by mail when you reach the threshold that is, 10$. Then add the pin to your Adsense to make it verified.

Google pays you when you reach the threshold of 100$.

You should read this guide to learn how to enable direct bank deposit for your AdSense account.

  • For Indian site owners, read:
    • How AdSense pays in India
    • How to enable direct bank transfer for AdSense payment in India

I hope that you can easily sign up for Adsense account after reading this guide of how to create a Google Adsense account.

Have any questions regarding how to create a Google AdSense account process? Feel free to ask me via publishing your comments!

Remember to share this tutorial with other blogger on Facebook, Twitter & Google Plus.

Arsalan Rauf
Arsalan Rauf

Arsalan Rauf is an entrepreneur, freelancer, creative writer, and also a fountainhead of Green Hat Expert. Additionally, he is also an eminent researcher of Blogging, SEO, Internet Marketing, Social Media, premium accounts, codes, links, tips and tricks, etc.

www.greenhatexpert.com

Filed Under: Blogging, How to Tagged With: adsense account login, adsense payment, create adsense account without website, How can I get AdSense approval?, How do I set up an AdSense account?, How does an AdSense account work?, How much does Google AdSense pay per 1000 impressions?, how to create adsense account for blogger, how to get adsense approval for youtube, how to make an adsense account for youtube under 18, make money with google adsense, youtube adsense earnings, youtube monetization page

Best Managed WordPress Hosting in 2023

Last Updated on December 7, 2023 By Arsalan Rauf

Best Managed WordPress Hosting in 2023

To manage a WordPress blog is a hard nut to crack. You need to focus on different things including marketing, content, social media and so on. Before you pay attention to these things, you need to focus on the speed of your WordPress website. Whether it is running smoothly or not and your hosting is good enough for you and not creating issues for you.

Nowadays, there are several companies that are giving affordable solutions to their customers. The cost of the hosting is less than 5$ and you will get a shared hosting. It will be a great solution for you to take a start. If you are running a business site, you need a high-quality WordPress hosting to manage your website.

By using the word high-quality hosting, it means best managed WordPress hosting. It will be online for specific WordPress users. So it has become an eminent option among the users of WordPress and developers of websites. You can take a start by using WordPress.com VIP, but there are a number of options available in the market too.

If you want to solve your problem as early as possible so select out of these top 3 hosting providers we recommend and why:

1. WPEngine:

WPEngine is the best managed WordPress hosting for users and it is perfect for everyone. You will get everything you need and you will also get developer friendly tools. Additionally, you can also use WPEngine coupon to get 50% off or discount “wpkube50”.

2. SiteGround:

SiteGround is another best managed WordPress hosting for beginner as well as for advanced users. It is easy to setup and gives you outstanding support. You get support within 10 to 15 minutes and the rates are unshakable. These qualities enable it to become the best host for WordPress bloggers. You do not need a Siteground Coupon to get 60% off because you will get it without using a coupon.

3. FlyWheel:

FlyWheel is another best managed WordPress hosting which you will not change. It is due to the fact that they are perfect for small business, bloggers and agencies. It also gives a number of qualities and unique features including demo site, billing transfer, and blueprint.

Here is a quick comparison of the 3 Best managed WordPress hosting providers listed above (last updated on January 19):

  Name Loads Under: Suitable for (visits / month)Cost per month
 WPEngine WPEngine 0.26s 25,000 $29
 SiteGround SiteGround 0.4s 10,000 $9.95
 Flywheel Flywheel 1s 5,000 $15

Best managed WordPress hosting gives faster loading times along with better security and professional WordPress support. But quality comes with cost so it is a bit costly than other shared hosting companies. Managed WordPress host’s servers aim to give better and faster performance of WordPress with easy configuration.

In this post, we are going to give you basic information about 8 trusted and best WordPress managed hosting services. So it will be an easy task for you to select the hosting of your own choice for your own business.

What is Managed WordPress Hosting?

Managed WordPress hosting is only designed and optimized for the sake of WordPress websites. In other words, this hosting will take care of all the technical aspects of WordPress for your convenience. It will also enable you to create as well as share the great content with your users. You will get rid of the worries of site updates, up-time, site speed and other problems.

There are several hosting companies which are using their own CDNs and server caching. It will save you from the burden of cache plugins including WP Super Cache and W3 Total Cache plugins. It is also suitable for those users who do not possess technical skills and do not have time to manage the server.

The Pros of Managed Hosting for WordPress

Security:

Premium managed hosting will give you bulletproof security. It will give you a tight layer of security which will save you from hacking, DoS, malware and other security attacks.

Expert Support

It will not be a fair statement that shared hosting providers consist of poor support. There are many companies which have staff that is well-trained and have knowledge of WordPress. Still, they cannot give you support of different things including site functionality, performance and WordPress errors etc. But opposite is the case with managed hosting support, they will give you expert WordPress assistance.

Speed:

Speed is a part and parcel of site ranking and there are many things you can do to improve it. It includes the usage of cache plugin and content delivery network including MaxCDN and reduces the size of images.

Most of the best managed WordPress hosting providers enable content caching at server level which gives you relief from external cache plugins. If you will use a normal plan, there is a chance that you may need CDN to improve the speed of website.

Daily Backups:

They take a backup of your website on daily basis. It includes data, content, themes and plugins which you can access from your dashboard. It will save you some bucks if you are paying for backup or maintenance including BlogVault and Vaultpress.

Additionally, they also create a restore point and if you face any problem. You can restore your site to the previous version when your site was fully functional with one click.

Automatic Updates

You do not need to update your WordPress files to the latest version because they will do it for you. Whenever the update is released and you do not have to pay for this update. Your managed WordPress hosting will do it for you.

No Downtime

It will never go down whatever the amount of traffic is, on your website.

The Cons of Managed Hosting for WordPress

Expensive

First of all, it is expensive from shared hosting and there is a marked difference between shared and managed hosting. An average shared hosting plan costs 3.95$ only and managed hosting can be of 30$.

Limitations:

They do not allow you to use any plugin that uses resources. It includes cache plugins including WP super cache and W3 Total cache. We are going to give you a list of disallowed plugins ­shared by managed hosts.

cPanel:

If you were using shared hosting and now moving to managed hosting, you will feel irritation to use the portal of managed hosting. It is because it is a bit different.

Top Managed WordPress Hosting Providers:

1: Hostinger

In 2024, Hostinger is the most affordable hosting option that you can use for your blog or e-commerce website.

2: WP Engine

(Loads under 0.26s, starts at $29, and comes with fantastic support)

Managed WordPress Hosting, Perfected WP Engine

WPEngine is one of the best managed WordPress hosting providers in the market. The price is expensive if we compare it to other hosting providers. It is because this company gives you fast loading, secure servers and great support. They have a team which can keep your website secure as well as fast. Therefore, it is the best and popular hosting company.  HTC and Foursquare and SoundCloud are using it and they are brands.

It can make backup with one-click and restore process is also available in one-click. This feature is available in all hosting plans. Additionally, it will scan and monitor your website to save it from hacking attempts and in case of hacking, it will fix it free of cost. Additional features

  • Staging area

It creates a copy of your live website so you can test new plugins and themes before making changes to your live site.

One Click Restore Point

One click restore point is helpful when something goes wrong with your website, theme or plugins. So you can use one click restore point to get the previous version of your website.

No Need for Cache Plugins

WP Engine has custom built ever cache technology which helps WordPress site to make fast enough for Google and other search engines.

Hacking Scans

If your site gets any attack, the company will fix it for you.

Pros:

You can add CDN easily to your site with one click and will get support for WordPress site. They have extremely fast and secure servers. Evercache is integrated and no cache plugins are required. In addition, they do regular attempts to scan hacking attempts in order to make your website secure and safe.

Cons:

WPEngine is costly than other managed WordPress hosting providers. It does not give flexibility in the plugin department.

WPEngine Coupons

Use this WPEngine coupon to get 50% off (wpkube50)

  1. SiteGround

(Loads under .4s, starts at $7.95, and usually responds to support questions in 15 minutes)

SiteGround WordPress Hosting Top Security and Speed Managed

Note: the support of SiteGround is super fast and priority support is not available in startup plan. Premium caching solution and one click staging is also not available in startup plan. So if you want to use these features you need to select GoGeek plan.

SiteGround is another best managed WordPress hosting provider and it is for those who cannot afford expensive hosting providers. SiteGround provides speed solutions and unique WP security at a reasonable price. In addition, it also gives all the shared hosting features including free domain name, WordPress installation, free WordPress migration, support and email accounts for 3.95$ only for one month.

Other features include:

  • Unique WordPress Autoinstaller— Easy to setup.
  • Autoupdater — It will update WordPress Core files and all of your plugins
  • WordPress SuperCacher — To improve the site performance.
  • WordPress staging — to test the new features before making it live.
  • HHVM— to improve site speed and it will load faster in 200ms only than PHP. This feature is available only for cloud hosting.

WP-CLI comes pre-installed — to do multisite management if you want to.

Pros:

Gives autoupdate, autoinstall, staging features and caching for a low price. It also has WP-CLI pre-installed, Git and WordPress migration without additional cost.  The security team is active and they regularly run security checks.

Cons:

It comes with Cloudflare and if you want to use MaxCDN, you will have to use plugins like WP total cache or W3 Total cache.

  1. Flywheel

(Loads under 1s, costs $15, amazing dashboard, a lot of useful features, and a ton of happy customers)

Flywheel Managed WordPress Hosting for Designers and Agencies

Flywheel is another best managed WordPress hosting which is designed by creative minds to fulfill your needs. It focuses on your workflow and makes the working of web designers smooth. There are features like billing transfers to your clients, easy collaboration and staging sites etc. In addition, you can manage all your websites with one dashboard and it is an easy task.

It’s Like a Design Party on The Internet

Flywheel has staff of WordPress experts and most of them are designers so do not worry about your problems. The prices are reasonable and suit your needs. It includes pay per site plan which costs you 15$ per month. Additionally, there are bulk plans are also available for you if you are a serious developer. It will cost you 100$ per month. Custom plans are also available.

Key Features:

  • Lightning speed– Designed specifically for WordPress sites and has unique features that affect your website with CDN.
  • Nightly backups –It will automatically make backup of your website on daily or nightly basis.
  • Around the clock security – it will monitor your websites constantly to avoid hacking attempts and malware and will fix the problems free of cost.
  • More intuitive SFTP – they are working and collaborating with other designers to make the task easier.

Pros:

it loads your page quickly and you can use plugins of your own choice. Flywheel has a highly qualified staff which is expert in WordPress which can take care of your problems and needs.

Cons:

It is also more expensive than shared hosting and it will be a bit difficult to learn a new dashboard. According to our point of view, it’s dashboard is super easy to use.

Flywheel coupon:

Use flywheel coupon to get 20% off “flykube”

  1. Bluehost WP Hosting

(Loads under 2s, starts at $12.49, and comes with bad customer support)

Optimized Hosting for WordPress - Fast, Secure, Simple - Bluehost

Bluehost is another best managed WordPress hosting provider which is available at reasonable price. The basic plan of Bluehost gives 100 million visitors per month with 2GB RAM, 30GB storage and 30GB backup storage. It has enhanced cPanel, 24/7 support from WordPress experts and you can add 5 WP sites. It also offers sitelock CDN with SiteLock pro. The minimum price is 2.95$ for the first month and will cost 24.99$/month after the first month.

Features of Bluehost:

  • VPS-based — Built on a VPS platform, gives enhanced performance and site speed.
  • Includes ManageWP — Can Manage and migrate multiple WordPress sites all from within one hosting plan.
  • Robust security— Gives SiteLock, an advanced CDN, and SiteLock WAF.
  • Expert support — All hosting plans include 24/7 access to WordPress experts.
  • Enhanced cPanel— Makes the transition from shared to managed hosting more seamless when working within a familiar interface.

Pros:

Affordable, VPS, SiteLock security, and Manage WP for added convenience. Gives 24/7 support with enhanced cPanel.

Cons:

It is more expensive than some other managed WordPress hosting providers. It may not give as many features as compared to other plans and may not suitable for largest developers.

  1. Kinsta

Kinsta Managed WordPress Hosting - Powered By Google Cloud

Kinsta is another fast and best managed WordPress hosting for WordPress users powered by Google cloud platform. The best feature of this hosting provider is unlimited visitors and unlimited page views on all plans. If you are a beginner in online business so you will not have to move to another hosting plan if your website starts receiving more traffic.

Kinsta has a premium quality customer service which is working behind the scenes to give the best results. Their team consists of professional developers who work with WordPress on daily basis.

Some other features on offer with Kinsta hosting include:

  • Free Migrations– it gives uninterrupted service with free site migration for multiple websites. You need to send the request and Kinsta will take care of the rest. The dashboard of Kinsta will enable you to monitor the migrations and you can also manage them on your phone.
  • Next-Gen Infrastructure– The company is powered by the Google Cloud Platform that offers automatic scaling, LXD containers, SSH access, PHP 7, WP-CLI automation, and Git. It also has a server level caching solution which can speed up your website and you do not have to use any caching plugin.
  • Top Notch Security– Kinsta is based on multi-layer protocols on the back-end and this quality makes the site more secure 24/7. It also monitors your website every minute 1440 times in a day in order to run it smoothly for you.

Pros:

Powered by Google cloud platform with server level caching service for your WP site that gives an outstanding performance. The support team is dedicated and works around the clock and also monitor your website on daily basis. Additionally, they do not charge extra for extra page view or visitor.

Cons:

Kinsta has service charges that starts from 100$ per month on their business plan 1.

  1. Pagely Hosting

(Loads under 0.09s, starts at $499, and overall perfect hosting for big businesses)

Managed WordPress Hosting by Pagely

Pagely is a famous and best managed WordPress hosting that pay attention to security. It focuses on high class security and they also pay attention to the site speed so that they can load faster. It is replete with features including automatic plugin and WordPress updates, daily backups, press Armor custom WP security configuration that will keep the harm at arm’s length.

In addition, you can use any app or plugin of your choice. The price starts at 499$/month for 30 websites and 200GB bandwidth with all features. It includes:

  • Convenient updates: Automatic WordPress Core and plugin upgrades with minimal interaction needed.
  • Varnish caching: Advanced varnish caching layer that loads the site in millisecond.
  • Free reign on plugins: Use almost any plugin or theme you want to use.
  • Complete site scans: Gives real-time malware scanning and removal plus redundant firewalls and DDoS protection.
  • PRESSCDN: This service starts at $9/month.

Pros:

Security focused, rich in features, best managed wordpress hosting with open attitude towards themes and plugins. It offers varnish caching and PRESSCDN to load site quickly.

Cons:

It is more costly than some other managed hosting providers.

  1. Pressable

(Loads under 2s and starts at $25)

Managed WordPress Hosting from Pressable

It is also known as Zippykid, it is a unique managed hosting service for WordPress and it gives 100% customer satisfaction. Therefore, it is rated no 1 in customer satisfaction. It has an appealing list of clients and testimonials, and the services are available on custom Reckspace hardware. The price plan begins with 25$ per month and it can handle 15k shared pageviews per month.

All plans include the following features:

  • Rackspace Hybrid cloud— The best servers to store your sites.
  • Daily backups— Your content will always be backed up automatically and in time.
  • SFTP access— Secure file transfer protocol so your data will remain safe.
  • SSL support— So you can set up shop and keep your customers secure, too.
  • Malware scanning and removal— Never feel the effects of malicious hackers again.

Pros:

It is high quality and reliable hosting for businesses and developers. It includes SSL, CDN, malware scanning and removal for convenience.

Cons:

When we consider it’s price, it may not offer the best managed WordPress hosting plans and not suitable for those who want extraordinary features.

  1. WebSynthesis

Synthesis Managed WordPress Hosting by StudioPress

Websynthesis is another best managed WordPress hosting and it was started by CopyBlogger Media. They have produced the most popular products on the internet. It includes Genesis Theme Framework and ScribeSEO. Synthesis is using NGINX architecture to maintain the traffic and it consumes 1/8 of the resources. It has MediaTemple dedicated servers and the plan begins at 47$ per month.

Some of its features include:

  • High quality servers— Get superior uptime and page load speed.
  • SEO— Keyword and social media research included.
  • Robust security — Enhanced security defenses.
  • Content marketing — Content and website optimization included.
  • Site Sensor uptime monitoring — Keep tabs on site uptime at all times.

Pros:

It uses NGINX architecture in order to load the site faster and gives SEO and content marketing tools. Uses site sensor uptime monitoring and enhanced security features for ultimate protection of your site and content.

Cons:

The price tag of the product is higher than other managed WordPress hosting and can go out of reach of newer developers.

  1. WordPress.com VIP

Services – WordPress.com VIP Enterprise content management

WordPress.com VIP is not normal managed WordPress hosting provider. It can cost 5000$ per month and it is a wonderful choice for high traffic websites including MSNBC, TechCrunch, GigaOM and Time. It is also ideal for those people who are looking for enterprise level solution.

Some features include:

  • SaaS— Turnkey infrastructure lets you build your site with confidence.
  • CDN— Security is a top priority.
  • Hourly backups— You will never lose a bit of data.
  • Flat pricing— Pay monthly rate to get unlimited traffic, bandwidth, and storage without paying a penny more.
  • 24/7 support— will answer your most pressing middle-of-the-night WordPress questions.

Pros:

It has SaaS, CDN, backups, 24/7 support all for a flat price.

Cons:

It is suitable for enterprise customers because the price tag is too much. Additionally, it is not appropriate for new developers and smaller website developers.

Do You Really Need Managed WordPress Hosting?

Best managed WordPress hosting is a perfect for both small and enterprise/high traffic website owners. If you are a blogger and developer, SiteGround is the best solution for you. The cost is less than other managed hosting companies and gives high quality support.

First of all, you need to know your achievement and priorities. If you are thinking to create a website that will drive a lot of traffic to your site, you need to get a managed host for it. It is because it will allow you enough traffic volume with stability for sites especially WordPress websites. If you are building a site for the first time and you purchase a managed host it may not be helpful.

You need to consider the customization and level of support you want. Shared hosting gives one click installations for your convenience, these can preload your website with settings that you may not like. Especially if you are a developer. If you will use a managed host, it will give you an opportunity to make smart decision while installation including security. It depends on your approach and achievement, what you want to do?

My Top Picks

After reviewing all the managed hosting providers, we consider every hosting provider as the best managed WordPress hosting. Let’s have a bird’s eye view of it.

SiteGroudn is for developers and bloggers who need features including SSL support, staging area, git integration at low price. They offer free migration, pretty inexpensive, and support team is quick. Most of the questions are answered within one or two hour. Live chat guys are not knowledgeable. So you have to go through ticket support system for technical questions instead of live chat group.

FlyWheel is for people who are not developers. Flywheel came into existence pretty late but they established themselves quickly. They offer managed hosting solution for WordPress, designers, small business owners and bloggers etc and easy to use. If you do not want to stuck with technical issues choose Flywheel. The dashboard of this company is very easy to use as compare to other companies. In short, Flywheel is not for developers but for those who can configure and setup WordPress sites.

Are you a developer? Use Pagely but they are expensive, it costs $499 / month).

Last year, Pagely had moved their servers to Amazon and since then they are providing world-class services for small blogs, membership sites, WooCommerce stores, SaaS solutions and global corporate sites. Their infrastructure technology has automatically daily backups, HHVM, built-in redundancy, real time malware monitoring, SSL acceleration, Press CDN, Press Armour and developer friendly tools including SSH, WP-CLI, GIT, Staging, REST API etc.

If you want everything, use WPEngine or Kinsta. These options are for you if you do not want to compromise the quality of support and developer friendly tools. We have been using WPEngine for a long time and did not face any trouble.

You can share your hosting providers and ideas in the comments section.

Do not forget to share this post.

**Data for speed tests data was taken from designbombs.com

Arsalan Rauf
Arsalan Rauf

Arsalan Rauf is an entrepreneur, freelancer, creative writer, and also a fountainhead of Green Hat Expert. Additionally, he is also an eminent researcher of Blogging, SEO, Internet Marketing, Social Media, premium accounts, codes, links, tips and tricks, etc.

www.greenhatexpert.com

Filed Under: Blogging, SEO, WordPress Tagged With: best cloud hosting for wordpress, Best Managed WordPress Hosting, best wordpress hosting, fastest managed wordpress hosting, fully managed wordpress hosting, Managed WordPress Hosting, managed wordpress hosting godaddy, siteground managed wordpress

  • 1
  • 2
  • 3
  • 4
  • Next Page »


Recent Posts

  • Free DeepSeek Accounts 2025
  • Free Zoho Mail Accounts 2025
  • Acudepot Discount Codes 2025
  • Free Blackshot Accounts 2025
  • Free GMX Email Accounts 2025
  • Songtrust Discount Codes 2025
  • Uzicases Discount Codes 2025
  • Cardillo Promo Codes 2025
  • Free DriverFix License Keys 2025
  • Avast Secureline VPN Activation Codes 2025

Recommended Posts

Create a Gmail Account Without Phone Number

Free Course Hero Account

Crunchyroll Accounts

Cracked Apps

Free Pokemon Go Accounts
Onlyfans Free Accounts
Free Chegg Accounts
Free Paypal Accounts
Free Gmail Accounts
Funny Steam Names

Categories

  • Apps
  • Apps for PC
  • Blogging
  • Discord
  • Facebook
  • Gaming
  • Grammar
  • Guide
  • How to
  • Instagram
  • Messaging
  • OnlyFans
  • Pinterest
  • Reddit
  • SEO
  • Snapchat
  • Social Media
  • Spotify
  • Steam
  • Telegram
  • TikTok
  • Twitch
  • Twitter
  • Whatsapp
  • WordPress
  • YouTube
  • Home
  • Social Media
  • Messaging
  • About
  • Submit Guest post