Green Hat Expert

  • Home
  • Social Media
    • Instagram
    • TikTok
    • Snapchat
    • Facebook
    • YouTube
    • Twitter
  • Messaging
    • Discord
    • Telegram
    • Whatsapp
  • About
  • Submit Guest post
You are here: Home / Archives for Guide

Download Social Bookmarking Demon Software 5.6.1.3 Free

Last Updated on August 21, 2022 By Arsalan Rauf

In this post of Green Hat Expert, you will be able to Download Social Bookmarking Demon Software Free.

How to Use & Download Social Bookmarking Demon Software Free and its introduction:

Social Bookmarking Demon Software is a bookmarking tool which will help you to generate quality backlinks. It will provide you high PR backlinks and to drive will provide you targeted traffic from various websites. The tool does it on auto pilot. So we can say that we can get the traffic of our own choice. It gives you various benefits, it gives you better rankings, makes backlinks for you and indexes your link in search engine faster.

Download Social Bookmarking Demon Software Free


https://www.youtube.com/watch?v=QBPMzaDY6no


File Size: 8.76 MB

[sociallocker id=31][/sociallocker]

Arsalan Rauf
Arsalan Rauf

Arsalan Rauf is an entrepreneur, freelancer, creative writer, and also a fountainhead of Green Hat Expert. Additionally, he is also an eminent researcher of Blogging, SEO, Internet Marketing, Social Media, premium accounts, codes, links, tips and tricks, etc.

www.greenhatexpert.com

Filed Under: Guide Tagged With: auto social bookmarking submitter, free online social bookmarking submitter, free social bookmarking submission, social bookmarking software, social bookmarking submission software free download, social bookmarking submission tool, social bookmarking tools 2016, social marker definition

Download Rapid Indexer Pro Software Free

Last Updated on August 21, 2022 By Arsalan Rauf

In this post of Green Hat Expert, you will be able to Download Rapid Indexer Pro Software Free.

How to Download Rapid Indexer Pro Software Free and its introduction:

Rapid Index pro software is designed for rapid index websites. It gives relief to your suffering of indexing your new website. There are several benefits of this software such as it helps you to index and increase your ranking in search engine. This software will provide you 100+ backlinks which will ping your website to give an indication to search engine that your website is ready to crawl and index. If your site is fresh, it can take several hours, at times, it takes minutes and sometimes can take up to weeks. When your website gets indexed in Google or other search engines, you start getting traffic to your website.

Download Rapid Indexer Pro Software Free

Additionally, you can also use this software in order to index your videos in the search engine as soon as possible. So download rapid indexer pro which rapid index websites and it will skyrocket your rankings too.


File Size: 4.11 MB

[sociallocker id=31][/sociallocker]

Arsalan Rauf
Arsalan Rauf

Arsalan Rauf is an entrepreneur, freelancer, creative writer, and also a fountainhead of Green Hat Expert. Additionally, he is also an eminent researcher of Blogging, SEO, Internet Marketing, Social Media, premium accounts, codes, links, tips and tricks, etc.

www.greenhatexpert.com

Filed Under: Guide

How to Minify CSS & JavaScript Files in WordPress

Last Updated on August 21, 2022 By Arsalan Rauf

Do you want to minify files on your WordPress site?

You are at the right place.

Minifying your WordPress CSS and JavaScripts files can enable your site to load faster. It also speeds up your WordPress site. In this post, I shall show you how to minify CSS JavaScript files in WordPress to improve the performance and speed of your site.

What is Minify and When Do You Need it?

Minify is a term which is used to describe a method that makes your website file size smaller. It completes this task by removing lines, white spaces and unnecessary characters from the source code.

Usually, it is suggested to use only for files which are sent to user’s browsers. It includes JavaScript, CSS and HTML files. In addition, you can also minify PHP files too. PHP is a server side programming language and if you minify it, it will not improve the load speed for your users.

The main advantage of minifying files is to improve the performance and speed of WordPress.

Compact files load faster and improve the speed of your site.

Some experts are of the view that the performance improvement is very small for most websites.

The minification process only decreases few kilobytes (kb) of data on WordPress websites. You can also reduce the pageload time by optimizing images for web..

Here is an example of normal CSS code:

body {
margin:20px;
padding:20px;
color:#333333;
background:#f7f7f7;
}
h1 {
font-size:32px;
color#222222;
margin-bottom:10px;
}

After minifying the code it will look like this:

body{margin:20px;padding:20px;color:#333;background:#f7f7f7}h1{font-size:32px;margin-bottom:10px}

If you want to achieve 100/100 score on Google PageSpeed insights or GTMetrix tool. Then minifying JavaScript and CSS will improve your score.

Now take a look at how to minify CSS/JavaScript on your WordPress site easily.

Minify CSS/Javascript in WordPress

First of all, you need to install and activate the Better WordPress Minify plugin.

For more details, see our step by step guide on how to install a WordPress plugin.

After activation, this plugin will add a new menu item named “BWP Minify” to your WordPress admin bar. When you will click on it, it will take you to plugin’s settings.

bwpminify settings

On the settings page, you have to check the first two options to minify JavaScript and CSS files automatically on your WordPress site.

Now click on save changes button to save changes.

Advanced options are also available on this page. The default settings should work for most of websites, but you can change these options depending on a case basis.

Now go to your website. Right click anywhere then select ‘view page source’ from browser options.

view page source

You will be able to see HTML source code generated by your WordPress site. When you look closely, you will see that this plugin will load CSS/JavaScript files from plugin’s own folder in lieu of your WordPress plugins and themes.

These are the minified versions of your original CSS and JavaScript files. Better WordPress minify plugin will keep them cached and serve the minified versions to user’s browsers.

Still having problems? Type your problems in the comment section.

Do not forget to share this post and like our Facebook page for more updates.

Arsalan Rauf
Arsalan Rauf

Arsalan Rauf is an entrepreneur, freelancer, creative writer, and also a fountainhead of Green Hat Expert. Additionally, he is also an eminent researcher of Blogging, SEO, Internet Marketing, Social Media, premium accounts, codes, links, tips and tricks, etc.

www.greenhatexpert.com

Filed Under: Guide, How to, SEO, WordPress Tagged With: best wordpress minify plugin, better wordpress minify, how to minify javascript and css in wordpress without plugin, inline small javascript wordpress, js css compression wordpress, minify css wordpress without plugin, minify html wordpress, minify javascript and css wordpress htaccess

How to Install a WordPress Plugin – Step by Step for Beginners

Last Updated on August 21, 2022 By Arsalan Rauf

After installing WordPress on your site, if you are a beginner, you need to learn how to install a WordPress plugin. Plugins have the ability to add new features to your WordPress website including slideshow and gallery etc. There are numerous paid and free plugins available for WordPress. In this post, I shall show you how to install a WordPress plugin.

Before You Start

If you are a user of WordPress.com, you cannot install plugins.

I have seen people complaining about plugins that they cannot see the plugins menu in their dashboard. It is because they are using WordPress.com and it has limitations. You need to upgrade to business plan of WordPress.com in order to install plugins.

On the other hand, you can install and activate any plugin you want to use on self hosted WordPress.org website.

How to Install a WordPress Plugin

You need to follow these instructions which can allow you to learn step by step how to install a WordPress plugin.

I have covered all three methods: uploading a WordPress plugin, installing a WordPress plugin using search and manually installing a WordPress plugin using FTP.

Install a Plugin using WordPress Plugin Search

To install the WordPress plugin in the easiest way, use the plugin search method. The downside of this option is that it should be available in the WordPress plugin directory which is limited to only free plugins.

First of all, go to your WordPress admin area and click on plugins>Add>New

search plugins

You will see a screen as above in the screenshot. You need to find the plugin by typing its name or functionality to find it like I did. After putting the name, you will find a number of listings like this:

plugin search results

Pick the plugin of your choice. in our search, we were finding floating social bar plugin which is the first plugin. I shall click the ‘install now’ button.

WordPress will start the download and install the plugin. After installation, you will see the button to activate the plugin.

activate plugin

You can install a WordPress plugin on your site but it will not work until you activate it. So click on the activate button to activate the plugin on your site.

That’s it. You have installed the first WordPress plugin on your site.

The next step is to configure the settings of plugin. These settings are different for each plugin that is why I cannot cover that in this post.

Install a Plugin using the WordPress Admin Plugin Upload

Paid WordPress plugins are not available in WordPress plugin directory. You cannot install these plugins by using the search method or first method.

Therefore, WordPress has given us the upload method to install such plugins. I shall also show you how to install WordPress plugin using the upload option or method in WordPress.

First of all, you have to download the plugin from the source that is available in zip format or file. Now, you have to go to WordPress admin area and click plugins>Add new page.

After that, click the upload plugin button at the top of the page.

upload plugin wp admin

It will lead you to the plugin upload page. Now click choose file button to select the file or plugin you want to upload from your computer.

plugin upload page

After selecting the file, now click on the install now button to begin the process.

WordPress will upload the plugin file from your computer and install it. You will see the success message after the completion of installation.

plugin installed manual

After installation, you have to click the activate plugin button to start using it.

You need to configure the settings according to your needs. The settings are different for every plugin I shall not be able to cover that in this post.

Manually Install a WordPress Plugin using FTP

At times, your WordPress hosting provider may restrict the files which can limit your ability to install the plugin from the admin area.

In such cases, you need to install the plugin manually using FTP.

FTP manager method is the least friendly for beginners.

First of all, download the plugin file which is in zip format. Now extract the zip file on your computer.

When you will extract it the plugin will create a new folder using the same name. That is the folder you need to upload manually to your website by FTP client.

You have to access your host using FTP manager. If you do not possess a FTP username and password, contact your WordPress hosting provider to get them.

Use the login credentials to connect to your website and open the FTP client on your PC or computer. After connecting, access the path /wp-content/plugins/

Now upload the extracted folder from the zip file to this directory /wp-content/plugins/ on your web server.

ftp plugin upload

After uploading the files, go to your WordPress admin area and visit plugins link in the menu. Now you will see that you have installed the plugin successfully on plugins page.

installed plugins

Now click on the activate button to activate the plugin. After activation, you may need to configure it. Every WordPress plugin comes with its own settings which are different from one another. So I shall not discuss it in this post.

I hope that you have learned how to install WordPress plugins.

If you are having any problems kindly post it in the comment section. I shall respond to you asap.

Do not forget to share this post.

Arsalan Rauf
Arsalan Rauf

Arsalan Rauf is an entrepreneur, freelancer, creative writer, and also a fountainhead of Green Hat Expert. Additionally, he is also an eminent researcher of Blogging, SEO, Internet Marketing, Social Media, premium accounts, codes, links, tips and tricks, etc.

www.greenhatexpert.com

Filed Under: Guide, How to, WordPress Tagged With: add new plugin wordpress missing, can you add plugins to free wordpress, how to add plugin in wordpress page, how to add plugins to wordpress free blog, how to install wordpress plugins manually, how to use plugin in wordpress, no option to add plugin wordpress, why can't i install plugins on wordpress

8 Best WordPress Backup Plugins Compared (Pros and Cons)

Last Updated on August 21, 2022 By Arsalan Rauf

In this post of Green Hat Expert, I am going to share 8 best WordPress backup plugins.

Best WordPress Backup Plugins

Are you searching for best WordPress backup and restore plugins? This post is for you.

You may need to create a WordPress backup for your site on regular basis. If you create a backup of your site, it can save you in difficult situations like if you have locked yourself accidentally. There are many free and premium backup plugins for WordPress and most of them are easy to use. In this post, I shall share with you the 8 best WordPress plugins for WordPress.

Image

Note: There are a number of WordPress hosting providers that offer limited backup services. But it is your responsibility to create a backup on your own for your site. Do not rely on hosting providers only.

If you are already making backups of your site, then you should select one of these 8 WordPress backup plugins to make it with ease.

Image

1: All in One WP Migration

All-In-One WP Migration

All in One WP Migration is the best WordPress backup plugin and I strongly recommend it.

I am also using this plugin for my sites. This plugin exports your WordPress files including themes, plugins, media files and database etc. You do not need technical knowledge for this plugin because it is very easy to use.

You can upload your WordPress site to a different location with a drag and drop in WordPress. All in One WP Migration will also solve the replace operations in your database and it is the first plugin that gives true mobile experience.

The free version of this plugin allows you to upload the file of 512MB only. Do not worry I am here to solve your issue.

How to Remove 512MB upload Size Limit on All-in-One WP Migration Plugin

If you own an existing WordPress site which you want to move with plugins, themes, settings and media content. All-in-One WP Migration is the first plugin that comes to your mind.

If the size of your .wpress file exceeds 512MB, it will redirect you to purchase the premium version to get the unlimited access to All-in-One WP Migration plugin. If your site is productive and you want to create a backup and you are facing the small size limit. See the instructions to uplift the limit of 512MB.

wpmigration 512 upload limit

First of all, you need to know that unlimited extension of this plugin costs you 59$. It includes lifetime update with unlimited support.

Go ahead and open up

/wp-content/plugins/all-in-one-wp-migration/constants.php

Lines 199:201 define the file upload size limit, there’s a nice comment there indicating such. Use Ctrl+F  “size”, it should take you right to it.

// =================
// = Max File Size =
// =================
define( 'AI1WM_MAX_FILE_SIZE', 536870912 );

You’ll see the max file size is available in Bytes. In order to increase the upload size limit to 4GB, simply multiply the number seen here by 8.

// =================
// = Max File Size =
// =================
define( 'AI1WM_MAX_FILE_SIZE', 4294967296 );

We’ve been getting lazier and doing this, which works the same as above.

// =================
// = Max File Size =
// =================
define( 'AI1WM_MAX_FILE_SIZE', 536870912 * 8 );

Save the file and navigate back to the import section of All-in-One WP Migration plugin to import. The file limit will uplift to 4GB.


wpmigration limit removed
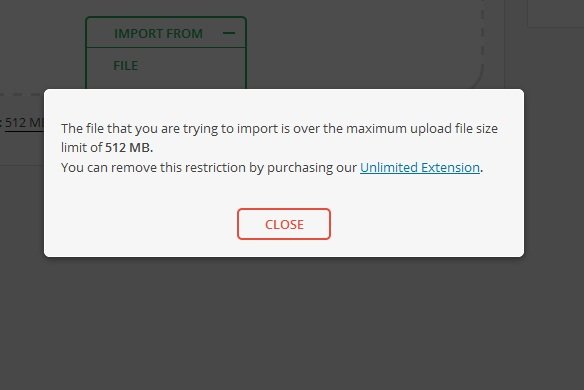
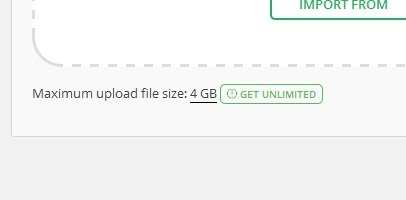
The plugin will no longer reject your large file uploads.
3 images

2. BackupBuddy

BackupBuddy

BackupBuddy is another famous premium WordPress backup plugin. It enables the users to create backups on daily, weekly or monthly basis. It can save your backups automatically in Amazon S3, Dropbox, Rackspace, Cloud, FTP, Stash and even mail it to yourself.

If you are using Stash service, then you can make real-time backups. The biggest advantage of using BackupBuddy WordPress plugin is that it is not based on subscription. So you do not have to pay the monthly fee. You can use this plugin on the number of sites available in your plan.

In addition, you also get access to premium support forums with regular updates, you can also store your backups in cloud storage of 1GB.

You can also use BackupBuddy WordPress plugin to migrate, duplicate and restore websites.

3. UpdraftPlus

UpdraftPlus

UpdraftPlus is another WordPress backup plugin that backup your WordPress site to your computer. You can create the complete backup of your site and can store it on the cloud as well.

It supports on-demand and scheduled backups as well. You can also select which type of files to backup. It will upload your backups automatically to Google Drive, S3, Dropbox, Rackspace, FTP, SFTP, email and other cloud storage services etc.

UpdraftPlus WordPress plugin also has a premium version with add-ons that help to clone site or migrate, database search and replace, and multisite support etc.

The premium version also allows you to get access to priority support.

4. BackWPUp

BackWPup – WordPress Backup Plugin

backWPup is another free plugin that creates the complete WordPress site backup for free. It stores the backup on the cloud (Amazon S3, Dropbox, Rackspace etc), FTP, email or on your PC or computer.

It is very easy to use and you can schedule automatic backups by keeping in view the update of your site.

Restoring a WordPress site from backup is also an easy task.

BackWPup also features a pro version that gives priority support, backups on Google drive, ability to store and so on.

5. BackUpWordPress

BackUpWordPress

BackupWordPress is a WordPress backup plugin that creates the complete backup with automatic scheduling support.

You can create different schedules for your files and database. There is a problem with free version, it does not allow you to store your WordPress backups to a cloud storage services.

If you want to save or store your backups on Google Drive, FTP or Dropbox, you need to buy a premium extension for it. The extensions are available for each service, you can buy the bundle of your own choice.

6. Duplicator

Duplicator

Duplicator is another famous WordPress plugin to migrate WordPress sites and the name also suggests that. It also offers backup features.

But it does not allow you to create autmomatic scheduled backups that is the quality which makes it less ideal as compared to other WordPress backup solutions. If you are maintaining a regular site, it is not a suitable choice for you.

7. WP-DB-Backup

wp-db-backup

This WordPress backup plugin has more than 400,000 active installs and WP-DB backup is another popular backup WordPress plugin. The problem is that it only creates backup of your WordPress database.

It means that you have to create backup of your media files manually.

You can choose this plugin if you do not update your site too often or do not upload images. Then you can use WP-DB backup as your primary WordPress backup plugin.

So WP-DB backup allows you to create database backups, restore your database, schedule automated backups with ease.

WP-DB Backup WordPress plugin is also beneficial for those users who do not have access to phpMyAdmin to backup WordPress database manually.

8. VaultPress (with Jetpack)

VaultPress (with Jetpack)

The founder of VaultPress is Matt Mullenwag (WordPress co-founder) and his team at automattic.

Recently, it has become part of Automattic’s another product that is, JetPack. You will require a JetPack subscription plan if you want to use VaultPress. There are different pricing plans available with different features.

VaultPress gives automated real-time cloud backup begins at 3.50$ per month. Setting up VaultPress and restoring from backups can be done in a few clicks. There are some packages which also offer security scans.

There are a few downsides of VaultPress as well.

First of all, it is a recurring expense which can multiply if you are using multiple WordPress sites.

Secondly, you will need to subscribe to JetPack, get a WordPress.com account, and install the JetPack plugin on your website.

Lastly, lower plans backups can be stored only for 30 days. If you want to get unlimited backup archive, it will cost you 29$ per month fee for each website. It is more expensive for beginners if we compare them to other plugins or solutions listed here.

Conclusion

To be continued

Every WordPress backup plugin has it’s pros and cons. I use All-in-One WP Migration due to two reasons. It is very easy to use and offers real-time backups. In my opinion, it is an ideal for large sites.

If you are a beginner and want to run a small or medium size website and do not want to pay monthly fee. We recommend BackupBuddy plugin for this purpose. They offer their own cloud storage, stash and it makes it an easy task for beginners to backup their site in few clicks.

Not matter which WordPress backup plugin you select, do not store your backups on the same server as your site.

If you do that, you are putting all of your eggs in one basket. If your server’s hardware fails, you will not have a backup which kills the purpose of setting up regular backups.

So, I highly suggest storing your backups on a third party storage service like Amazon S3, Dropbox and Google drive etc.

I hope that after reading this guide, you will be able to pick eht best WordPress backup plugin for your site.

Do not forget to share this post and also like our Facebook Page to get latest updates.


Arsalan Rauf
Arsalan Rauf

Arsalan Rauf is an entrepreneur, freelancer, creative writer, and also a fountainhead of Green Hat Expert. Additionally, he is also an eminent researcher of Blogging, SEO, Internet Marketing, Social Media, premium accounts, codes, links, tips and tricks, etc.

www.greenhatexpert.com

Filed Under: Blogging, Guide Tagged With: backupbuddy wordpress plugin, how to backup wordpress website using plugin, multisite backup plugin, updraft backup plugin wordpress, updraftplus wordpress backup plugin, wordpress backup and restore plugin, wordpress backup to dropbox, wordpress full backup plugin

Download IT Help Desk and Asset Management Software Free

Last Updated on August 21, 2022 By Arsalan Rauf

In this post of Green Hat Expert, you will be able to Download IT Help Desk and Asset Management Software Free.

How to Download IT Help Desk and Asset Management Software Free and its introduction:

This software provides us different services including bug tracking, customer support and also project management. Therefore, it is an easy task to perform IT help desk and asset management tasks by using this tool. IT help desk and asset management software gives a serial number to its customers in order to save their data in their database. So you will be able to use it in the future.


Requirements for IT help desk and asset management software:IT Help Desk and Asset Management Software

  • Access to SMTP Relay
  • Or Acess to Send Mail
  • Unix And Windows NT server both are supported.


File Size: 145 KB

[sociallocker id=31][/sociallocker]

Arsalan Rauf
Arsalan Rauf

Arsalan Rauf is an entrepreneur, freelancer, creative writer, and also a fountainhead of Green Hat Expert. Additionally, he is also an eminent researcher of Blogging, SEO, Internet Marketing, Social Media, premium accounts, codes, links, tips and tricks, etc.

www.greenhatexpert.com

Filed Under: Guide Tagged With: asset management software free download full version, asset management software reviews, best free asset management software, it asset management software free, it inventory management open source, open source asset management software, spiceworks asset management review, sysaid it asset management, Trouble Ticket Software

How to Contact OpenSea

Last Updated on April 8, 2022 By Arsalan Rauf

Do you have any issues on OpenSea?

OpenSea is one of the most popular NFT marketplaces.

However, the marketplace is more likely to develop bugs and face downtime.

It may take a while for OpenSea support to give you a response due to a large number of users and requests.

Therefore, you might need to wait for many days to get your issue resolved.

Luckily, there is not a one method to contact OpenSea but more than one ways.

In this post, I am going to tell you how to contact OpenSea for support, what is OpenSea’s email and can you call them.

How to contact OpenSea

To contact OpenSea, you can use their Twitter account or a request, or you can join their Discord server.

On the other hand, you can also use the official email of OpenSea at contact@opensea.io.

OpenSea contains a help center where you can submit a request.

It is the best way to get help from Opensea.

If they have not responded or resolved your ticket for many days, you can ping them on Twitter too.

The official Twitter account of OpenSea for support is @opensea_support.

Unluckily, the direct messages are disabled by them, but you can still tag them in a tweet.

In addition, you can also reply to one of their existing tweets with your ticket ID so they can address your issue.

There are several ways to contact OpenSea:

Method 1. Submit a request

The first method to get OpenSea support is to submit a request.

First of all, you can contact them using the Opensea “Submit a request” page available on the help center.

On the other hand, you can submit a request directly here: https://support.opensea.io/hc/en-us/requests/new.

After reaching the “Submit a request” page, you need to choose what you need help with.

There are several categories or options that you can select from.

The categories are “Account”, “Wallet and Transaction Errors”, “Buying NFTs”, and so on.

If you are having issue with your OpenSea account, you need to select the “Account” category to get help.

After selecting the category that you need help with, the next thing is to complete the rest of the form.

It will ask you about your email address, a sub-category, and your wallet address.

Also, you also have to enter the subject and a description of your problem on Opensea.

Additionally, If you want to add screenshots for better help, you can upload them under “Attachments (optional)”.

In the end, you need to submit the request and wait for the team of OpenSea to reply.

The process may take several days to get response from them.

Opensea will use your email to reply you that you have given while contacting them.

Method 2. Tag OpenSea on Twitter

If you are unable to get Opensea attention after multiple days, you can tag them on Twitter.

This option will help you to get a response quicker.

There are two OpenSea Twitter accounts.

The accounts are @opensea and @opensea_support.

The Twitter account that you should tag is @opensea_support.

Unluckily, you cannot send a DM to @opensea_support because they no longer receive direct messages and direct messages are disabled.

However, you can still ping them on Twitter or get response from them by replying to their tweets.

Compose a tweet that tells about your issue and tag @opensea and @opensea_support to contact them on Twitter.

The issue can also be discussed with them by replying to one of their tweets.

All you need to do is provide them with your ticket ID so that they can get in touch with you accordingly.

Method 3. Join the OpenSea Discord server

OpenSea also contains a Discord server where you can get assistance regarding your issues and also provide feedback.

However, the help will be provided by the community on their server.

First of all, you need to join the OpenSea Discord server from this URL: https://discord.com/invite/opensea.

You need to agree to the rules before you can start chat on the server.

After accepting the rules, reach the “community-help” channel.

If you have a question about Opensea, you can ask their community for assistance.

If you are facing a bug, you can report that in the “bugs” channel.

What is OpenSea’s email?

The official email address of OpenSea is contact@opensea.io.

If you need help with your issue, you can get in touch with OpenSea at contact@opensea.io and they’ll respond to you request as early as possible.

You need to check the email address of the Opensea account, if you have received an email from them, check the sender’s email.

It is because OpenSea will not contact you via email address unless you’ve recently submitted a request.

Can you call OpenSea?

No, a call option is not available for Opensea.

No, you cannot call OpenSea.

It is because OpenSea does not have a phone number that you can use to call them.

The fastest way to get in touch with OpenSea, you need to submit a request on this URL: https://support.opensea.io/hc/en-us/requests/new.

It is one of the ideal ways to get help from OpenSea.

Final Words

Try to solve your issue by yourself before you try to contact Opensea.

This can be done by using the OpenSea help center directly here: https://support.opensea.io/.

The help center offers multiple help categories that you can select from.

For instance, if you want to know how to buy an NFT, you need to click on the “Buying” category.

The whole help center has many helpful articles for your assistance.

Search bar can also be used to get the help related to your category.

If you are unable to solve your issue by yourself, you need to use Opensea submit a request option.

Due to an increase in requests, it may take a while to get a response from Opensea on your request.

What’s Next

How to Contact MetaMask

How to Contact Coinbase

3 Ways to Contact TikTok

Arsalan Rauf
Arsalan Rauf

Arsalan Rauf is an entrepreneur, freelancer, creative writer, and also a fountainhead of Green Hat Expert. Additionally, he is also an eminent researcher of Blogging, SEO, Internet Marketing, Social Media, premium accounts, codes, links, tips and tricks, etc.

www.greenhatexpert.com

Filed Under: Guide, How to

Is There a Trust Wallet Chrome Extension?

Last Updated on March 2, 2022 By Arsalan Rauf

Trust wallet is a cryptocurrency wallet which stores tokens of BEP20 and ERC20.

There are more than 10 million users on Trust wallet.

Trust wallet allows you to purchase bitcoin and you can earn money from it.

The prices can be tracked through the charts on the app.

Trust Wallet is also available on both stores including App Store and Google Play Store.

However, many users are curious to know if there is a Chrome extension for it.

It is because MetaMask has a mobile application as well as a Chrome extension.

Therefore, MetaMask users can use it on both computer as well as on the mobile device.

In this post, you are going to see if there is a Trust Wallet Chrome extension and whether it is available for PC to download.

Is there a Trust Wallet Chrome extension?

No, currently, Trust Wallet does not have a Chrome addon to install on PC.

Google play store and app store do have the application of Trust Wallet and it can be downloaded from there.

Trust Wallet did not announce an update about launching or developing a Chrome extension.

Therefore, you are not going to see it anytime soon.

On the other hand, MetaMask does have a chrome extension unlike Trust Wallet.

I suggest MetaMask if you are using your PC to transact or trade cryptocurrencies because it is an ideal alternative.

Trust Wallet can also be imported to MetaMask with the help of your secret recovery phrase.

As a result, you don’t have to pay transaction fees because you will not have to transfer amount from one wallet to another.

A lot of users are asking for a Chrome extension for Trust Wallet.

But they have not made any announcement for its launch, there is a chance that they may develop an extension in the future.

Editor’s note: if it will happen, I’ll update this article.

Currently, if you come across a Trust Wallet Chrome extension, it means that it is not legit, therefore do not try to download it.

For now, you’ll have to use Trust Wallet on your android device and wait for the extension to come.

Is Trust Wallet only for mobile?

Yes, Trust Wallet is only available for mobile and can be downloaded from the App Store and Google Play Store.

Currently, Trust Wallet does not have a desktop version.

The developers have not designed a desktop version for Trust Wallet because they do not see a need for it.

In fact, Trust Wallet has become one of the most popular wallets even without a Chrome extension.

However, Trust Wallet for PC can be accessible if you use BlueStacks.

In short, BlueStacks is an emulator that enables you to run Android applications on your computer/laptop.

If you want to use this cryptocurrency wallet on your computer, MetaMask is a great alternative.

How do I open Trust Wallet on Chrome?

It is not possible to open Trust Wallet on Google Chrome.

The reason is Trust Wallet does not have a chrome extension until now.

The application is available for download on Google play store as well as on App store.

However, if you have the MetaMask Chrome extension, you can easily import Trust Wallet to it and there will be no transaction fee for it.

If you don’t have the MetaMask Chrome extension you can get it from chrome extensions or simply go to this download link.

After downloading it from extensions, import Trust Wallet with the help of your secret recovery phrase and select a password.

Is the Trust Wallet Chrome extension legit?

No, the chrome extension of the Trust Wallet is not legitimate.

It is because it is not developed by Trust Wallet, but by a developer named “lyndonjonson27”.

In addition, the logo of the extension is also different from the Trust Wallet’s logo.

Furthermore, it contains only 52 users to the date and it has zero reviews.

That is why I highly suggest do not add the extension to Chrome as it might be harmful to your computer.

What’s Next

Best Ad Block Extensions for Chrome

Best Chrome Extensions

Arsalan Rauf
Arsalan Rauf

Arsalan Rauf is an entrepreneur, freelancer, creative writer, and also a fountainhead of Green Hat Expert. Additionally, he is also an eminent researcher of Blogging, SEO, Internet Marketing, Social Media, premium accounts, codes, links, tips and tricks, etc.

www.greenhatexpert.com

Filed Under: Guide

How to Contact MetaMask

Last Updated on April 8, 2022 By Arsalan Rauf

Do you have any issue or problems on MetaMask?

There is a chance that your transaction is pending or stuck.

Or maybe the token balance is not displayed to you.

Either way, you need to contact MetaMask for the sake of assistance.

Before you try contacting MetaMask, you can visit the FAQ page for help.

It is because the FAQ page has answers to commonly asked questions on MetaMask.

In addition, assistance is also available on the MetaMask community.

You need to create a new account in order to post there.

In this article, I am going to tell you how to contact MetaMask, whether they provide support, and what is their email address for help.

How to Contact MetaMask

To contact MetaMask, you can use the email, or submit a request or contact them on Twitter.

On the other hand, you can get help from the MetaMask community too.

You can contact them by submitting a request, MetaMask has a “Submit a request” page.

Try to add as much information as possible when you’re submitting a request to them.

The information will reduce the delays in replies.

The email address of MetaMask is support@metamask.io.

You can use the email in order to report a bug or you need help with something.

The last method is to use MetaMask’s official Twitter account for support @MetaMaskSupport.

You can post a tweet and tag @MetaMaskSupport if you have any problems and you want to bring them into their notice.

Here are 3 methods to contact MetaMask:

Method 1. Submit a request

The first method to get MetaMask support is to submit a request.

You can contact them using the MetaMask “Submit a request” page.

While submitting your request, you need to ensure that you have put all the details to describe your issue.

First of all, visit the “Submit a request” page by clicking on this direct URL: https://metamask.zendesk.com/hc/en-us/requests/new.

After reaching the page, you need to select the issue you are facing (e.g. MetaMask Extension).

After doing so, enter your email address and select the version of your MetaMask.

You can locate it by right-clicking “MetaMask” and clicking on “Manage Extension”.

After doing so, you need to choose the network and the purpose of contacting MetaMask.

Then, include the subject, description, and attachments to get an overview of your problem.

In the end, click on “Submit” to submit your request to MetaMask.

After submitting your request, you need to wait for a few days to get response from MetaMask.

They will use email to reply to you.

Method 2. Email MetaMask

The second method is to use the email address to contact MetaMask.

Email them to get in touch with them and MetaMask’s official email address is support@metamask.io.

When a user wants to send them a bug report, this email address is mainly used for this purpose.

However, it can also be used for the sake of reporting an issue you are experiencing.

The issues can be related to transactions, glitches, questions and so on.

You need to provide the maximum details to get your issue solved via email.

This action will prevent the delays in getting response.

After sending the email, wait for some days to get the response from MetaMask.

Method 3. Use Twitter for MetaMask Support

The last method in this list to contact MetaMask is to tweet them by using Twitter.

To get official support from MetaMask, you need to use the official Twitter account for support that is, @MetaMaskSupport.

The MetaMask Twitter account is verified, so you need to ensure that it has a verification badge before you post a tweet.

Now, you can do couple of things.

First of all, you can tag them @MetaMaskSupport by posting a tweet about the issue that you’re facing.

It is an ideal way to attract their attention.

Secondly, you can also reply to one of their existing or new tweets.

In the reply, you can send them the problem you are facing.

After going through their tweets and replies, I come to know that @MetaMaskSupport is very active.

Is there a MetaMask support?

Yes, MetaMask does have a user support.

There are some channels you can use to reach them.

The main channels to reach them are the “Submit a request” page and their Twitter account @MetaMaskSupport.

You can contact MetaMask support directly by using their “Submit a request” page.

On the other hand, you can also use their email and contact them at support@metamask.io.

What is MetaMask email?

The official email address of MetaMask is support@metamask.io.

The email address can be used to report a bug or if you are having any trouble with the extension of MetaMask.

You need to check the email address of the sender if you have received an email from MetaMask.

It is because sometimes even if the email is from support@metamask.io, it might be fake.

The second thing you need to keep in mind that MetaMask will never ask you for your secret recovery phrase.

Final Words

Before you try contacting MetaMask, it is highly suggested that you visit their Help Center first.

You can get help from the Help Center because it has multiple help categories that you can select from.

The categories are “Getting Started”, “Managing my Account”, “Token Swaps”, and many more.

You need to choose the category that you need help with and read the available article that is related to your issue.

Again, you need to keep in mind that MetaMask support will never ask you to reveal your secret recovery phrase.

If someone is asking for it then it will be a scammer online that asks you for your secret recovery phrase.

You need to stay away from them because if you share your recovery phrase with them, your funds will be stolen.

A scam example of such email is, you may receive an email saying that your wallet will be suspended.

What’s Next

How to Contact Coinbase

3 Ways to Contact TikTok

6 Working Methods to Contact OnlyFans

Arsalan Rauf
Arsalan Rauf

Arsalan Rauf is an entrepreneur, freelancer, creative writer, and also a fountainhead of Green Hat Expert. Additionally, he is also an eminent researcher of Blogging, SEO, Internet Marketing, Social Media, premium accounts, codes, links, tips and tricks, etc.

www.greenhatexpert.com

Filed Under: Guide, How to

How to Contact Coinbase

Last Updated on April 8, 2022 By Arsalan Rauf

Coinbase is a cryptocurrency exchange platform that enables you to purchase many cryptocurrencies including Bitcoin and Ethereum.

If you have not created an account yet, then you should create an account.

Keeping in view the traffic of the website, it is one of the top exchanges on the web.

There is a chance that you face some kind of issue while using Coinbase.

For instance, after creating an account, you need to verify your identity.

If you face issues with the verification of your ID, you can contact Coinbase support for help.

Same is the case with your issues with funding your account or trading, contacting Coinbase is the best way to resolve the issue.

In this post, I am going to teach you how to contact Coinbase support to get assistance.

How to contact Coinbase

To contact Coinbase, you can send them a direct message to @CoinbaseSupport on Twitter account or submit a ticket or call them.

On the other hand, you can also go to the Coinbase Help Center for assistance.

The Help Center of Coinbase has answers to frequently asked questions.

Use the search bar to search for the questions and find the answer to your queries.

Further, you can browse the related categories available on the Help Center.

If you are unable to find the answer there, you can send them a direct message on Twitter or submit a ticket to Coinbase.

After doing so, you need to be patient for their response.

Coinbase is growing rapidly that is why the support team may have to deal with bulk tickets.

We have discussed three working ways to contact Coinbase below:

Method 1: Submit a ticket

The first method you can use to Contact Coinbase is to submit a ticket using their Help Center.

First of all, visit the Coinbase Help Center and click on “Contact Us” button.

At the bottom of the page, you will see the “Contact Us” button.

On the other hand, you can also go to “Contact Us” page directly by clicking on this URL: https://help.coinbase.com/en/contact-us.

To submit a ticket, you can go to the “Contact Us” page regardless of your country.

There are several products available on that page and you can select from them.

The several products that you can select from are “Coinbase”, “Coinbase Pro”, “Coinbase Custody” and so on.

Select the product in which you are having issues.

For instance, if you have a problem with Coinbase, then choose “Coinbase”.

The next step is to give more information about the problem that you are facing.

On the dropdown box, click on “Let’s get started”.

After doing so, choose the issue you are experiencing.

On the dropdown box, click on “What seems to be the problem?”.

Now, select the specific issue that you are experiencing.

Now, scroll down to the form, you need to fill all the fields.

First of all, enter the email address which is associated with your Coinbase account.

Coinbase will contact you using the email that you are entering.

After doing so, add the subject to your message.

For instance, if you want to check the status of your document review, use the subject “Document review status” in the subject.

After selecting the subject, add description of the issue too.

Here is an example of description of issue: “Hi, Coinbase. I have recently created an account on Coinbase but the documents that I’ve provided are not yet approved. Can you tell me the status?”.

The last step is to click on “send verification email” to verify your email account to submit the ticket.

Method 2: Send Direct Message to Coinbase on Twitter

The second method to contact Coinbase is to send them a DM on Twitter.

Coinbase has a Coinbase Support account on Twitter that can be used to contact them.

First of all, you need to go to Twitter and visit the Coinbase Support profile.

After reaching their profile on Twitter, click on the “Mail” icon to open a conversation with them.

After doing so, describe your problem that you are experiencing on Coinbase and send them a message on Twitter.

On the other hand, you can also compose a tweet and tag them using @CoinbaseSupport.

This is the best way to attract them by using the tag @CoinbaseSupport.

Keeping in view their replies and tweets there, the Coinbase Support on Twitter is very active and their response is well-timed.

Contacting Coinbase on Twitter is another good method to get a quick response from the team.

Method 3: Call Coinbase support

Lastly, you can use this method to contact Coinbase, that is to call them.

The phone number of Coinbase Customer Service is +1 888 908-7930 for the US and all other countries.

If you are a resident of the UK, you can talk to them by dialing 080 168 4635.

If you are a resident of Ireland, contact the customer service by 1800 200 355.

However, this method can be used to contact them if you want to lock your Coinbase account if you have seen any suspicious activity.

The other issues are not entertained here.

If you are facing a problem other than suspicious account activity, you can use the previous methods in this article to contact them.

What is Coinbase’s email?

The official email addresses of Coinbase are support@coinbase.com, contact@coinbase.com, and no-reply@coinbase.com.

At times, Coinbase also sends emails from subdomains such as contact@updates.coinbase.com.

Before you open the mail link, you need to ensure to check the email address of sender.

If the email address of the sender does not contain Coinbase domain at the end, it means it is not valid email.

How do I speak to a human at Coinbase?

You can dial +1 888 908-7930 in order to contact a human being.

However, the number is useful if you need to lock your account due to suspicious activity.

Other issues will not be entertained from this method.

To address the other issues, you need to submit a ticket via Coinbase help center or message them on Twitter.

Final Words

If you are having trouble with Coinbase, the first way to get help is to visit their help center.

There are a number of answers available to frequently asked questions.

However, if there is no answer to your issue, you can try contacting them using the method available in this article.

The response of the support team depends on the number of tickets or messages they receive, usually, it may take 1-3 business days to get a response.

If you want to report a complaint, it can be done by submitting a complaint, use this URL: https://help.coinbase.com/en/contact-us/submit-a-complaint.

What’s Next

6 Ways to Contact OnlyFans

3 Methods to Contact Snapchat Support

How to Contact Discord

Arsalan Rauf
Arsalan Rauf

Arsalan Rauf is an entrepreneur, freelancer, creative writer, and also a fountainhead of Green Hat Expert. Additionally, he is also an eminent researcher of Blogging, SEO, Internet Marketing, Social Media, premium accounts, codes, links, tips and tricks, etc.

www.greenhatexpert.com

Filed Under: Guide, How to

  • « Previous Page
  • 1
  • …
  • 12
  • 13
  • 14
  • 15
  • 16
  • Next Page »


Recent Posts

  • Free DeepSeek Accounts 2025
  • Free Zoho Mail Accounts 2025
  • Acudepot Discount Codes 2025
  • Free Blackshot Accounts 2025
  • Free GMX Email Accounts 2025
  • Songtrust Discount Codes 2025
  • Uzicases Discount Codes 2025
  • Cardillo Promo Codes 2025
  • Free DriverFix License Keys 2025
  • Avast Secureline VPN Activation Codes 2025

Recommended Posts

Create a Gmail Account Without Phone Number

Free Course Hero Account

Crunchyroll Accounts

Cracked Apps

Free Pokemon Go Accounts
Onlyfans Free Accounts
Free Chegg Accounts
Free Paypal Accounts
Free Gmail Accounts
Funny Steam Names

Categories

  • Apps
  • Apps for PC
  • Blogging
  • Discord
  • Facebook
  • Gaming
  • Grammar
  • Guide
  • How to
  • Instagram
  • Messaging
  • OnlyFans
  • Pinterest
  • Reddit
  • SEO
  • Snapchat
  • Social Media
  • Spotify
  • Steam
  • Telegram
  • TikTok
  • Twitch
  • Twitter
  • Whatsapp
  • WordPress
  • YouTube
  • Home
  • Social Media
  • Messaging
  • About
  • Submit Guest post