After installing WordPress on your site, if you are a beginner, you need to learn how to install a WordPress plugin. Plugins have the ability to add new features to your WordPress website including slideshow and gallery etc. There are numerous paid and free plugins available for WordPress. In this post, I shall show you how to install a WordPress plugin.
Before You Start
If you are a user of WordPress.com, you cannot install plugins.
I have seen people complaining about plugins that they cannot see the plugins menu in their dashboard. It is because they are using WordPress.com and it has limitations. You need to upgrade to business plan of WordPress.com in order to install plugins.
On the other hand, you can install and activate any plugin you want to use on self hosted WordPress.org website.
How to Install a WordPress Plugin
You need to follow these instructions which can allow you to learn step by step how to install a WordPress plugin.
I have covered all three methods: uploading a WordPress plugin, installing a WordPress plugin using search and manually installing a WordPress plugin using FTP.
Install a Plugin using WordPress Plugin Search
To install the WordPress plugin in the easiest way, use the plugin search method. The downside of this option is that it should be available in the WordPress plugin directory which is limited to only free plugins.
First of all, go to your WordPress admin area and click on plugins>Add>New
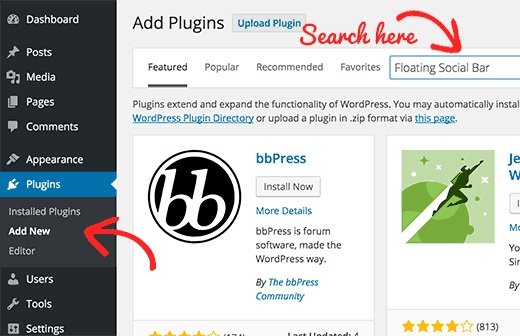
You will see a screen as above in the screenshot. You need to find the plugin by typing its name or functionality to find it like I did. After putting the name, you will find a number of listings like this:
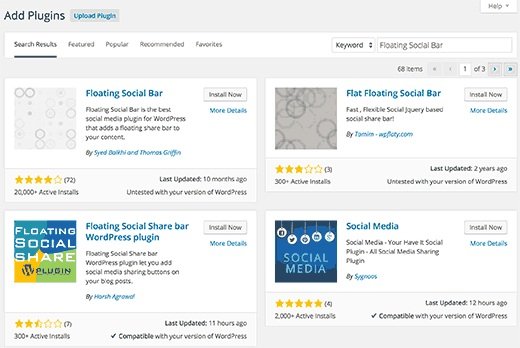
Pick the plugin of your choice. in our search, we were finding floating social bar plugin which is the first plugin. I shall click the ‘install now’ button.
WordPress will start the download and install the plugin. After installation, you will see the button to activate the plugin.
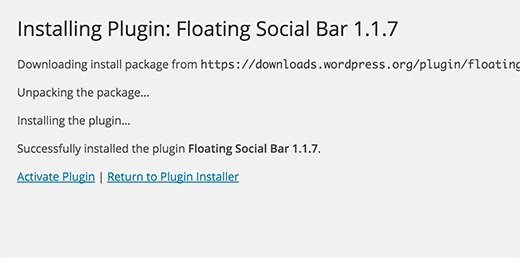
You can install a WordPress plugin on your site but it will not work until you activate it. So click on the activate button to activate the plugin on your site.
That’s it. You have installed the first WordPress plugin on your site.
The next step is to configure the settings of plugin. These settings are different for each plugin that is why I cannot cover that in this post.
Install a Plugin using the WordPress Admin Plugin Upload
Paid WordPress plugins are not available in WordPress plugin directory. You cannot install these plugins by using the search method or first method.
Therefore, WordPress has given us the upload method to install such plugins. I shall also show you how to install WordPress plugin using the upload option or method in WordPress.
First of all, you have to download the plugin from the source that is available in zip format or file. Now, you have to go to WordPress admin area and click plugins>Add new page.
After that, click the upload plugin button at the top of the page.
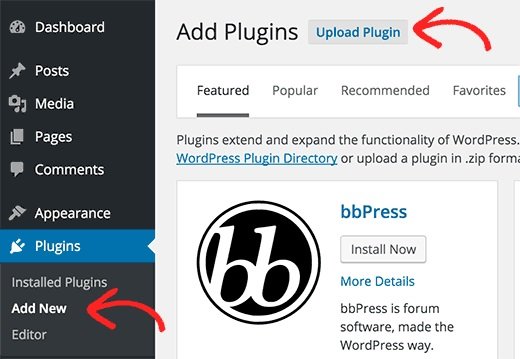
It will lead you to the plugin upload page. Now click choose file button to select the file or plugin you want to upload from your computer.
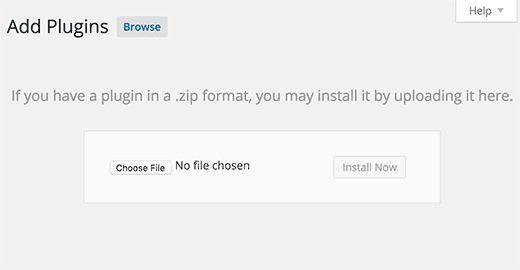
After selecting the file, now click on the install now button to begin the process.
WordPress will upload the plugin file from your computer and install it. You will see the success message after the completion of installation.
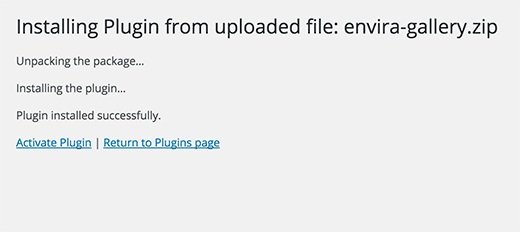
After installation, you have to click the activate plugin button to start using it.
You need to configure the settings according to your needs. The settings are different for every plugin I shall not be able to cover that in this post.
Manually Install a WordPress Plugin using FTP
At times, your WordPress hosting provider may restrict the files which can limit your ability to install the plugin from the admin area.
In such cases, you need to install the plugin manually using FTP.
FTP manager method is the least friendly for beginners.
First of all, download the plugin file which is in zip format. Now extract the zip file on your computer.
When you will extract it the plugin will create a new folder using the same name. That is the folder you need to upload manually to your website by FTP client.
You have to access your host using FTP manager. If you do not possess a FTP username and password, contact your WordPress hosting provider to get them.
Use the login credentials to connect to your website and open the FTP client on your PC or computer. After connecting, access the path /wp-content/plugins/
Now upload the extracted folder from the zip file to this directory /wp-content/plugins/ on your web server.
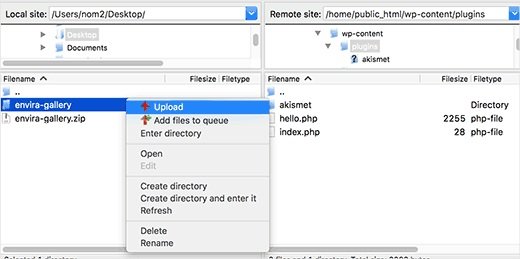
After uploading the files, go to your WordPress admin area and visit plugins link in the menu. Now you will see that you have installed the plugin successfully on plugins page.
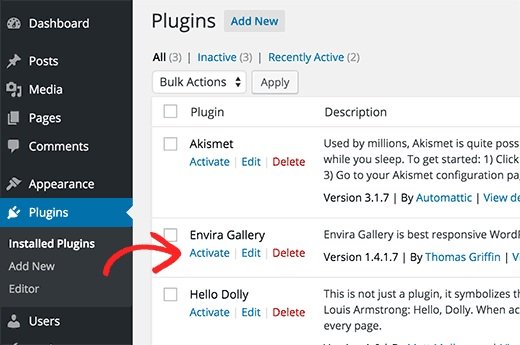
Now click on the activate button to activate the plugin. After activation, you may need to configure it. Every WordPress plugin comes with its own settings which are different from one another. So I shall not discuss it in this post.
I hope that you have learned how to install WordPress plugins.
If you are having any problems kindly post it in the comment section. I shall respond to you asap.
Do not forget to share this post.
Arsalan Rauf is an entrepreneur, freelancer, creative writer, and also a fountainhead of Green Hat Expert. Additionally, he is also an eminent researcher of Blogging, SEO, Internet Marketing, Social Media, premium accounts, codes, links, tips and tricks, etc.