Green Hat Expert

  • Home
  • Social Media
    • Instagram
    • TikTok
    • Snapchat
    • Facebook
    • YouTube
    • Twitter
  • Messaging
    • Discord
    • Telegram
    • Whatsapp
  • About
  • Submit Guest post
You are here: Home / Archives for Social Media

How to See Your Facebook Email Address

Last Updated on August 15, 2022 By Arsalan Rauf

Have you forgot the email address that you used to create your Facebook account?

If so, you won’t be able to sign in to Facebook unless your mobile number is not linked with it.

If you’ve linked your phone number with Facebook, it can be used to sign in to your account.

However, if you didn’t add your phone number, you are left without a choice other than to use your email.

If you have forgot it, there are a few methods that can be used to find it.

In this post, I will tell you how to see your Facebook email address, how to find out what email you used for Facebook on your phone, and more.

How to see your Facebook email address

To see your Facebook email address, you can go to your contact information (if you’re signed in to Facebook) or see your saved passwords in your phone’s settings.

On the other hand, if you’re not logged in to Facebook, your phone number can be used for log in process if you’ve linked it in the past.

If you’re already signed into Facebook, you can see your email by visiting your contact information via your settings.

The email address that you’ve used to create your Facebook account will be available and shown in the contact information setting.

If you’re not signed in to Facebook and you forgot your email address, you can use the mobile number to log in instead.

However, if you didn’t add your phone number, the only ways that you can use is to view your saved passwords in your phone’s settings.

For iOS devices, you can see your saved passwords by navigating to your phone’s settings and tapping on “Passwords”.

For Android users, you can see your saved passwords by visiting your phone’s settings > Google > Manage your Google Account > Security > Password manager.

You can follow the below steps in this guide on how you can find your Facebook password if you’re already logged in.

Step 1. Go to your settings

First of all, log in to Facebook if you are not yet.

If you do not remember your email address, you can use your mobile number to log in (if you’ve linked it).

After opening Facebook, tap on the “Menu” icon on the bottom bar.

The menu will be opened by tapping on the “Menu” icon.

The menu will show you your Facebook profile and page(s).

Under your Facebook profile and page(s), there are several options that you can select such as “Groups”, “Friends”, and more.

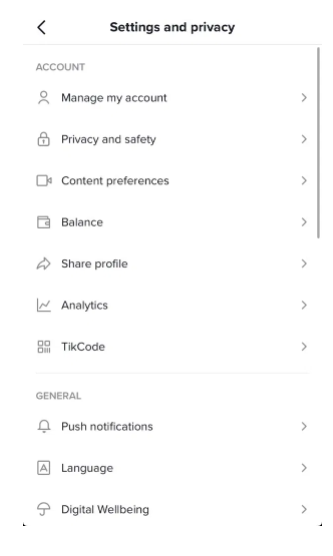
Scroll down the menu until you locate the option that shows “Settings & Privacy”.

To expand it, you need to tap on “Settings & Privacy”.

Then, to visit your Facebook settings, tap on “Settings”.

If you’re on a desktop version of Facebook, click on the dropdown arrow on the top bar, then click on “Settings & Privacy”.

Step 2. Tap on “Name and contact information”

After tapping on “Settings”, it will take you to the settings page.

On the settings page, there are multiple headers such as “Account”, “Audience and visibility”, “Permissions”, and more.

Under the “Account” header, an option is available that says “Name and contact information”.

This option will help you to manage your contact information such as your email address, phone number, and identity.

To manage it, you need to tap on “Name and contact information”.

If you’re using FB on a desktop, you need to click on “Settings”.

Step 3. Tap on “Contact info”

After tapping on “Name and contact information”, it will take you to the name and contact information page.

On the page, there are three options including your name, contact info, and identity confirmation.

The “Name” option enables you to view and change your name on Facebook.

After that, the “Contact info” option helps you to manage your phone number and email addresses on FB.

In the end, the “Identity confirmation” feature is to confirm your identity with Facebook in order to run ads.

Since you want to find your Facebook email address, you need to tap on “Contact info”.

If you’re on the desktop version of Facebook, you’ll be able to view your email address on “General Account Settings”.

Step 4. See your Facebook email address

After tapping on “Contact info”, it will show you your phone number if you’ve linked it with Facebook.

Your email address will also be visible under your phone number.

The email address that is available is the email address that you’ve used to create your FB account.

Therefore, it can be used to log in to Facebook.

If you are looking for a way to change who can see your email address, it can be done by tapping on your email and changing the “Who can see this email address?” setting.

I hope that you have learned how to see your email address on Facebook!

How do I find out what email I used for Facebook on my phone?

To find out what email you used for Facebook on your phone, the ideal step is to go to the “Contact info” page.

After reaching the “Contact info” page, you’ll be able to see the email address that you’ve used to create your Facebook account beside the mail icon.

To begin with, log in to your Facebook account from your phone number first.

After that, tap on the menu > Settings & Privacy > Settings > Name and contact information > Contact info.

How do I get into my Facebook account if I forgot my email and password?

To get into your Facebook account if you forgot your email and password, you can try to locate them via your saved passwords.

On both iOS and Android devices, you can see your saved passwords by navigating to your phone’s settings.

For iOS devices, you can see them by visiting your phone’s settings and tapping on “Passwords”.

For Android devices, your email and saved passwords can be seen by going to your phone’s settings > Google > Manage your Google Account > Security > Password manager.

Final Words

Forgetting the email that you’ve used to make your Facebook account is one of the worst things that can happen to anyone

Especially if you have not linked your phone number with your Facebook account.

As a result, you won’t be able to reset your password.

Luckily, if you’re already logged into Facebook, you can locate your password by going to the “Contact info” page on the Facebook mobile app.

What’s Next

How to See Your Facebook Password Without Changing it

How to Remove Your Profile Picture on Facebook

What Does “Following” Mean on Facebook?

Arsalan Rauf
Arsalan Rauf

Arsalan Rauf is an entrepreneur, freelancer, creative writer, and also a fountainhead of Green Hat Expert. Additionally, he is also an eminent researcher of Blogging, SEO, Internet Marketing, Social Media, premium accounts, codes, links, tips and tricks, etc.

www.greenhatexpert.com

Filed Under: Facebook, Social Media

How to See Your Facebook Password Without Changing it

Last Updated on August 12, 2022 By Arsalan Rauf

Have you been not using Facebook for a while? If yes, you might have forgotten your password.

However, you might be still signed into the FB app.

In this case, there are a couple of things that need to be done.

First of all, you can change your Facebook password by selecting the “Forgot password?” link from the login page of Facebook.

On the other hand, you need to check whether your Facebook password is saved on your device or not.

If luckily your Facebook password is saved on your device, there is no need to reset your password.

However, many users do not know about it how to see their Facebook password.

In addition, some people do not save passwords on their device, so they might not save the Facebook login details.

Regardless, in this post, I will tell you how to see your Facebook password on both iPhone and Android devices whether you’re logged in or not.

How to see your Facebook password

To see your Facebook password, the first thing you need to do is to check your saved passwords on your device.

Your saved passwords can be checked on both iPhone and Android devices.

If you’re an iPhone user, you can see your saved passwords by going to “Passwords” in your phone’s settings.

After reaching the “Passwords” screen, you’ll be able to see all of your saved passwords of the apps such as Facebook.

For Android users, you can see your saved passwords by going to the “Password Manager” using your Google account.

The “Password Manager” will have a list of all of your saved passwords, and your Facebook password might be available there.

If you are unable to find it, then you might have disabled the saving of passwords.

In this case, you are left with no choice but to reset your Facebook password.

How to see your Facebook password on iPhone

To see your Facebook password on an iPhone, the first step is to go to your phone’s settings.

After that, go to “Passwords” and you’ll be able to see your Facebook password there.

On an iPhone, you can ask Siri to find your saved passwords or find them in your settings.

If you’re using Siri, you need to ask like that, “Hey Siri, what is my Facebook password?”.

After that, you’ll be asked to use Touch ID to view it.

If you did not activate Siri on your iPhone, you can go to your saved passwords manually instead.

You can go to it manually by going to your settings > passwords > facebook.com.

Here are the steps in this guide on how you can do this.

Step 1. Go to your settings

Visit your iPhone Settings.

The first thing you need to do is to go to your phone’s settings.

It can be done by searching for “Settings” or finding it manually.

To find the settings of your phone, swipe down from the top of your screen and search for “Settings”.

After that, tap on the Settings icon to visit your settings.

On the other hand, you can find the settings by searching for its icon on your home screen.

After locating your settings, tap on it to visit it.

Step 2. Tap on “Passwords”

Scroll down & tap on “Passwords”.

After reaching your phone’s settings, you’ll see multiple options such as “Airplane Mode”, “Wi-Fi”, “Bluetooth”, and so on.

The option that you should be looking for is “Passwords” as you’ll be able to see your saved passwords there.

Scroll down until you locate the option that shows “Passwords”.

The “Passwords” option is available under the “Wallet & Apple Pay” option.

To view your saved passwords on your device, you need to tap on “Passwords”.

Move on to the next step to learn how to find your Facebook login details.

Step 3. Tap on “facebook.com”

Tap on “facebook.com” and use Touch ID to see your Facebook login details such as username and password.

After tapping on “Passwords”, you need to provide/enter your passcode or use Touch ID to view them.

If you’ve enabled Touch ID, you need to use your thumb to unlock it.

Alternatively, if you’re going with your passcode, enter your six-digit passcode.

After unlocking your passwords, a list of all of your saved passwords will be shown.

For instance, if you’ve saved your Snapchat password, you’ll be able to see it from the “snapchat.com” option.

The option that you should be finding is the “facebook.com” option.

You can locate it by scrolling down to the “F” alphabet or searching for “Facebook” using the search bar.

After finding the “facebook.com” option, tap on it to view.

After tapping on it, you’ll be able to view your Facebook username and password on the “Username” and “Password” fields.

Tap on the “Password” field and select “Copy” to copy the password.

I hope that you have learned how to change your Facebook password on an iPhone!

How to see your Facebook password on Android

To see your Facebook password on Android, you need to go to your Google Account from your phone’s settings.

After reaching your Google Account, you need to tap on “Manage your Google Account” next to “Password Manager”.

In the Password Manager, you can see your saved passwords, also passwords of Facebook.

Here are the steps you need to follow in this guide to do this:

  1. Firstly, go to your Phone’s Settings.
  2. Scroll down and tap on “Google”.
  3. Select “Manage your Google Account”.
  4. Go to the “Security” tab.
  5. Scroll down and tap on “Password Manager”.
  6. On the Password Manager, tap on “Facebook”.
  7. Enter the passcode or use your fingerprint to unlock it.
  8. Lastly, tap on the “eye” icon to reveal your Facebook password.

On Android, most of your passwords will be found on the Password Manager.

Therefore, if you are looking for your Facebook password, the best way is to navigate to your Password Manager via your Google Account.

I hope that you have learned how to change your Facebook password on Android!

Final Words

If you’re logged in to Facebook, the password will not be visible directly on the app.

The reason behind it is that Facebook does not allow it as it compromises your security.

If there was a feature that enables you to see your Facebook password while you’re logged in, then anyone will be able to access or view your Facebook password.

As a result, they will be able to change it through your settings and your Facebook account will be compromised.

Therefore, if you want to view your FB password, you should follow the steps mentioned in this guide.

What’s Next

3 Steps to Appear Offline on Facebook Messenger

How to Add a Follow Button on Facebook

What Does “Following” Mean on Facebook?

Arsalan Rauf
Arsalan Rauf

Arsalan Rauf is an entrepreneur, freelancer, creative writer, and also a fountainhead of Green Hat Expert. Additionally, he is also an eminent researcher of Blogging, SEO, Internet Marketing, Social Media, premium accounts, codes, links, tips and tricks, etc.

www.greenhatexpert.com

Filed Under: Facebook, Social Media

How to Fix “Thanks for Providing Your Info” on Instagram

Last Updated on August 12, 2022 By Arsalan Rauf

Are you facing this message, “Thanks for Providing Your Info. We’ll review your info and if we can confirm it, you’ll be able to access your account within approximately 24 hours” on Instagram?

In 2019, the issue had started, but a lot of users are getting it in the present.

People are getting locked out of their Instagram accounts for no obvious reason which is causing anger in many users.

It’s really annoying to encounter this issue because you won’t be able to know the exact date that when you will get your Instagram account back.

The “24-hour” period isn’t exactly 24 hours because there is a lack of reviewers on Instagram’s platform.

Moreover, Instagram support is nearly impossible to contact with unless you’ve purchased ads from them.

Even so, it is not the duty of ad support team to review the disabled accounts, only a few of them will be kind enough to forward your issue to their internal team.

Having said that, this post will guide you in the best and working way you can get your Instagram account reactivated if you’re getting the “Thanks for Providing Your Info” issue.

Why did I get the “Thanks for providing your info” message?

You got the “Thanks for providing your info” message on Instagram due to the use of a third-party app or automation.

If you did not use any automation at all, then you are getting the error by mistake.

If you’ve used a third-party app or an automation tool, it may cause the “Thanks for providing your info” message on Instagram.

Unfortunately, even if you think that you’ve gotten the error by mistake, the process will be the same to get your account back as the ones who’ve used automation.

You can perform the actions faster when you use the third-party apps and automation.

Instagram will be able to detect that you are using the tools and as a result, it will temporarily block or suspend your account.

This is to prevent spam on their platform.

If you’re action blocked, you have to be patient and wait for 24 hours to 48 hours for it to be lifted.

However, if you got the “Thanks for providing your info” message, it can be a different thing.

To get your account back, you’ll need to take manual action for that.

But don’t worry, if you follow the steps in this guide, you can reactivate your Instagram account.

How to Fix “Thanks for providing your info” on Instagram

To fix the “Thanks for providing your info” on Instagram, your task is to submit the “My Instagram account has been deactivated” form.

After submitting the form, you will get an email from Facebook where you have to reply to them with a photo of yourself holding a handwritten code.

If successful, they will send you another email from Facebook saying that your Instagram account has been reactivated.

If your Instagram account is disabled, your task is to complete the “My Instagram account has been deactivated” form in the Help Centre.

This is the only working method to get your Instagram account back.

You need to avoid scammers and do not trust anyone that says that they can get your account back if you pay them.

This kind of services are big scams as they are provided by people who do not have any link to Instagram.

It is a child’s play for scammers to trap people who recently got their Instagram accounts disabled because they’ll do anything to get their accounts back.

Just keep in mind that Instagram will never reach out to you to pay for verification or to recover your account.

Here is a step by step guide to fix “Thanks for Providing Your Info” on Instagram:

Step 1. Fill up the “My Instagram account has been deactivated” form

To get started, you need to visit the Instagram Help Centre and fill up the “My Instagram account has been deactivated” form.

Here is a list of forms that can be used to get in touch with Instagram:

  • https://help.instagram.com/contact/396169787183059
  • https://help.instagram.com/contact/1652567838289083
  • https://help.instagram.com/contact/437908793443074
  • https://m.facebook.com/help/contact/606967319425038

The only legitimate method to get your Instagram account reactivated is to complete the “My Instagram account has been deactivated” form by filling it in the Help Centre.

This is the only form that can help you to get your account reactivated.

Please do not try to fill up multiple forms in the Help Centre.

Otherwise, Instagram may block your IP address and it will disrupt the process.

Complete the relevant fields on the form by filling them including your full name, your Instagram username, your email address, and your country.

After filling up the form completely, click on “Send” to send the form to Instagram.

Step 2. Photo verification and code

After submitting the “My Instagram account has been deactivated” form, you will receive an automated email.

Send a picture of yourself to IG holding the code (if asked). This is to verify that you’re not a robot.

Check the inbox of the email that you’ve provided in the form.

If you haven’t got an email from Instagram, make sure to check your junk/spam mail as it may have been sent there.

After getting the email, you may be asked to take a “mugshot” of yourself holding the code.

Take the picture and send it to IG from the same email.

This step is straightforward and you can do nothing from your side to make the process quick.

Step 3. Wait to get Instagram’s response

The last step and the most important one is to wait patiently for Instagram’s email response.

If your account has been reactivated, an email from Facebook support will be sent to you saying that it has been reactivated and you should be able to access it.

But the burning question is—how long do you have to be patient and wait for the reviewing process?

The reviewing process may take 24 hours, 3 days, or more than a week.

The duration of the reviewing process will not be the same for everyone—the duration can be less than 24 hours, 3 days, or more than a week.

One user said that they sent the form on Nov 2nd and his account got reactivated on Nov 5th, which shows that it took 3 days for the reviewing process to complete.

Another user said that they waited for about two weeks for their account to be restored after sending the photo verification.

It might take more time or can be much shorter—it depends on your luck.

You need to understand that the review team of Instagram is extremely limited, so it may take a while to receive a response from them.

Instagram gets a lot of forms and emails on a daily basis, so you’ll have to be patient and wait until they review yours.

Every form is manually reviewed by a real person and the next thing is to process the data to finalize whether the account can be reactivated or not.

They get hundreds of reports every day and it is not possible with limited team members to review all of them on the same day.

Additionally, due to the coronavirus pandemic, there are lesser reviewers available on Instagram’s end which is slowing down the process:

So, you have to remain patient until your form gets reviewed by them.

If you haven’t got an email reply from Instagram/Facebook after 3 or more days, a follow-up email to them can also be sent.

On the other hand, you can try filling up the form once again.

But again, I highly recommend that you don’t spam their email or misuse the “My Instagram account has been deactivated” form, or they will block your IP address.

How to prevent your Instagram account from getting disabled

To prevent your account from getting disabled in the future, it is recommended to remove all third-party apps and avoid using automation.

Additionally, you need to reset your password and delete all apps and websites from the Instagram app.

Remove all third-party apps, do not use automation, remove all apps and sites, and update your Instagram password.

To remove apps and websites from the Instagram app, visit your profile > menu > settings > security > apps & websites > active > remove.

After deleting all the apps and websites, their access to your Instagram account will be removed.

On the other hand, you can reset your password which will sign you out of all third-party apps and automation tools.

Third-party apps and automation enable you to perform actions faster than normal.

As a result, Instagram will detect it and they will know that you’re using them.

If you have installed a third-party app/automation, you’ll get a ton of issues like action blocks and the risk of getting your Instagram account blocked/disabled.

So, if you want to save your Instagram account from getting blocked in the future, you need to restrict yourself from using third-party apps and automation tools.

However, if you’re still using them, you need to ensure that you only use which are trusted by Instagram/Facebook.

Here is the list of Instagram partners on the Facebook Partner Directory.

Conclusion

There are hundreds of users getting their Instagram accounts disabled every day, so you are not alone in this.

You do not have to worry if your account is locked or disabled, it isn’t blocked for good—there’s always hope.

In addition, some people who’ve received emails saying that Instagram cannot be reactivated due to x reasons managed to recover their account back.

Instagram reviews forms randomly due to their flawed process and they do not want to do that, so you have to wait until it is your turn.

The reason behind it is that a lot of people getting their accounts locked each day, so the review process typically takes more than 24 hours.

Again, do not fall in trap of scammers claiming that they can reactivate your account for a fixed price, they won’t.

The only legitimate way to get your account back is by contacting Instagram using their “My Instagram account has been deactivated” form.

It is my final suggestion that you have to be patient and wait for Instagram to review your form and the picture verification (using email) after submitting it.

Only re-submit the form or send an email to IG again if you haven’t got Instagram’s response after a week.

What’s Next

How to Contact Instagram Support

Why Did My Instagram Account Get Deleted For No Reason?

How to Know If You Are Shadowbanned on Instagram

Arsalan Rauf
Arsalan Rauf

Arsalan Rauf is an entrepreneur, freelancer, creative writer, and also a fountainhead of Green Hat Expert. Additionally, he is also an eminent researcher of Blogging, SEO, Internet Marketing, Social Media, premium accounts, codes, links, tips and tricks, etc.

www.greenhatexpert.com

Filed Under: Instagram, Social Media

How to Fix “You’re tapping too fast. Take a break!” on TikTok

Last Updated on April 23, 2023 By Arsalan Rauf

Is your TikTok showing this error message that “You’re tapping too fast take a break!”?

A number of users are experiencing this problem these days, especially new users.

It can be a hurdle whenever you try to like or comment on any video.

The error will stop you from supporting your favorite content creator.

Read this post carefully to get help on how to fix the error and it will not happen again too.

Why is TikTok showing this error: You’re tapping too fast take a break?

The question arises why TikTok keeps showing the error You are tapping too fast, take a break whenever a users tries to like a video?

The error is an indication that you are commenting or liking videos too fast and not even watching them completely.

When you like a lot of videos without fully watching them, TikTok will detect this activity and flag you as a bot and block you from liking/commenting for a period of time.

It usually happens with the new comers.

It is because it takes a while to trust the newer accounts.

If you are new and recently created an account on TikTok and like multiple videos without watching them, the TikTok system will think you’re a bot and restrict you from these actions.

The newer accounts get into trouble for a number of actions on TikTok. It also includes the inability to get on the for You Page on TikTok.

TikTok is also being used for automation purposes and many fake accounts are being created for its sake.

Therefore, the platform restricts the fake accounts by detecting the bots and spam using the algorithm designed for it.

Hence, if you are a new user and keeps liking the videos without watching the full length of video, you may experience the error: You’re tapping too fast, Take a Break!

How long does the error message last?

The error message continues for several minutes, several hours or even for 24 hours or more than this time.

If your account is new, you may be blocked for a longer span because Tiktok loses the trust in your account.

On the contrary, the block does not continue for long period on older accounts due to the built trust in TikTok.

But you do not have to worry about it, eventually it will be removed because it is temporary not permanent.

How to Fix: You’re tapping too fast take a break on TikTok

To fix the issue “You’re tapping to fast. Take a break!” on TikTok, you can either wait for the clearance, clear your cache, reinstall the tiktok application, or create a new account.

Let’s have discussion on all these methods one by one.

1. Wait for the Clearance

The most common or used method of fixing the You’re breaking too fast take a break error on tiktok is to wait for the algorithm or tiktok to open it.

The unblock process may take a few minutes, an hour or more than that depends on how many times you have come across this error message.

The best and easy way to fix it is to wait and the block will be lifted.

It is because the issue is temporary not permanent.

Hence, your restrictions will be removed with time.

2. Clear your cache

The second step is to clear the cache, it is the saved data on the application.

Clearing the cache may lift the ban from the account.

Furthermore, it will also clear some space on the android.

Here’s a step-by-step guide on how to clear your cache on the TikTok application.

Go to your settings.

tiktok setting and privacy

Firstly, navigate to your profile.

Then, tap on the “triple-dots” icon on the top-right hand corner of the screen.

The tap will show the settings and privacy page to the user.

Navigate to the bottom of the page.

Scroll down to the very end of the Settings and privacy page.

Above the “Add account” option, there is a “Clear cache” option available.

Tap on “Clear cache” to clear the cache of app.

tiktok clear cache

That is it.

After clearing the cache on the app by tapping on it, an animation will be loading on the screen.

If the number on the right side of “Clear Cache” option has turned in to “0 M” it means that you have done the job of clearing the cache successfully.

3. Reinstall the app

If your profile is new, it means you can go for this method that is, to reinstall the TikTok application.

On the home page, delete the application from the device.

Visit the Google Play store and reinstall the Tiktok app.

Reinstallation process will delete the most of the cache, data, and settings so it will get rid of the issue You are tapping too fast take a break from showing.

4. Create a new account

If all the previous options are not working for you, then try making a new account.

When you create a new account, the account will be in a fresh state, so no more blocks on the account.

However, the same mistake should not be repeated that you did in the previous account.

It is because it will get you blocked/banned again.

A new account is also necessary if anything happens to the main account.

For example, if your main tiktok account gets deleted/blocked, you can inform your followers using the secondary account.

How to Prevent: You’re tapping too fast take a break on TikTok

How to save yourself from You’re tapping too fast take a break error on Tiktok from appearing on your screen?

To save yourself from this error, make sure you watch full length of the video before taking any action on the video such as liking or commenting on it.

These instructions are especially for a new account:

1. Watch the entire video before liking it

It is necessary for the new tiktokers to watch the entire video before liking or commenting on it.

If you will not do it, TikTok will flag you as a bot and block you from performing more actions.

The new accounts are at risk because the algorithm of TikTok doesn’t trust the new user.

So, if you have created a new account, you should abstain from liking or commenting on videos.

2. Use the TikTok app like a human

It may sound weird to you but if you want to save your account from the error, you need to stop acting like a robot.

In short, you need to use the app like a normal human, follow, like or comment the videos with intervals and do not spam these actions.

When you behave like a robot, follow, like or comment without intervals, Tiktok considers you as a bot and blocks your actions on the app.

Why does TikTok say you’re tapping too fast? (another common error)

Apart from the error, you may experience another error that is, You’re following too fast.

You can experience this error if you have exceeded the limit of following on TikTok.

Usually, the user should not follow more than 30 users per hour on the app.

So here is a tip whenever you follow users, ensure you are doing it in intervals to prevent the block.

Final Words

If you are getting the error You’re tapping too fast take a break on Tiktok, it is happening because you are doing actions too fast without watching the content(video) from the beginning to the end.

To save yourself from this issue from happening again, you need to watch the entire video before you like or comment on it.

So the TikTok app will consider that you are a human not a robot.

Related Posts:

How to Find a TikTok Video

Working Ways to Earn Money on Tiktok

How to change Tiktok username without waiting

What Does Clear Cache Mean on Tik Tok

Arsalan Rauf
Arsalan Rauf

Arsalan Rauf is an entrepreneur, freelancer, creative writer, and also a fountainhead of Green Hat Expert. Additionally, he is also an eminent researcher of Blogging, SEO, Internet Marketing, Social Media, premium accounts, codes, links, tips and tricks, etc.

www.greenhatexpert.com

Filed Under: Social Media, TikTok

What Does “Other Viewers” Mean on Facebook Story?

Last Updated on August 11, 2022 By Arsalan Rauf

Are you facing a “1 other person viewed this story” on Facebook story?

The full sentence will be: “1 other person viewed this story. As it was shared to Public, a person you aren’t friends with saw it”.

In 2017, Facebook has released its stories that allow the users to upload a video or a photo that can remain in stories for 24 hours and their friends can see it.

It is same as Snapchat stories (the original publisher of stories).

Social media apps like Twitter, YouTube, LinkedIn, and so on has come to increase the attention of its users.

With the story feature, users can share their events of life with their dear ones and family.

Additionally, users can also see who viewed their Stories by looking at their list of the viewers.

However, it also has some confusing terms in the viewer’s list including “Other Viewers” on Facebook Stories.

If you have also seen that term (e.g. A other person viewed this story), you might want to know what it means.

After all, you want to know who seen your stories right?

In this post, I will tell you what “Other Viewers” mean on Facebook stories, how to see them, and more.

What Does “Other Viewers” Mean on Facebook story?

“Other Viewers” are the people on FB who have viewed your story that are not in your friends list on Facebook.

For instance, if it says “4 other people viewed this story”, it shows that 4 people that you’re not friends with have seen your story.

“Other viewers” will only be visible if you’ve changed your story’s privacy setting on Facebook.

By default, the privacy setting of your story will be set to “Friends” only.

“Friends” only means that only your friends on FB can view your story.

If you changed it to “Public”, anyone on Facebook or Messenger will be able to view your story.

Having said that, if someone who is not in your friend’s list on Facebook sees your story, they will be under “Other Viewers”.

If you happened to change your story’s privacy setting to “Public”, people who are not your friends on Facebook will be able to view your stories.

These users are categorized under “Other Viewers” on FB, and you cannot see their profiles.

The irony is that the users under “Other Viewers” will be anonymous.

A privacy setting called “Custom” is also available that allows you to select who can view your story.

If you only want to display your story to a selected group of friends, you can use this option.

However, this setting will restrict the public to see your story, as a result, “Other Viewers” won’t show up.

How to see “Other Viewers” on Facebook

Facebook does not show the profiles of “Other Viewers”.

Unluckily, you cannot see “Other Viewers” on FB

According to Facebook, if the privacy of your story is set to “Public”, you’re only able to view the followers who viewed your story, but not their specific names.

If the privacy of your story is set to “Public”, everyone will be able to see your story.

People who’ve seen your story that are not friends with you on Facebook will be shown under “Other Viewers”.

However, their names will not be shown to you.

In short, the users under “Other Viewers” will be hidden from you and they remain anonymous.

This limitation is disliked by many users as they are unable to see who the “Other Viewers” are.

There’s even a petition filed by Wendy Williams that demands Facebook to display the “Other Viewers”.

You can also sign the petition if you support it.

How to get rid of “Other Viewers” on Facebook

Go to Facebook app > profile > add story > add a photo/video > privacy > friends.

To get rid of “Other Viewers” on Facebook, your best bet is to change your story privacy to “Friends” the next time you post a story.

The reason why “Other Viewers” appears on your Facebook story views is that you’ve set the story’s privacy setting to “Public”.

If you’ve changed your story’s privacy setting from “Friends” to “Public”, users on FB who are not in your friends list can view your story.

As a result, they will be categorized under “Other Viewers” for instance, 3 other persons viewed this story.

If you want to restrict strangers from viewing your stories, you need to make changes to your privacy settings.

Here are the steps in this guide on how you can get rid of “Other Viewers” on the Facebook app:

  1. Firstly, open your Facebook profile > Add Story.
  2. Add a photo/video.
  3. Tap on “Privacy” at the bottom left of your screen.
  4. Lastly, change your privacy setting to “Friends”.

Note: You only have to change this setting one time.

Once you have changed your privacy setting to “Friends”, stories that you post in the future will only be seen by your friends.

In short, people who are not friends with you won’t be able to see your stories.

Therefore, this will prevent “Other Viewers” from showing up and it will be hidden from your story views.

Does “Other Viewers” mean that I’m blocked?

If someone blocks you right after they viewed your story, it will hide their profile, and you’ll see “1 viewer” in your story views.

Yes, “Other Viewers” on your Facebook story views can mean that someone has blocked you.

However, it can hardly happen.

“Other viewers” are people who saw your story that is not on your friends list on Facebook.

If you’re blocked on Facebook, you will be restricted from seeing the person’s posts, stories, and you’ll be removed as a friend.

Neither can the person see your stories or posts on the platform.

However, if the user viewed your story and blocked you right after, you’ll get “1 viewer” on your story views.

You will not be able to view the person’s name.

If the user unblocks you, adds you as a friend on Facebook, and you accept it, their name will re-appear on your story views.

I have tested it with the help of 2 accounts, and it’s proven to be true.

Final Words

Knowing who viewed your stories is necessary due to privacy and safety reasons.

Unfortunately, if your privacy settings are set to “Public”, you won’t be able to see the people who saw your stories that you’re not friends on Facebook with.

Facebook is still not showing who the “Other Viewers” are, so you can only see your friends that saw your story.

Here are the main key points in the article:

  • If you set your story’s privacy setting to “Public”, everyone on Facebook and Messenger can view your story.
  • “Other Viewers” are people who are not on your friends’ list on Facebook.
  • You cannot see “Other Viewers” as Facebook is deliberately keeping them hidden.
  • In the event that anyone blocks you after watching your story, you’ll see “1 viewer” in your story views as their profile will remain anonymous.

All in all, it’s highly recommended that your privacy settings should be set to “Friends”.

Otherwise, strangers will be able to see your story and you will not be able to know them.

What’s Next

Fake Email for Facebook

What Does Bump Mean on Facebook?

Why Is The “Add Friend” Button Not Showing on Facebook?

Arsalan Rauf
Arsalan Rauf

Arsalan Rauf is an entrepreneur, freelancer, creative writer, and also a fountainhead of Green Hat Expert. Additionally, he is also an eminent researcher of Blogging, SEO, Internet Marketing, Social Media, premium accounts, codes, links, tips and tricks, etc.

www.greenhatexpert.com

Filed Under: Facebook, Social Media

3 Steps to Appear Offline on Facebook Messenger

Last Updated on August 11, 2022 By Arsalan Rauf

You can see whether someone is offline or online on Facebook Messenger.

However, the activity status of the person should be enabled.

Same as WhatsApp, you can disable your activity status on Facebook Messenger

If the person’s activity status is disabled, they can always be offline.

In short, you won’t be able to tell whether the person is active or not.

If you want to appear offline on Facebook Messenger, you need to go through this guide to find out how.

How to appear offline on Facebook Messenger

To appear offline on Facebook Messenger, the first step is to tap on your profile picture.

Now, go to “Active Status” and turn off the “Show when you’re active” option.

After turning off the “Show when you’re active” feature, your active status will not be shown.

Before you turn off the “Show when you’re active” feature, your FB friends should be able to see a green dot on your profile picture.

After turning it off, the green dot will no longer be shown on your profile.

However, just remember that you won’t be able to see the activity status of your friends too.

If you want to view your friends’ activity status, the option “Show when you’re active” should be enabled.

Having said that, follow the below steps in this guide on how you can appear offline on Facebook messenger by turning off your active status.

#1: Tap on your profile picture

Go to Facebook Messenger and tap on your profile picture available on the top bar.

The first thing you need to do is to tap on your profile picture on the Messenger app.

To get started, open the Messenger app on your android device.

The Messenger can also be used on a desktop, but the user interface will be a little different.

We have used the mobile version of Messenger for the sake of this guide rather than the desktop version.

Therefore, it’s better to use the Messenger app instead of the desktop version when following this guide.

After opening Messenger, you’ll see your chats.

After that, tap on your profile picture available on the top bar.

If you’re using the desktop version of Messenger, tap on the three dots next to your profile picture instead.

A navigation menu will be opened with several options.

Move on to the next step to learn how to navigate to the active status setting.

#2: Tap on “Active Status”

Step 2 is to tap on the “Active Status” option.

The navigation menu will show multiple options such as “Dark mode”, “Switch account”, “Active Status”, and more.

“Dark mode” allows you to change the appearance of the app and you can enable the dark theme.

You can switch your FB accounts using “Switch account” option.

In the end, you can turn on or turn off your activity status using the “Active Status” feature.

To visit the active status settings, you need to tap on the “Active Status” option.

This feature will help you to appear offline on Facebook if you disable it.

If you’re using Messenger on a desktop, you can open a different navigation menu by tapping on the three dots.

On that navigation menu, you need to click on “Preferences” to go to your preferences.

After that, tap on “Turn Off Active Status” to visit the active status setting.

Move on to the next step to learn how to turn off your active status to appear offline on Messenger.

#3: Turn off the “Show when you’re active” option

Active Status > Show when you’re active > Switch off.

After tapping on the “Active Status” option, it will take you to the “Active Status” setting.

On the setting, you will come across “Show when you’re active” option.

The “Show when you’re active” feature is enabled by default.

If the option is enabled, your contacts and friends will be able to know when you are active.

Alternatively, if the option is disabled, your friends and contacts will not be able to know when you’re active.

Tap on the switch to turn off the “Show when you’re active” option.

After tapping on the switch, you will see a pop-up message confirming whether you want to turn off your Active Status or not.

To turn off your Active Status, you have to tap on “Turn off”.

Once your Active Status is turned off, you will appear offline to your contacts as well as friends on Facebook Messenger.

However, the ability to see your friends’ or contacts’ Active Status will also be lost too.

This setting is same as hiding your “Last Seen” status on WhatsApp.

I hope that you have learned how to appear offline on FB Messenger!

Can you appear offline on Facebook Messenger but still see messages?

Yes, you can appear offline on FB Messenger but still see messages.

Appearing offline on Messenger will hide your Active Status from your Facebook friends and contacts.

In short, they won’t be able to see that you’re online.

However, you can still view messages that people send you.

Additionally, you will still be able to view your existing chats on Facebook.

How do I hide myself on Facebook Messenger?

To hide yourself on Facebook messenger, the only way is to turn off your Active Status.

After turning off your Active Status, your contacts and friends will not be able to view that you’re online.

However, it will also restrict you to see whether they are online too.

Usually, whenever you’re online on Facebook, you see a green dot on your profile picture.

Now after turning off your Active Status, the green dot will not be displayed on your profile picture even if you’re using Facebook Messenger.

Final Words

Appearing offline on Facebook Messenger is an ideal method to mitigate stalkers.

It also stops someone from thinking that you’re deliberately ignoring their messages or them.

If you usually reply late to someone’s messages, appearing offline is an ideal option.

The only drawback of using this option is that you won’t be able to see your contacts’ and friends’ Active Status.

What’s Next

What Does “Other Viewers” Mean on Facebook Story?

How to Send Files on Messenger

How to Change Your Profile Picture on Messenger

Arsalan Rauf
Arsalan Rauf

Arsalan Rauf is an entrepreneur, freelancer, creative writer, and also a fountainhead of Green Hat Expert. Additionally, he is also an eminent researcher of Blogging, SEO, Internet Marketing, Social Media, premium accounts, codes, links, tips and tricks, etc.

www.greenhatexpert.com

Filed Under: Facebook, Social Media

How to Fix “Your Account Was Compromised” on Instagram

Last Updated on August 5, 2022 By Arsalan Rauf

Are you getting a “Your Account Was Compromised” error on Instagram and do you want to fix it?

The full error message is: “It looks like you shared your password with a service to help you get more likes or followers, which goes against our Community Guidelines”.

Along with, “Change your password to continue using Instagram”.

And, “If you share your new password with one of these services, you may get blocked from following, liking, or commenting”.

If you’re facing a “Your Account Was Compromised” error, it means that you are using a third-party app.

If you share your Instagram login ID and password with a third-party app, your Instagram account may be locked.

The reason behind it is that Instagram thinks that your account has been compromised.

In this post, I will tell you how to fix “Your Account Was Compromised” on Instagram so you can get your account back.

How to fix “Your Account Was Compromised” on Instagram

To fix “Your Account Was Compromised” on Instagram, the first thing is to reset your Instagram password.

To reset it, visit the Instagram login page, tap on “Forgotten password?” and follow the on-screen instructions.

The instructions are entering your Instagram username or email in the field.

It also needs you to visit your email inbox to receive the password reset link.

By tapping on the password reset link, it will take you to the “Create A Strong Password” page where you can reset your Instagram password.

After resetting your IG password, you’ll regain access to your Instagram account.

Here is a step by step guide to fix “Your Account Was Compromised” on Instagram:

Step 1. Visit Instagram login page and tap on “Forgotten password?”

To get started, you need to open the Instagram login page.

If you’re signed into one of your existing Instagram accounts, you need to visit your profile.

To do that, tap on your profile picture available on the bottom bar.

After opening your profile, tap on your username at the top.

After tapping, it will open a list of your Instagram accounts.

At the bottom of the list, an option to add a new account will be shown to you.

To add a new IG account, you need to tap on “Add account”.

After that, you’ll see two options such as “Log In to Existing Account” and “Create New Account”.

To reach the login page of Instagram, you need to tap on “Log In to Existing Account”.

After reaching the Instagram login page, tap on “Forgotten password?”.

Step 2. Enter your Instagram username or email

After tapping on “Forgotten Password”, it will take you to the “Trouble with logging in?” page.

The page will display a couple of options including “Username” and “Phone”.

In order to write this guide, I will use an Instagram username or email address.

First of all, enter your Instagram username or email address in the “Username or email address” field.

After putting your Instagram username or email address, tap on “Next”.

If you don’t have access to one, you can select the “Phone” option and enter your mobile number instead.

Step 3. Tap on “Ok”

After entering your Instagram username or email address, it will open a pop-up.

The pop-up says that an email link has been sent to your email address.

The full message will be like, “We sent an email to your-email@gmail.com with a link to get back into your account”.

Now, you need to go to your email and check your inbox for the email link.

Step 4. Check your email and tap on “Reset your password”

After receiving an email link, you will need to check it from your email.

First of all, log in to your email account and go to your inbox.

You should receive an email with the title of, “your-username, we’ve made it easy to get back to Instagram”.

If you didn’t get the email, it is necessary to check your junk and spam folder.

Usually, the email will arrive in less than 5 minutes.

Open the email and go through it.

In the email, a couple of buttons will be available including “Login in as your-username” and “Reset your password”.

To fix the compromised error, you need to reset your Instagram password.

Therefore, you need to tap on “Reset your password” in order to reset your Instagram password.

Step 5. Reset your Instagram password

After tapping on “Reset password”, it will take you to the “Create A Strong Password” page.

On this page, a couple of fields will be available including “New password”, and “New password, again”.

First of all, create a new password and enter it in the “New password” field.

Just remember that your password has to be more than six characters, and also add a combination of numbers, letters, and special characters.

After that, re-enter your new password in the “New password, again” field.

It is to confirm your new password for the system.

In the end, tap on “Reset Password” and your IG password will be reset.

Step 6. Go back to Instagram

After resetting your Instagram password, return to the Instagram app.

Now, sign in to your compromised Instagram account if you are not yet.

After all the process, you will be able to access your Instagram account without getting the “Your Account Was Compromised” error!

The reason behind it is that you’ve changed your Instagram password.

If you managed to get your Instagram account back, it is ideal to log out of all third-party apps and uninstall them.

As a result, the “Your Account Was Compromised” error will not happen again.

Final Words

If you’re still encountering the “Your Account Was Compromised” error message, there are two things you need to do.

Firstly, try uninstalling and reinstalling Instagram after3 days.

Some users managed to fix the “Your Account Was Compromised” error message by doing this method.

The second way that you can use is to submit the “My Instagram Account Was Deactivated” form.

The “My Instagram Account Was Deactivated” form is mainly used for deactivated Instagram accounts.

However, you can submit it if you’re facing issues with logging in too.

After submitting the form, Instagram will need a selfie of yourself holding a code and they will ask it.

After submitting the selfie, Instagram will review it and reactivate/restore your account.

What’s Next

Good Instagram Comments For Your Friends

Funny Instagram Captions (For Friends & Selfies)

How to Find Live Videos on Instagram

Arsalan Rauf
Arsalan Rauf

Arsalan Rauf is an entrepreneur, freelancer, creative writer, and also a fountainhead of Green Hat Expert. Additionally, he is also an eminent researcher of Blogging, SEO, Internet Marketing, Social Media, premium accounts, codes, links, tips and tricks, etc.

www.greenhatexpert.com

Filed Under: Instagram, Social Media Tagged With: Your account was compromised Instagram message Reddit

What Does “Join” Mean on YouTube?

Last Updated on August 5, 2022 By Arsalan Rauf

Have you recently come across a join button beside a subscription button on YouTube?

If yes, you might be curious to know what the button is for and why YouTube has added it.

In addition, you might be curious about some channels that have the join button and the rest of the channels you see don’t.

YouTube is also a social media site that comes up with new features, therefore, you need to keep yourself abreast of all the updates.

In this post, I am going to guide you what does the “join” button mean on YouTube, how to get it and so on.

After going through the whole post, you will be able to know what the “Join” button on YouTube is all about.

What Does “Join” Mean on YouTube?

The Join button on YouTube is a CTA (call to action) button that takes you to a membership page of a channel when you click it.

The YouTube’s Join button comes with a monthly subscription where you can become a member of a channel to enjoy interesting things.

If you know about Twitch, the “Join” button on YouTube is the same as the “Subscribe” button on Twitch.

The join button on YouTube is similar to the subscribe button on Twitch.

The “Join” button has appeared on some YouTube channels in 2018.

Joining a channel as a member is not free of cost like the subscribe button on YouTube.

By using this feature, you can support a YouTube channel by paying a monthly subscription.

When you purchase it, you will get channel membership perks including loyalty badges and custom emojis which can be used in live chat and comments.

However, these parks are only present if that YouTube has added it to the channel.

Otherwise, you will not be entertained with the perks after getting a membership.

For instance, if you joined a channel, for instance, PewDiePie, you’ll get a loyalty badge next to your name when you comment on a video or in a live chat.

PewDiePie contains three tiers on his channel membership including Tier 1, Tier 2, and Tier 3.

Each tier contains different perks which are the ones from the previous one.

If you were to subscribe to a tier 2 membership, you will get access to his discord channel and early access to his new videos, and so on.

However, if you joined a channel like MrBeast, a loyalty badge will be shown next to your name, and nothing else.

So, before you join a channel as a member, you should check the perks before.

But the question arises why did YouTube add channel memberships?

YouTube introduced the “Join” button to allow YouTubers to earn a greater income from YouTube along with ads.

A comedy YouTuber, Mike Falzone stated that he had tripled his revenue from memberships of channel alone.

How to get the “Join” button on YouTube

You have to complete certain minimum requirements as stated by YouTube to get the “Join” button and add memberships to your channel.

All channels do not have the “Join” button on YouTube because you need to fulfill certain minimum requirements to add channel memberships.

To get the “Join button on YouTube, the first requirement is that your channel needs to be in the YouTube Partner Program.

Your channel must contain over 30,000 subscribers (1,000 for gaming channels), you must be 18+ years of age, and you’re available in one of the available locations.

If you didn’t complete one or more of the minimum requirements, your channel won’t be eligible for memberships on YT.

Once you’ve completed the minimum requirements for YouTube memberships, visit the memberships page on your channel from the desktop.

After reaching the page, follow the on-screen instructions to enable memberships on your channel.

While going through the setup process, you can add perks, add badges, enter emojis, prepare an announcement, and create members-only posts.

How to become a channel member

To become a channel member, you need to tap on the “Join”button on a channel.

To become a channel member, your task is to tap on the join button next to the subscribe button on a YouTube channel and follow the instructions on the screen to complete your purchase.

Just remember that some channels do not contain the channel membership feature as they are not eligible for it or they disabled it.

The join button is available beside the subscribe button on a YouTube channel.

After tapping on the “Join” button, a membership pop-up box will appear where you can see the different membership tiers.

Some channels contain only one membership tier, while others might have more than one.

Just keep in mind that some channels don’t have the “Join” button on their channel.

The reason behind it is that they are either not eligible for channel memberships or that they disabled the feature.

Having said that, you will not be able to become a member on certain channels if you do not have the “Join button”.

After tapping on the button, you need to follow the instructions on the screen to complete your purchase.

There are no refunds, so you need to ensure that to look at the membership perks before you try to subscribe.

What perks does a channel member get?

A channel member can get access to one or many perks depending on what the YouTuber has set.

You need to go through all the perks that you’re going to get before deciding to join as a member on a YouTube channel.

Usually, a channel member will be rewarded a loyalty badge and custom emojis to use in comments and live chat.

Other perks that one can get include access to members-only community posts, videos, live streams, and live chat.

Some YouTubers have added perks that are out of the scope of YouTube including discounts on merch.

For instance, being a Tier 2 member on the channel of PewDiePie gives you access to his discord channel.

Alternatively, being a channel member on the “the Hacksmith” will give you discounts on their merch.

So, before joining as a member of a channel, you should read the perks that you’re going to get on the membership pop-up box first.

How much does YouTube take from membership?

The creator gets 70% of YouTube’s membership revenue while 30% goes to YouTube.

If you’re part of a Multi-Channel Network, you might get a lower membership revenue share.

YouTube takes 30% of the revenue of a YouTube membership subscription.

Alternatively, YouTubers (creators) get 70% of membership revenue.

However, if you’re part of a Multi-Channel Network (MCN), your might get a lower revenue share, which means less than 70%.

You need to ensure to check with your MCN about it.

Final Words

The introduction of the channel memberships feature has allowed YouTubers to generate more income from YouTube with ads.

It also gives rise to YouTube’s revenue as they get a 30% share of membership revenue.

If you want to support your favorite channel, it can be done by tapping on the “Join” button to become a channel member as of Jun 22, 2018.

Joining a channel is not free like subscribing to a channel and you have to pay a fixed monthly fee to sustain your membership.

What’s Next

Good, Cool, Cute YouTube Channel Names Ideas

How to Download Private Videos on YouTube

Why Are My YouTube Email Notifications Not Working?

Arsalan Rauf
Arsalan Rauf

Arsalan Rauf is an entrepreneur, freelancer, creative writer, and also a fountainhead of Green Hat Expert. Additionally, he is also an eminent researcher of Blogging, SEO, Internet Marketing, Social Media, premium accounts, codes, links, tips and tricks, etc.

www.greenhatexpert.com

Filed Under: Social Media, YouTube

What Does ft. Mean on YouTube?

Last Updated on December 24, 2024 By Arsalan Rauf

Have you seen the abbreviation “ft.” on YouTube?

You may have seen this abbreviation in the title of a music video.

Or you might have seen it in the title of a song.

The meaning of ft on YouTube is the same for both video titles.

However, it can cause confusion because abbreviations can describe different things.

For instance, “ft.” without the dot is an entirely different abbreviation.

You need to see the context of the sentence to understand the meaning of the abbreviation.

In this post, I am going to teach you what “ft.” means on YouTube.

Further, you will also be able to know why it is used, how to use it and so on.

What Does ft. Mean on YouTube?

Ft. = featuring.

The abbreviation ft stands for featuring on YouTube platform.

Usually, it is used in the title of the music videos published on YouTube when an artist collaborates with another artist in a song.

For instance, a music video “Love the Way You Lie’ is recorded by Eminem featuring Rihanna.

Therefore, the title of the video is “Eminem – Love The Way You Lie ft. Rihanna”.

The main artist comes first in the title of the music video and the name that comes after “ft.” is the invited artist.

Do not mix “ft.” with “ft” as both of them are different abbreviations.

The “ft” abbreviation stands for foot or feet (without the dot), that is a unit for measurements.

Alternatively, with the dot (ft.) shows featuring, that is used in music videos.

Since YouTube is a platform where music videos are available in bulk that is why you will see “ft.” more often as compared with “ft”, until someone is trying to show measurements of something.

How do you use ft. on YouTube?

If you are collaborating with someone then you can use “ft” in the title of your YouTube video.

Although the music videos use “ft.” in the title of the video if you are collaborating with someone, you can use it too.

For instance, if you want to upload a video of a travel vlog with your friend, you can make the title like “Travel vlog ft. + (the name of your friend).

The same is the case, if you are doing a prank video with another prankster, you can make the title as “Prank ft. + (the name of the YouTuber).

It is an ideal way to give credit to another person who is making the video with you.

The term “ft.” is not limited for music videos.

The term can be used in the title if you are doing any sort of collaboration in the video.

If you have added the person in most parts of your video, you can add “ft.” to give recognition to their work.

They might get offended if you do not give them credits.

It is the best way to give credits to anyone in your video.

Further, you can also add their social media profiles in the description of the video to make them easily accessible for the viewers.

It is very decent to give credits to anyone who collaborates with you on YouTube.

Why do we use ft. in Videos?

So the question arises, why do people use “ft” in their videos?

The purpose of using “ft” on video is to give credits to the person making the video content with you.

It is a common decency to give credit to someone who collaborates with you on a YouTube video.

This is one way to give credit to someone by adding “ft.” with their name for collaboration purpose.

The best way to credit anyone on your video is to add “ft” in the title of your video.

For instance, if a YouTuber name Arsalan is collaborating with you on a video, then you should add “ft. Arsalan” to the title of your video.

It will tell people about the person performing in your video.

Otherwise, the subscribers or viewers might get confused because they might not be familiar with the person in your video.

However, if the person is performing in your video for a short period, there is no need to add “ft” in the title of the video.

If anyone is coming in your video for a short time, it is called a cameo.

Therefore, you do not have to add “ft” in the title of the video until the person is performing for the most part of the video.

What does ft. mean before a name?

If the “ft” appears before the name, this abbreviation stands for featuring.

When you or anyone collaborates with another person in a video, the usage of “ft” shows the credit to the person.

Let’s say Arsalan (the main artist) is collaborating with Rauf (another artist) in a music video.

The video will be titled, “Arsalan ft. Rauf”.

Alternatively, if the main artist is Rauf, and Arsalan is another artist, the title of the video will be, “Rauf ft, Arsalan.

The abbreviation is not specific for music videos, the “ft” abbreviation can also be titled in non-music videos too.

As long as there is a collaboration in the video, “ft.” can be used to give credits to another person in the title.

If there is a single person in the video, the “ft” abbreviation cannot be used.

What is the full form of feat.?

The full form of “feat” means featuring.

Feat = featuring.

Same is the case with the abbreviation of “ft”.

Ft. = featuring.

In short words, “ft” is the shorter abbreviation of “feat”.

It is very common in the titles of music videos in order to make the video titles shorter.

Ft. = feat. = featuring.

It means that both abbreviations “ft” and “feat” can be exchanged.

The difference is “ft” is a shorter version and “feat” is the longer version.

There are some points to consider when it comes to selecting between “ft” and “feat” for the title of your video.

First of all, the “ft.” abbreviation is shorter than “feat.”.

If your video title is already long then you should consider using “ft” (the shorter version).

Alternatively, if the title of your video is short, I recommend you use the longer version that is, “feat”.

“Ft” is the short version as compared with “feat”, that is why people may know about it.

Is feat. short for feature?

The answer is no, it is not.

“Feat” is a short version of featuring not feature.

This abbreviation is usually used in the video title of music video when an artist collaborates with another.

Feat without the dot is a noun in English language.

So if you come across a word “feat” that does not have a dot at the end, it does not stand for featuring.

It is because it is a noun in English instead.

Alternatively, if the abbreviation “feat.” is present in the music video title, it stands for featuring (for example feat. Eminem).

ft. sentence examples

Do you want to use ft in the title of your YouTube music video or in a sentence?

Here are some examples so you can use “ft.” in a sentence:

  • Ignoring Prank ft. Davis
  • Getting Personal With Tom ft. Clark
  • Surprising People ft. Eddie
  • Boxing session Ft. Mary
  • 24 Hours Vlog ft. Arsalan
  • Travel Vlog ft. Adams
  • Prank Call ft. James
  • House Tour ft. Charles
  • Workout Vlog ft. Jones

Final Words

In this post, I have successfully discussed the meaning of “ft.” on YouTube.

Further, it is also discussed how to use “ft”, when to use it and why it is used etc.

To give a bird’s eye view, “ft.” is not only used for music videos.

“ft.” can also be used for all types of videos, as long as it includes someone else in the video.

Furthermore, “ft.” and “feat.” can be exchanged for one another.

The usage of the abbreviation depends on the circumstance.

For example, it is better to use “ft.” instead of “feat.” Where videos have longer titles.

On the other hand, if the title is short, you can opt for “feat” instead of the short version that is “ft”.

It is not necessary because both abbreviations can be used interchangeably.

What’s Next

Working Ways to Download Private Videos on YouTube

How to Watch Age Restricted YouTube videos Online

How to Watch Blocked YouTube Videos in School

Arsalan Rauf
Arsalan Rauf

Arsalan Rauf is an entrepreneur, freelancer, creative writer, and also a fountainhead of Green Hat Expert. Additionally, he is also an eminent researcher of Blogging, SEO, Internet Marketing, Social Media, premium accounts, codes, links, tips and tricks, etc.

www.greenhatexpert.com

Filed Under: YouTube

How to Fix “Post unavailable” on TikTok

Last Updated on April 23, 2023 By Arsalan Rauf

Are you getting a “Post unavailable” error on TikTok and looking for a way to fix it?

A lot of users are facing this error message on their “For You” page.

It typically happens for underaged users on TikTok.

For instance, if you’re 13 years old, the error message will be shown to you when you view inappropriate content.

In this post, I will tell you why TikTok says the post is unavailable and how to fix “Post unavailable” on TikTok.

Why does TikTok say the post is unavailable?

TikTok says the post is unavailable because either you are underage or you’ve set your age to 13 to 15 years old.

If you’re underage, posts that TikTok algorithm marked as “inappropriate” will be restricted for you.

The aim of TikTok is to create a safe and welcoming platform for everyone.

Having said that, they released a lot of privacy and safety settings.

You cannot edit some privacy and safety settings if you’re underage.

For instance, if your age is between 13 to 15 years, the “Video downloads” setting is turned off by default and you cannot change it.

Same is the case with the feature to watch “inappropriate” videos on TikTok is restricted for underaged users by default.

Having said that, some users are aged 18 or above but some posts on their “For You” page are still protected.

If that’s the case, the “Post unavailable” message is happening because of a bug.

A username named @Lamiixo tweeted, “When did TikTok start having “post unavailable”?”.

Apparently, @Lamiixo is not the only one getting this error message as many other users are reporting it on Reddit, YouTube, and other social media platforms.

How to fix “Post unavailable” on TikTok

To fix “Post unavailable” on TikTok, the first thing is to turn off “Restricted Mode”.

If you’ve mistakenly set your age to below 16, the only way is to contact TikTok to change/update your birthday.

You can access all the features on TikTok if you’re 18 years old or above.

On the other hand, you can create a new TikTok account and set your age to 18 or above.

Method 1. Turn off “Restricted Mode”

  1. Firstly, go to TikTok and go to your profile.
  2. Tap on the menu icon.
  3. Now, select “Settings and privacy”.
  4. Tap on “Digital Wellbeing”.
  5. Now, select “Restricted Mode”.
  6. Tap on “Turn off” to turn it off.

After tapping on “Turn off”, you need to provide the passcode that you’ve set.

If someone turned off restricted mode for you, the passcode is imperative so you need to ask for the passcode for this purpose.

Restricted mode restricts videos that may not be suitable for some people.

Therefore, if you want to see all videos on your “For You” page, restricted mode should be disabled.

Method 2. Contact TikTok (to update your birthday)

  1. Firstly, go to the “Share your feedback” form.
  2. Enter your email address.
  3. Provide your TikTok username.
  4. Select “Change account information” as the category,
  5. Select “General question” or “Other” as the subcategory.
  6. Explain your issue in the “How can we help?” field.
  7. Agree with the statements.
  8. Lastly, submit the form.

In the “How can we help?” field, you need to describe the problem for which you need help.

For instance, if you’ve accidentally set your age to 13 years old but you’re actually 18 years old, you need to describe it.

To prove your age, you can also attach a photo of your ID.

After submitting the form, you need to wait for a few days to get TikTok’s response.

TikTok will send a reply to you by email, so make sure to check your junk/spam folder too.

If you’re 18 years old or above but you’re getting the “Post unavailable” issue, choose the “Report a bug” category instead of the “Change account information” category.

An example of a description to write, “Hi TikTok team, I’m 18 years old but I’m still getting the post unavailable error when I see certain TikTok videos. Please help me to fix this”.

You can also report a problem on the app by visiting your profile > Menu > Settings and privacy > Report a problem.

Method 3. Create a new TikTok account

The final solution is to create a new TikTok account.

This is the ideal way to avoid the “Post unavailable” error from happening.

When you’re creating a new TikTok account, you need to ensure that you set your age to 18 years old or above.

The reason behind it is that if you set your age to 13 years old, you won’t get access to a lot of features on TikTok.

The features are the ability to watch videos that are deemed inappropriate.

What’s Next

Good, Cute, and Cool TikTok Profile Pictures

Top 10 Most Viewed TikTok Videos

How to Delete All of Your TikTok Posts

Arsalan Rauf
Arsalan Rauf

Arsalan Rauf is an entrepreneur, freelancer, creative writer, and also a fountainhead of Green Hat Expert. Additionally, he is also an eminent researcher of Blogging, SEO, Internet Marketing, Social Media, premium accounts, codes, links, tips and tricks, etc.

www.greenhatexpert.com

Filed Under: Social Media, TikTok

  • « Previous Page
  • 1
  • …
  • 21
  • 22
  • 23
  • 24
  • 25
  • …
  • 37
  • Next Page »


Recent Posts

  • Free DeepSeek Accounts 2025
  • Free Zoho Mail Accounts 2025
  • Acudepot Discount Codes 2025
  • Free Blackshot Accounts 2025
  • Free GMX Email Accounts 2025
  • Songtrust Discount Codes 2025
  • Uzicases Discount Codes 2025
  • Cardillo Promo Codes 2025
  • Free DriverFix License Keys 2025
  • Avast Secureline VPN Activation Codes 2025

Recommended Posts

Create a Gmail Account Without Phone Number

Free Course Hero Account

Crunchyroll Accounts

Cracked Apps

Free Pokemon Go Accounts
Onlyfans Free Accounts
Free Chegg Accounts
Free Paypal Accounts
Free Gmail Accounts
Funny Steam Names

Categories

  • Apps
  • Apps for PC
  • Blogging
  • Discord
  • Facebook
  • Gaming
  • Grammar
  • Guide
  • How to
  • Instagram
  • Messaging
  • OnlyFans
  • Pinterest
  • Reddit
  • SEO
  • Snapchat
  • Social Media
  • Spotify
  • Steam
  • Telegram
  • TikTok
  • Twitch
  • Twitter
  • Whatsapp
  • WordPress
  • YouTube
  • Home
  • Social Media
  • Messaging
  • About
  • Submit Guest post