Green Hat Expert

  • Home
  • Social Media
    • Instagram
    • TikTok
    • Snapchat
    • Facebook
    • YouTube
    • Twitter
  • Messaging
    • Discord
    • Telegram
    • Whatsapp
  • About
  • Submit Guest post
You are here: Home / Archives for SEO

Free Local Marketing Tools, Tips & Tricks That You Should Use

Last Updated on July 31, 2020 By Arsalan Rauf

Free Local Marketing Tools, Tips & Tricks That You Should Be Using

Take a minute and bookmark the page. It took us days of research to find all these tools a combination of our own personal and a few great finds we didn’t know about.

All these tools are free and extremely useful. I’d suggest checking out each one before moving on and trying to understand how it can apply to your situation.

Each tool has the following information:

URL: the link where to find it

Description: how it works at a high level

So lets get right into it.

SEO tools offered by the Search Engines

There’s a few SEO tools you need to be aware of.

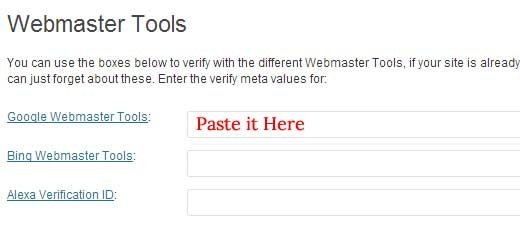
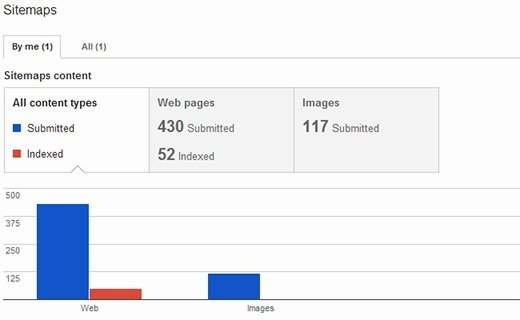
The Google Search Console & Bing Webmaster Tools

google search console

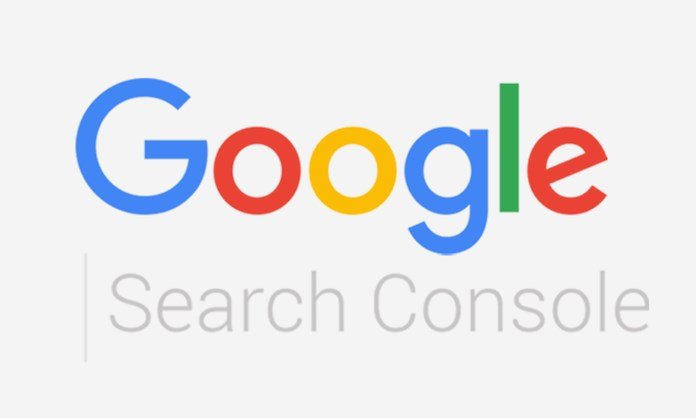
Using these two links you can control and understand HOW search engines see your website. It’s extremely important to sign up for the webmaster tools and go through the setup. This is something that is crucial to your SEO success.

  • URL: https://search.google.com/search-console/about
  • Description: Measure your sites performance in Google, but also fix issues, performance and get alerted when things are going wrong.

Now let’s move onto our second tool:

  • URL: https://www.bing.com/toolbox/webmaster
  • Description: Bing is the second largest search engine. You will want to optimize your site for it as well.

Search Engines & Local Ranking Tools

Apart from this, the search engines offer a few tools that are all specifically around LOCAL search. These are necessary if you want to rent for local keywords such as “dentist near me”.

To get these local kinds of rankings you will need to set up your business listings with as MUCH information as possible, and reviews from customers.

  • Clear business name, address
  • Leave a clear description with clear keywords (informative)
  • Add 5-10 photos with nice images
  • Incentivize customers to leave reviews (this helps a lot)

You can sign up for each search engines local ranking here:

  • https://www.bingplaces.com/
  • https://www.google.com/business/
  • https://www.yext.com/pl/yahoo-listings/index.html

Check All Your Local Citations

URL: NAP / Local Citation checking

How it works:

This tool is awesome. It goes through and actually tells you HOW you are doing on each citation that you have locally.

So it goes through all the main networks such as: Google search, Facebook, Google maps, Bing, Yelp. Fourquare etc – and double-checks if you have a listing and whether or not it was found.

Final thoughts:

Awesome for double-checking and ensuring you have all your profiles covered. Especially if you have conflicting information across the platforms.

Systemizing How Customers Leave Google Reviews

URL: https://supple.com.au/tools/google-review-link-generator/

Make it easier for customers to leave reviews and you guessed it – more customers will leave reviews. So what do you do? Well here’s a really cool tool.

You basically can create a custom link that goes directly to leaving a comment. This saves the hassle and back and forth which prevents some customers from leaving a review.

Definitely suggested for a business where something like a QR code could work – i.e coffee shop, retail things of that nature.

How to Spoof Your Location for SEO Results

One of my favorite tricks for any small business is this little method below. Using it you can change your geo-location to anywhere in the world without using a VPN.

Anyone who does local SEO knows one of the most annoying things is constantly having to switch IP addresses to the appropriate country or geo-location. So this method is a quick and easy way to get this done.

  1. Open In Cognito tab window on Chrome
  2. CTRL + SHIFT + C / or get to the developer console
  3. Hit ‘Sensors’
  4. Choose the geo-location you prefer
  5. Search Google
  6. Allow location access
  7. Refresh once or twice
  8. Voila!

Checking Your Content for SEO-alitidy.

URL: https://yoast.com/research/real-time-content-analysis/

You know when you write up a piece of content trying to count your keywords can get pretty boring. I like using this plugin from Yoast which in real-time analyzes the makeup of your text.

This is one of the final ‘task items’ on our SEO checklist. Before we publish and put out an article we’ll check and see how it does for our keywords and readability.

You also get a snippet of how it will show up in search, which lets you optimize the introduction of your article. Definitely a tool that you will use a lot.

Free Keyword Tool for Finding Those Juicy Opportunities

wms everywhere

URL: https://whatsmyserp.com/everywhere

So this is a free keyword tool that you can use within Chrome. All you need to do is visit the page, hit install, sign up for an account and it’s good to go.

Basically, whenever you search for something you will get information like search volume and CPC (cost per click). This is ultra useful when you are researching your niche.

You also have the ‘related keywords’ + ‘also searched for’ which can spawn a lot of ideas. Definitely a tool that’s extremely useful since it all starts with picking the right keywords.

Something which I personally use almost daily (when writing content outlines).

Apart from this keyword tool , check more alternatives to this tool:

1: Ubersuggest Alternatives

2: Keywords Everywhere Alternatives

Your FREE link explorer

URL: https://moz.com/link-explorer

There’s a lot of different ways to analyze links but when it comes to FREE – nobody does it better than Moz. You will get the information you need with their tool.

Of course, if you can get the paid, but even with free you will get the important data such as:

Links to any site, competitor backlinks, broken links, spam score, link building opportunities… at the end of the day the free version won’t hold you back that much.

Not to be cliche, but of course, it’s not the tool but how you use it 🙂

The high level SEO check up:

URL: https://seositecheckup.com/

This is a tool that I’ll often pop a client’s website when starting a project. It ranks your site across a few categories which can be important but take a bit of digging to find.

From an overview of general SEO to speed to server & security to mobile usability and advanced SEO. The thing about SEO is that it often comes down to some more technical elements.

This website helps you detect those. I’m particularly fond of the security information. Why?

It can really help you figure out a few key questions:

  • No email addresses are written out in plain text (i.e no spam)
  • Checks your SPF records (if you’re on spam lists)
  • Tells you if all version of your URL resolve to the same page
  • Checks your mail server SSL configuration

It gives you more information than this and can be download as a report.

Another way to check up on your website

URL: http://siteliner.com/

This website focuses a bit more on your structure and content. However, it’s got an entirely different set of information which can really help you.

The best of course is doing both and working from a list on both of them. Using Siteliner you will find a lot more of the duplicate content, broken links, i.e functionality problems.

My Favorite SEO Extension

Click Here to Find

This is one of the best extensions available. It basically gives you a quick down and dirty on any website you are visiting. There’s a lot of SEO tools bars like this but most of them are paid. So the fact you can get the MOZbar for free and it has so much functionality is awesome.

This is not just a local extension, but it’s so good it had to be included.

Usually will just leave this running while I’m doing the regular competitor research.

It’s one of those things, that you don’t know what you will find – sometimes it’s a website, backlink or some oddity where this tool really makes its value.

For those kind of investigations (which should be on going for any SEO).

Use this tool for your graphics and media

URL: https://canva.com/

The easy to use interface, the overall experience and all the templates. Canva is the go-to with its freemium model. Even though usually I will avoid that kind of thing 🙂

Even if you don’t have any design experience making something decent is quick and easy with Canva. And at the very worst, remember that having some branding never hurts.

Another huge benefit: the diversity of content you can make – from flyers, eBooks to more advanced promotional materials. If you’re on a budget Canva is your friend.

Creating Optimized Google Listings

URL: https://microdatagenerator.org/

Google prefers using the JSON-LD version of the schema for local listings. Which is a fancy way of saying that setting up your Google listing on your own – isn’t enough!

You also need to generate and add this snippet of code to your website. This helps tell Google that it’s relevant to your listing and will lead to higher rankings. Definitely worth doing.

Removing Negative Reviews

URL: https://objection.co/free-negative-review-removal-tool/

When you have negative reviews sometimes they are FAKE. This program was designed to help detect those illegitimate reviews. By using language processing it can help detect if the review is real or fake.

This can help in making a case for its removal. Definitely a tool that’s worth adding to your toolkit especially as your brand’s online presence grows.

Unfortunately, there are tons of people out there who will leave a negative review for no good reason.

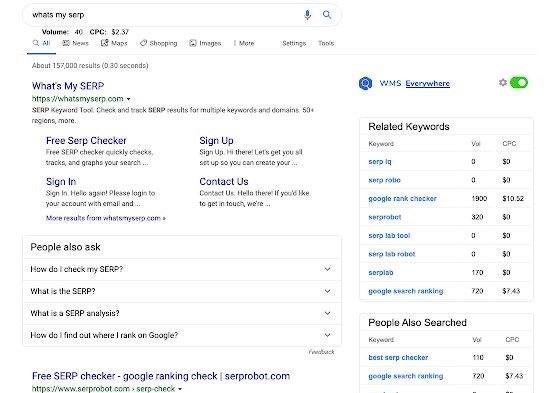
Tracking your local Keywords

URL: WhatsmySERP.com/serp-check

This is a free SERP checker. Basically what it does is check your webpage against the top 100 Google positions for any given keyword.

This means you can measure your progress – see if your efforts are moving your website up in the Google search results. The important thing about WhatsmySERP.com is that you can choose to search by geo-location.

This is essential when you are searching for your keyword rankings locally, as you need the very specific geo-location that you are trying to rank for and nothing else.

There’s an easy feature with this tool that allows to switch that. You can also filter by device, country and a few other features.

To wrap up our list of SEO tools

There’s a lot of SEO tools there, and they can help you in many ways but remember that at the end of the day it starts with a good SEO strategy.

An understanding of the tools and WHEN/WHERE to use them.

It’s easy to feel empowered by tools, but it’s important to know how to use them – otherwise, you can end up losing a lot of time with little to show for it.

The best way to proceed

If you are new to the world of SEO take the time to read about each type of tool listed above. There are other alternatives to some of these tools – you may want to check them out at a later date.

For the moment I’d suggest acquainting yourself with the basic/free versions, before moving ahead in your exploration.

If you have more tools you’d like us to review. Any thoughts or comments – leave them here.

And of course, let us know what your favourite tool from the list is.

Arsalan Rauf
Arsalan Rauf

Arsalan Rauf is an entrepreneur, freelancer, creative writer, and also a fountainhead of Green Hat Expert. Additionally, he is also an eminent researcher of Blogging, SEO, Internet Marketing, Social Media, premium accounts, codes, links, tips and tricks, etc.

www.greenhatexpert.com

Filed Under: SEO

What is an XML Sitemap? How to Create a Sitemap in WordPress?

Last Updated on May 8, 2018 By Arsalan Rauf

What is an XML Sitemap? How to Create a Sitemap in WordPress?

In 2000s, Government websites used to have sitemap page on the main page. It contained a list of all the pages available on the site. In this age, even some sites have HTML sitemaps of that kind. Now sitemaps have evolved from manually created HTML bulleted list. Today sitemaps are available in XML instead of HTML and their target audience is not people but search engines.

People also ask:

What is a WordPress sitemap?

Do I need to have a sitemap on my website?

How to create a sitemap in WordPress or how can I create a sitemap in my site?

If you are finding the answers to these questions, you are at the right place.

In this post, I shall explain what is sitemap? Why do you need a sitemap? How to create a sitemap in WordPress? How to tell search engines about your sitemaps?

What is a WordPress XML Sitemap?

It is a list of pages on a site which can accessible by all users. An XML sitemap is a way of telling search engines about all the pages available on your website. WordPress XML sitemap also informs search engines that which links are important than others and how frequently you update your site as well. sitemaps enable search engines to crawl your site in a better way and it does not boost your search rankings.

greenhatexpert sitemap

Why You Need an XML Sitemap

From SEO or Search engine optimization point of view, XML sitemap is a part and parcel. First of all, you need to know it does not affect your search rankings. However, if your website has a page which is not indexed yet, sitemap will give a way to allow search engine to know about that page, then search engines will index it in a proper way.

Sitemaps are very helpful for new blogs and websites. It is because most of the new blogs generally do not get enough backlinks to their individual posts so it is difficult for search engines to know about their pages and posts. Sitemaps enable those sites to help search engines to crawl their websites in an efficient way.

For famous websites, sitemap enables your site to interact with search engines in more effective way. Search engines will guess how often you update your website, which parts of your site are updated on daily basis as compared to others. Then search engine will set a crawl rate for your website. It will improve the visibility of your website to search engines.

How to create a Sitemap in WordPress?

There are different ways to create an XML sitemap for your WordPress site. At Greenhatexpert, I use WordPress SEO plugin by Yoast to generate our sitemaps. In addition, it also allows you to optimize your blog posts and pages with different features including social integration, sitemaps and so on. I have noticed that it is efficient as compared to other standalone sitemap generators for WordPress site. In addition, it also offers custom sitemaps such as Video sitemap.

To add a sitemap to your site, first of all, you need to install and activate WordPress SEO by Yoast. WordPress does not allow XML sitemap functionality by default. So you need to turn it on by yourself.

To perform this task go to SEO>XML Sitemaps and check the box to make the XML sitemap functional.

enable sitemaps wp seo

When you will check the box to enable the function of sitemap, WordPress seo will display a plenty of options that will help you to configure your sitemaps. If you are not aware of their functions then ignore them and click on save settings to save it.

Now you have generated XML sitemap and it is accessible publicly. WordPress SEO will show a XML sitemap button which you can use to see your sitemap_index.xml sitemap.

How to Tell Search Engines About Sitemaps?

Search engines are at home in finding a sitemap. Whenever you publish a post or page, a ping reaches Google and Bing to let them know about changes in your sitemap. However, I suggest that you submit your sitemap to Google by using Google webmaster tools. The advantage of doing it is that Google will display the errors, pages indexed and other relevant stats and it will be beneficial for you as a webmaster.

Visit Google webmaster tools. If you are not already log in to your Gmail account, then you need to sign in. After logging in, you will reach webmaster tools. There you can see ‘ Add a property’ button, click it and then add the URL of your site.

Then you need to verify your ownership of your site which you want to add. There are many ways to do it. But if you are already using WordPress SEO plugin, so you copy the HTML meta tag value and paste it in WordPress SEO plugin because it is the easiest way for you.

To do that, click on Alternate methods and then on HTML tag. You will see a line of HTML meta tag code there.

verify ownership2

Copy and paste this line in a text editor like word or notepad. Now copy the value inside the content=””. Now leave the verification page of webmaster tools site open because you need to revisit it after adding the meta tag to verify the ownership of the site. Go to the admin area of your WordPress and then click on SEO tab. It will take you to the dashboard of WordPress SEO plugin. Scroll down to see webmaster tools heading. Paste the meta tag value you copied from Google webmaster tools and save the settings.

wp seo webmaster tools

Go back to Google webmaster tools and here you will have to press the verify button. You will see a notification like ‘ Congratulations you have successfully verified your ownership of ‘www.greenhatexpert.com’. click continue to see webmaster tools dashboard for your website.

On the next screen, you will see sitemaps column and there will be no sitemap. When you will click on it, it will take you to sitemaps page where you will be able to add your sitemaps. Click the red button ‘Add/Test Sitemap’ and give the URL of your sitemap.

submit sitemap google

WordPress SEO plugin by Yoast publishes a number of sitemaps for your WordPress website. the main sitemap is sitemap_index.xml which has link to your other sitemaps. You can submit it (sitemap_index.xml) alone or submit all other sitemaps one by one. I suggest submitting sitemap_index.xml alone, Google will take care of the rest of the sitemaps and will crawl them automatically.

After the installation of your sitemap, it will be shown as pending. Google will take some time to crawl your site. After some time, you can see some stats about your sitemap. It will display a number of links that available in sitemap. It will also show a ratio of index and ratio of images and web pages like how many of them got indexed etc.

sitemap stats

So visit Google webmaster tools often, at least once in a month. When your website becomes old, you will see more and more stats of your site. In addition, how search engine sees it. It will allow you to learn how well your site is performing in search engine. And how can you improve it?

I hope that you liked this post. I hope that I have answered your questions about XML sitemap. What is XML sitemap and its benefits, how to create one etc. Still have questions?

Do not hesitate to ask them.

Do not forget to share this post.

Arsalan Rauf
Arsalan Rauf

Arsalan Rauf is an entrepreneur, freelancer, creative writer, and also a fountainhead of Green Hat Expert. Additionally, he is also an eminent researcher of Blogging, SEO, Internet Marketing, Social Media, premium accounts, codes, links, tips and tricks, etc.

www.greenhatexpert.com

Filed Under: Guide, SEO Tagged With: best sitemap generator, google xml sitemap, html sitemap generator, sitemap google, what is xml sitemap in seo, xml sitemap drupal, xml sitemap example, xml sitemap wordpress

How to Add SSL and HTTPS in WordPress Website

Last Updated on March 18, 2018 By Arsalan Rauf

In this post of Green Hat Expert, we shall discuss how to add SSL and HTTPS in WordPress.

How to Add SSL and HTTPS in WordPress

Do you want to move your site from HTTP to HTTPS? Do you want to install a SSL certificate on your WordPress site?

This post is for you and it will show you to how to add SSL and HTTPS in WordPress.

If you do not have knowledge about SSL or HTTPS, you do not need to worry about it. We shall also explain it.

What is HTTPS and SSL?

What is HTTPS and SSL

When we make a purchase or log in to different websites, we have to share our personal information.

It needs a secure connection to protect the data transfer.

That is where HTTPS and SSL work.

HTTPS or secure HTTP has the ability to secure the connection between your server and the browser of user.

It will make a hard nut to crack for hackers to spy on your connection.

Each site has a unique SSL certificate for the purpose of identification.

If the server is pretending to be on HTTPS and in reality, the certificate does not match. Then modern browsers will warn the users and prevent them from connecting to the site.

unsecure connection

You may ask a question that why is it necessary to move from HTTP to HTTPS and install a SSL certificate?

Why do you need HTTPS and SSL?

For example, if you have an eCommerce website, you absolutely need HTTPS or SSL certificate. It is due to the fact that you collect payment information from the users.

Most of the payment providers or gateways will ask you to have a SSL certificate including Stripe, Paypal Pro and Authorize.net.

Additionally, Google also announced HTTPS and SSL as a ranking factor or signal in Google search results.

It means that you have to install SSL or HTTPS to your site in order to improve the SEO of your site.

There are a number of websites online which are eCommerce and using SSL.

We have also added SSL or HTTPS to our website Green Hat Expert by Arsalan Rauf.

secure site

People also ask Do SSL or HTTPS slow down the WordPress website?

In reality, there is nothing like that and it does not affect the speed of your page. So do not worry about it.

Requirements for using HTTPS/SSL on a WordPress Site

SSL does not have any high requirements. You need to purchase a SSL certificate to install it.

There are some WordPress hosting providers which offer SSL with their plans. Siteground is one of them that gives one year SSL certificate free of cost in their “grow big” plan.

If your hosting provider does not support or offer a free HTTPS or SSL certificate, you can also ask them if they sell any third party SSL.

Bluehost sells it around 50 to 200$. In addition, you can also buy SSL from Godaddy.

After purchasing a SSL certificate, you need to ask your web hosting provider to install it for you.

It is an easy and straight forward process.

How to Setup WordPress to Use SSL and HTTPS

If you are going to start a new website and want to use HTTPS on your site. So you have to update the URL of your site.

Go to Settings> General and update your WordPress and site URL address field.

updating urls

If you want to add SSL to your existing site, you have to setup WordPress SSL redirects from HTTP to HTTPS.

Do it by using the following code in your htaccess file.

1
2
3
4
5
<IfModule mod_rewrite.c>
RewriteEngine On
RewriteCond %{SERVER_PORT} 80
RewriteRule ^(.*)$ https://www.yoursite.com/$1 [R,L]
</IfModule>

Do not forget to replace yoursite.com URL with the URL of your site.

If you are using nginx servers, you need to add the following to redirect it from HTTP to HTTPS. Most of the users do not use it.

1
2
3
4
5
server {
listen 80;
server_name yoursite.com www.yoursite.com;
return 301 https://yoursite.com$request_uri;
}

After following these steps, your site URL and content will be on SSL and you will not find the error of WordPress HTTPS not working.

If you want to add HTTPS or SSL on your WordPress multi site login pages or admin area, you need to configure SSL in wp-config.php file.

Just add the following code above the “That’s all, stop editing!” line in the file of wp-config.php.

1
define('FORCE_SSL_ADMIN', true);

This trick of wp-config.php will work on multi sites as well as on single site.

Setup SSL and WordPress HTTPS on Exclusive Pages

Now, if you want to add SSL or HTTPS on specific pages of your choice, you need to install a plugin WordPress HTTPS (SSL).

First of all, you need to install and activate the SSL or HTTPS plugin.

You should know that this plugin has not been updated for a while, but still, it is working perfectly. It is also safe to use.

When you will activate the plugin, it will show you the menu of HTTPS in your WordPress admin.

Click on it to go to the settings of plugin.

https settings

The first option of the settings will ask you to enter your HTTPS host. Most of the time it is your domain name.

In addition, if you want to configure SSL certificate on a subdomain and you have got HTTPS for main domain name. Then you have to enter the root domain.

If you are using a shared SSL certificate which you have got from your web host. Then you have to enter the host information instead of using your domain name.

There are some cases where the user uses non-traditional SSL host and wants to use a different port. So you can add it in the port field.

Force SSL administration settings will compel WordPress to use SSL certificate on all admin area pages.

You need to check this box in order to ensure that admin area of your WordPress is secure.

The next option will enable you to use force SSL exclusively. By checking this box, Force SSL will use SSL on those pages where you wanted to use it. The rest of the traffic will go to normal HTTP URL. It works well when you want to use SSL option for checkout, shopping cart and user account pages.

Click on save changes to save the settings of your plugin.

If you want to use HTTPS or SSL certificate for specific pages, just go to those pages and check the force SSL checkbox.

ssl pages

After completing the task, load your page in Chrome or other browsers like Mozilla to check the green light.

chromesslerror

That is all. I hope that you have learned that how to add SSL or HTTPS in WordPress.

If you have liked this article, do not forget to share this post.

You may like our post about

Best Online Grammar Checker tools for WordPress

FAQS about SSL and HTTPS

How do I add https to my website? Or how do I convert a site from HTTP to HTTPS?

Step 1: Host with a dedicated IP address

Step 2: Buy a Certificate

Step 3: Activate the certificate

Step 4: Install the certificate

Step 5: Update your site to use HTTPS

How do I secure my WordPress site?

Use SSL to secure your WordPress site. Change the admin username. Monitor your files etc.

Where do I find the htaccess file in WordPress?

First, log in to your cPanel. Click on “File Manager” under the “Files” section.

Arsalan Rauf
Arsalan Rauf

Arsalan Rauf is an entrepreneur, freelancer, creative writer, and also a fountainhead of Green Hat Expert. Additionally, he is also an eminent researcher of Blogging, SEO, Internet Marketing, Social Media, premium accounts, codes, links, tips and tricks, etc.

www.greenhatexpert.com

Filed Under: Guide, SEO Tagged With: install ssl certificate wordpress godaddy, wordpress force https, wordpress https (ssl), wordpress https htaccess, wordpress https mixed content, wordpress https redirect, wordpress install ssl certificate, wordpress ssl plugin

  • « Previous Page
  • 1
  • 2
  • 3


Recent Posts

  • Free DeepSeek Accounts 2025
  • Free Zoho Mail Accounts 2025
  • Acudepot Discount Codes 2025
  • Free Blackshot Accounts 2025
  • Free GMX Email Accounts 2025
  • Songtrust Discount Codes 2025
  • Uzicases Discount Codes 2025
  • Cardillo Promo Codes 2025
  • Free DriverFix License Keys 2025
  • Avast Secureline VPN Activation Codes 2025

Recommended Posts

Create a Gmail Account Without Phone Number

Free Course Hero Account

Crunchyroll Accounts

Cracked Apps

Free Pokemon Go Accounts
Onlyfans Free Accounts
Free Chegg Accounts
Free Paypal Accounts
Free Gmail Accounts
Funny Steam Names

Categories

  • Apps
  • Apps for PC
  • Blogging
  • Discord
  • Facebook
  • Gaming
  • Grammar
  • Guide
  • How to
  • Instagram
  • Messaging
  • OnlyFans
  • Pinterest
  • Reddit
  • SEO
  • Snapchat
  • Social Media
  • Spotify
  • Steam
  • Telegram
  • TikTok
  • Twitch
  • Twitter
  • Whatsapp
  • WordPress
  • YouTube
  • Home
  • Social Media
  • Messaging
  • About
  • Submit Guest post