Google Adsense is one of the best ad programs available on the internet. There are several alternatives to Adsense available but none has consistently outperformed Adsense in terms of user friendliness, innovation and overall experience it is a jack of all trades.
On February 21, 2018, Adsense team has introduced and launched Google auto ads feature for everyone. Recently, Adsense team has made the biggest innovation. In fact, Auto ads are going to change the way of using Adsense in real time.
Ad placement, ad optimization, and maintain a better user experience are one of the biggest concerns of most Adsense publishers.
Google auto ads are using artificial intelligence to manage the ad optimization and ad placement automatically for publishers. However, as a publisher, you can manage:
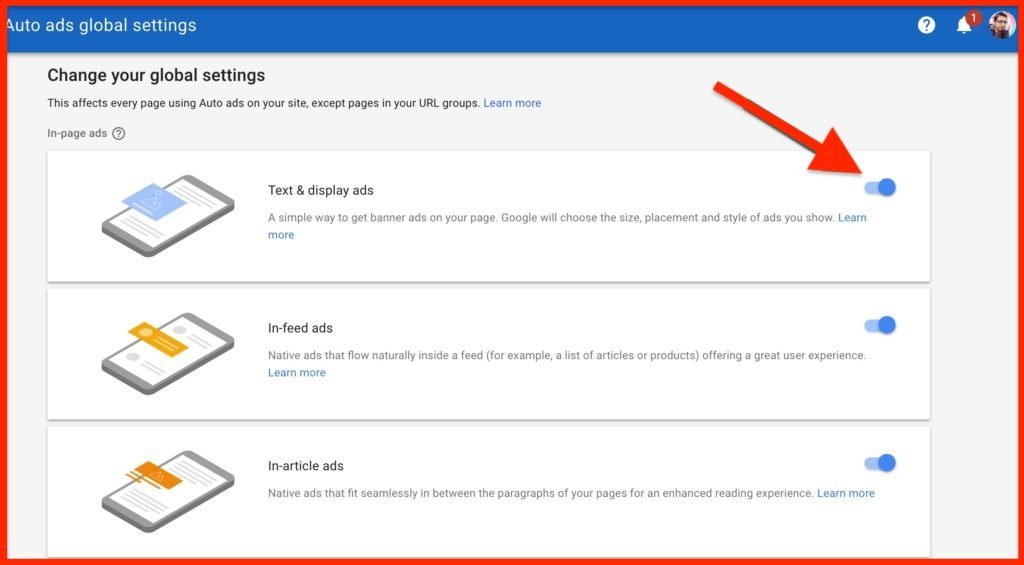
- Global settings:What kind of ads should be shown
- Domain-based setting:Configure what ads should be shown on specific domain or sub-domain
- Directory settings:Configure the kind of ads to be shown on the particular directory. For example, on pagination pages or archive pages, you may not want to show matched content ads, and you can configure the same from the AdSense settings panel. This feature is known as Advanced URL settings. You can read more about it here.
So far I have read mixed reviews of users about Auto ads. However, I am optimistic about the future of Adsense auto ads because it will take care of the process of ad optimization and a blogger can pay attention to build quality content. Adsense will take care of the rest. Google Adsense is a plug and play ad program that is entirely automatic. Say thanks to artificial intelligence.
Important things to know about AdSense Auto ads
Auto ads will not be an issue for anyone who has used Google Adsense. However, before you start setting up auto ads, some instructions you need to know. Before you start the integration, it will also answer your questions.
- If you already have AdSense ads placed on your website, you can decide not to remove it. AdSense auto ads will automatically detect those ads and place more ads accordingly.
- Already using Anchor or Vignette ads?Auto ads consist of Anchor and Vignette ads and many more additional formats such as Text and display, In-feed and Matched content ads. Note that all users that use Page-level ads will automatically be migrated to Auto ads without any need to add a code to their page. However, logging in to your AdSense account and setting up Global settings for auto-ads for the first time is the best idea.
How to Enable Google AdSense Auto ads (Complete Guide)
Here is a quick walkthrough of the steps:
- Login to your Google AdSense account
- Go to my Ads > Auto Ads
- Click on ‘Setup Auto Ads’
- Configure your Global settings

- ‘Enabling’ automatically get new formats at the bottom.
- Click on Save.
- Now place the ad codes on every page of your blog/website. I use Google tag manager for the same. You can use any technique that is suitable for you. If you are already using Page level ads, you do not need to do anything.
- You can always check the performance of Google Auto ads by going to My Ads > Auto ads and clicking on Statistics.
Overall, it will be exciting to see how Google auto ads work in the future. So far I have read mixed reviews.
As I discussed earlier, it will be something that everyone will adapt with the passage of time. It uses artificial intelligence or machine learning and it will become better with time.
Let me know your experience with Adsense auto ads.
Have you implemented on your blog?
If not, what is your plan to implement it?
Also see: Official AdSense help page on Auto-ads
If you liked this post, do not forget to share this latest post.
Arsalan Rauf is an entrepreneur, freelancer, creative writer, and also a fountainhead of Green Hat Expert. Additionally, he is also an eminent researcher of Blogging, SEO, Internet Marketing, Social Media, premium accounts, codes, links, tips and tricks, etc.