
Roblox Shaders play an important role in the improvement of the game’s graphics.
Shaders are mods and they can improve in-game shadows, texture gradients and lighting.
However, you need to check whether your PC is compatible with shaders or not.
Roblox will not work smoothly if you have an outdated graphics card.
It will cause lagging in the game and the game might crash too.
Therefore, if you have an outdated graphics card, you should not download shaders on Roblox.
I am saying that because it affects the performance of the game negatively.
In this post, I am going to teach you how to get, download and install shaders (Zeal’s Shaders) on Roblox.
How to get shaders on Roblox
You have to download Zeal’s Shaders to get shaders on Roblox.
After downloading Zeal’s Shaders, play a Roblox game and choose a shader preset.
The installation process of Zeal’s Shaders is straightforward.
To start the process, you need to visit the download page and download it.
To install the shaders, you need to follow the instructions you see on screen.
You need to accept the license agreement and install all the components.
Zeal’s Shaders contain many presents such as “Low”, “Medium”, “High”, “Ultra” and “Max”.
If your graphics card is not updated, I highly suggest that you choose the “Low” or “Medium” preset.
It is because the game might lag or even crash if you select a higher preset.
The reason is, your outdated graphics card will not be compatible with the shaders.
Here is a step by step guide on how to get Shaders on Roblox:
Step 1: Download Zeal’s Shaders
First of all, you need to download Zeal’s Shaders.
After downloading it, you can run the installation.
To get started, click on this URL: https://mega.nz/file/TzoG0DgQ#aIokJYhxH4-N0yZbkCVhFlCBcAwu6OqlIdhHBgvPIMQ.
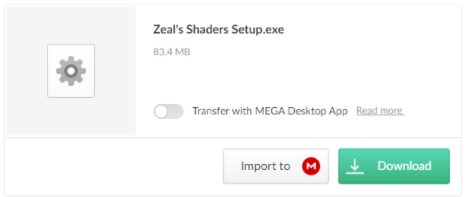
After clicking on the link, the link will take you to the download page of Zeal’s shaders.
The page contains a “Zeal’s Shaders Setup.exe” file there.
To download Zeal’s Shaders, click on “Download”.
It takes several minutes to complete the downloading process.
It is because the file is large in size that is why it takes a while to download it.
After downloading the file, click on it to open it.
Once you click on the file, it will open the “Zeal’s Reshade Preset Setup Wizard”.
Before you go through the installation, you need to close the Roblox first.
Now, click on “next” to move on to the next step.
Step 2: Accept the license agreement
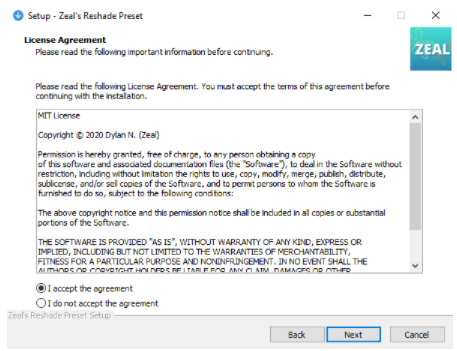
After clicking on the Next button, the license agreement will be shown.
You need to accept the license agreement to continue the installation.
To accept the license agreement, click on “I accept the agreement”.
Now, click on “next” to move on to the next step.
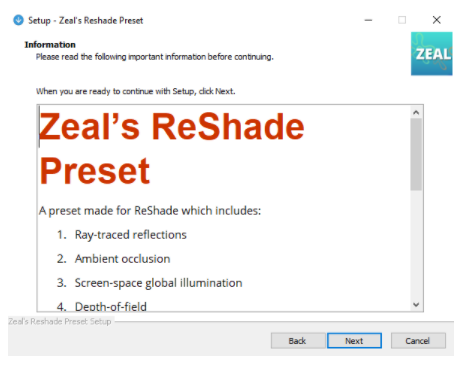
After clicking on the next button, you will come across the information page.
The page contains information about Zeal’s Shaders.
Zeal’s Shaders has ambient occlusion, ray-traced, screen-space global illumination and so on.
However, the ray-traced reflections will only work if you possess a ray-tracing graphics card.
Click on “next” to move on to the next step.
Step 3: Install all components
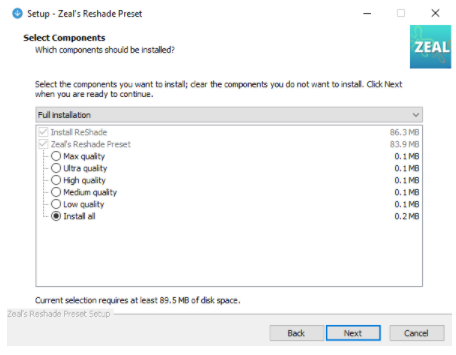
After clicking the next button, you will see the “Select Components” page.
This page enables you to select and install the components you want.
Furthermore, you need to get rid of the components by clearing them that you do not want to install.
I am going to install all of the presets here.
Click on “Install all” to install all of them.
Now, Click on “next” to move on to the next step.
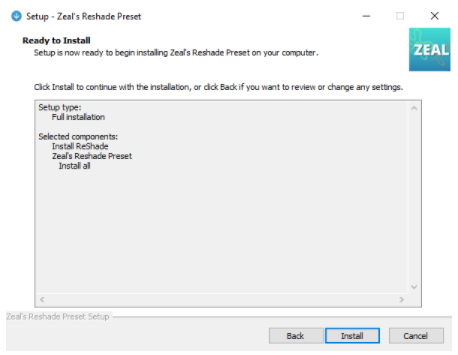
After completing the selection of the components which you want, you will be moved to “Ready to Install” page.
This page displays the components you have selected and the setup type.
Further, you can also click the “Back” button if you want to make changes or review the settings.
If you want to proceed, click on “install” to install Zeal’s Shaders for Roblox.
Step 4: Play a game on Roblox
The installation may take several minutes to complete.
After its completion, you will come across a pop-up message.
The pop-up message will be “Zeals Shaders have finished installing. You may now open Roblox”.
To close the pop-up, you need to click on “OK”.
After that, click on “Finish” to complete the setup process.
After the installation of Zeal’s Shaders, you need to play a game on Roblox.
You need to do it to check whether the shader is working or not.
First of all, visit the Roblox.com and log in to your own account.
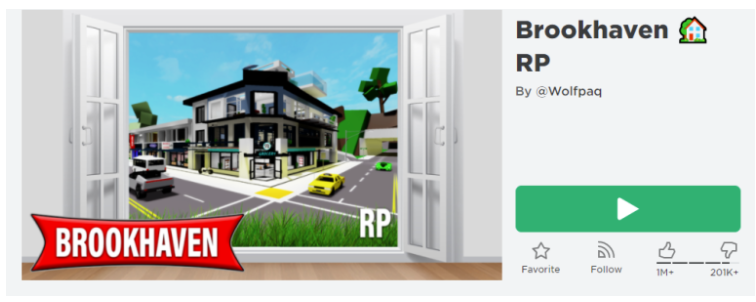
After logging in, select a random game such as Brookhaven RP.
Now, click on play button to get started with the game.
Step 5: Select a preset
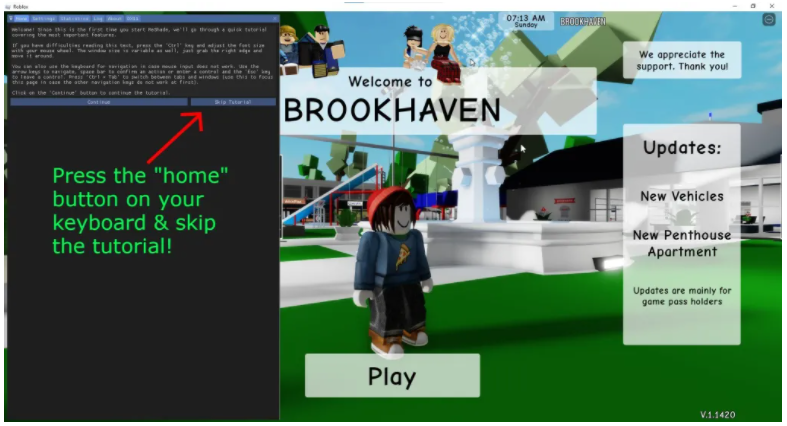
After opening the game, you will be asked to press the “home” button using your keyboard.
To open the menu of Shaders, press the “home” button.
You will come across a welcome message once you open the shaders’ menu.
The tutorial option will be prompted Click on “Skip Tutorial” to skip it.
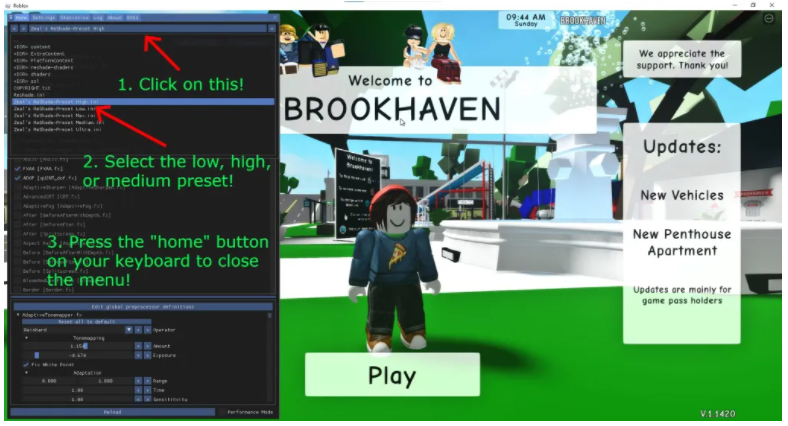
After skipping the tutorial, your task is to choose a Zeal’s Shaders preset.
First of all, you need to click on the top bar.
After clicking on the top bar, you will come across a list of presets that you can select from.
These are the components that you have selected and downloaded as presets.
They are five in total including Low, Medium, High, Ultra and Max.
The lowest intensity shader preset is “Zeal’s Reshade-Preset Low.ini” whereas the highest intensity shader preset is “Zeal’s Reshade Preset Max.ini”.
The selection of the preset depends on the graphics card you own.
I am telling you because the preset can affect the performance of the game.
If you do not have an updated graphics card, I highly suggest that you choose either “Low” or “Medium”.
On the contrary, if you do have an updated high-end graphics card, you can choose “High” or “Ultra” for it.
Press the “home” button after selecting a preset that is available on the keyboard to close the menu.
After you have selected a preset, the game is still lagging, you should consider “Low” preset.
After the selection of “Low” preset, if the game is still lagging then it shows that you have an outdate graphics card and it does not support the shader.
If it happens, you need to uninstall Zeal’s Shaders to prevent the lagging while playing game.
Otherwise, the lagging will continue and you won’t be able to play the game.
I have successfully described how to get shaders on Roblox.
Final Words
After installation of Shaders on Roblox, you need to check the performance of the game especially lagging.
Is Roblox lagging once you have enabled the shader?
If it is lagging, you need to choose a lower shader preset and check the performance again.
If you have selected a high shader preset, it will increase the lag on Roblox.
On the contrary, if you select a low shader preset, the lagging will decrease on Roblox.
If Roblox is lagging to that extent, the game is unplayable. It means that your computer is not compatible with the shader due to an outdated graphics card.
In such a case, you should uninstall the shader.
What’s Next
Arsalan Rauf is an entrepreneur, freelancer, creative writer, and also a fountainhead of Green Hat Expert. Additionally, he is also an eminent researcher of Blogging, SEO, Internet Marketing, Social Media, premium accounts, codes, links, tips and tricks, etc.