
How to Install and Setup Facebook Comments in WordPress
Are you looking to add Facebook comments on your WordPress site?
Facebook is the largest social media network in the world. Therefore, top sites including TechCrunch are using Facebook comment system and avoiding default WordPress comments. In this post, I am going to show you how to install and set up Facebook comments in WordPress.
Before we get to know it, let’s take a look at why would anyone want to use Facebook comments instead of default WordPress comments.
Pros and Cons of Using Facebook Comments in WordPress
The first benefit of using Facebook comments in WordPress is that it boosts your site visibility on Facebook’s network. When someone leaves a comment on your site, they can check the box to share the comment with their Facebook friends. It can give you the potential for additional traffic.
The second benefit of using Facebook comments is that it will remove the anonymity factor, so the users will not leave spammy comments. It is because it will be published on their Facebook profile.
However, it also has a downside too. It is because users do not feel comfortable leaving a comment from their Facebook account or profile due to their sense of anonymity.
Unlike other comment systems such as Disqus, Facebook comments are neither synced to your WordPress comments nor stored. They replace WordPress comments completely. If your post has some posts with WordPress comments, those existing comments will appear after or before Facebook comments.
Now you are aware of pros and cons, now see how to install Facebook comments in WordPress.
Installing Facebook Comments in WordPress
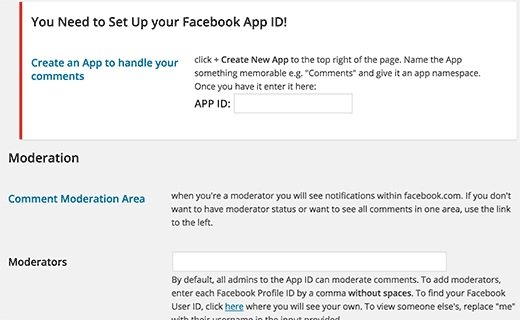
First of all, you have to install and activate the Facebook Comments plugin to your site. After activation, you need to go to Settings> Facebook Comments to setup the plugin.
If you want to use Facebook comments on your site, you need to create a Facebook app. If you already have created an app for your site, you can use that app ID here. Otherwise, you will have to create a new one.
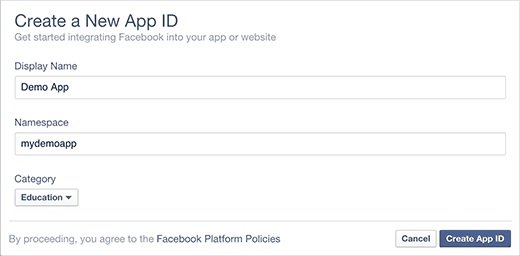
First of all, visit the Facebook Apps page, then click on the create new app button to create an app.
Now you have to give a name for your app and click on the create app ID button to complete it.
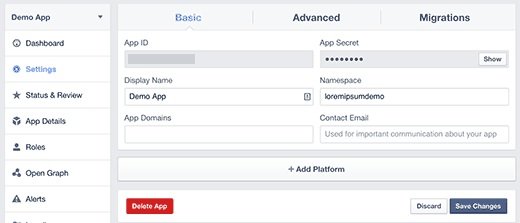
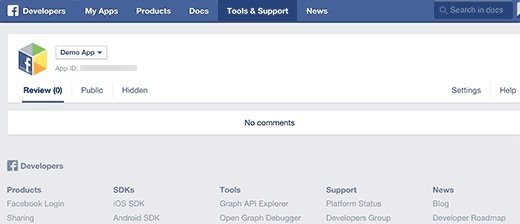
Facebook will create a new app for you to use and it will take you to app dashboard. You will see your app ID there.
Now you will copy and paste this app ID into your plugin settings. Before doing that, you have to configure the app to make it functional on your website. Now click on settings link, click on +Add platform button.
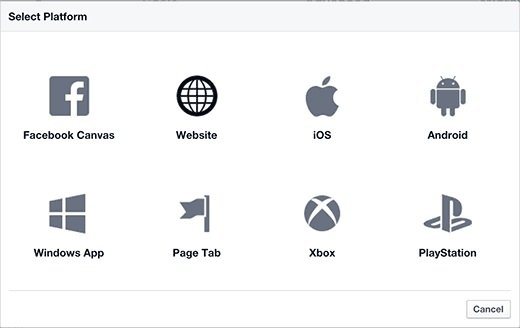
You will see a new popup window on the screen. Now click on website to select it as your platform.
It will add a new website section in the settings of your app’s page where you can enter the address of your WordPress site.
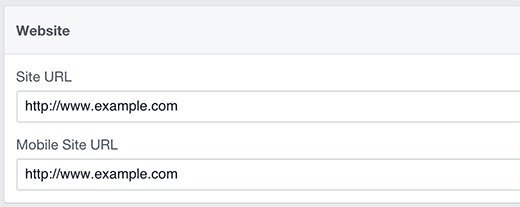
Now save your settings, you can copy the app ID and paste it into the plugin’s settings page available on your WordPress site.
This WordPress Facebook comments plugins offer a comprehensive set of options. The default settings of the plugin work for most of the sites. If it is not working on your site, you should see the settings to see what to change.
After completing it, click the ‘save changes’ button to save your settings.
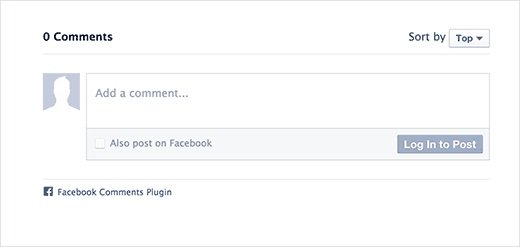
Now, go to your website to see Facebook comments in comment section on your site.
Moderating Your Facebook Comments
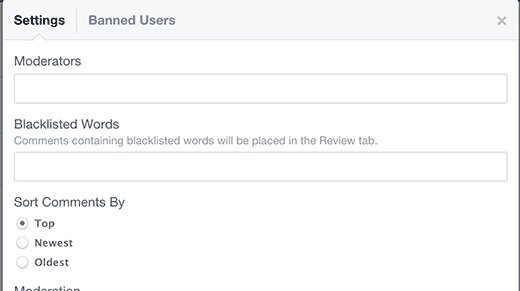
Now you are the admin of the Facebook app, that is why you will get notifications for new comments whenever you will login or use your Facebook account. You can find the link to your Facebook comment moderation tool in the plugin’s settings page.
Click on the settings link in the Facebook comment moderation tool to add new comment moderators.
I hope that you will like this post and it will help you to install and setup Facebook comments in WordPress.
You may also want to check our guide on How to add social media icons to blogger.
Do not forget to share this post and like our Facebook Page.
Arsalan Rauf is an entrepreneur, freelancer, creative writer, and also a fountainhead of Green Hat Expert. Additionally, he is also an eminent researcher of Blogging, SEO, Internet Marketing, Social Media, premium accounts, codes, links, tips and tricks, etc.